This post may contain affiliate links. Please see our disclosure policy.
Making your own all-natural DIY foundation is easier than you think! By making the switch, you will save time and money while crafting a truly custom makeup product.
Foundation can be made with just a few ingredients, most of which can be found right in your pantry.
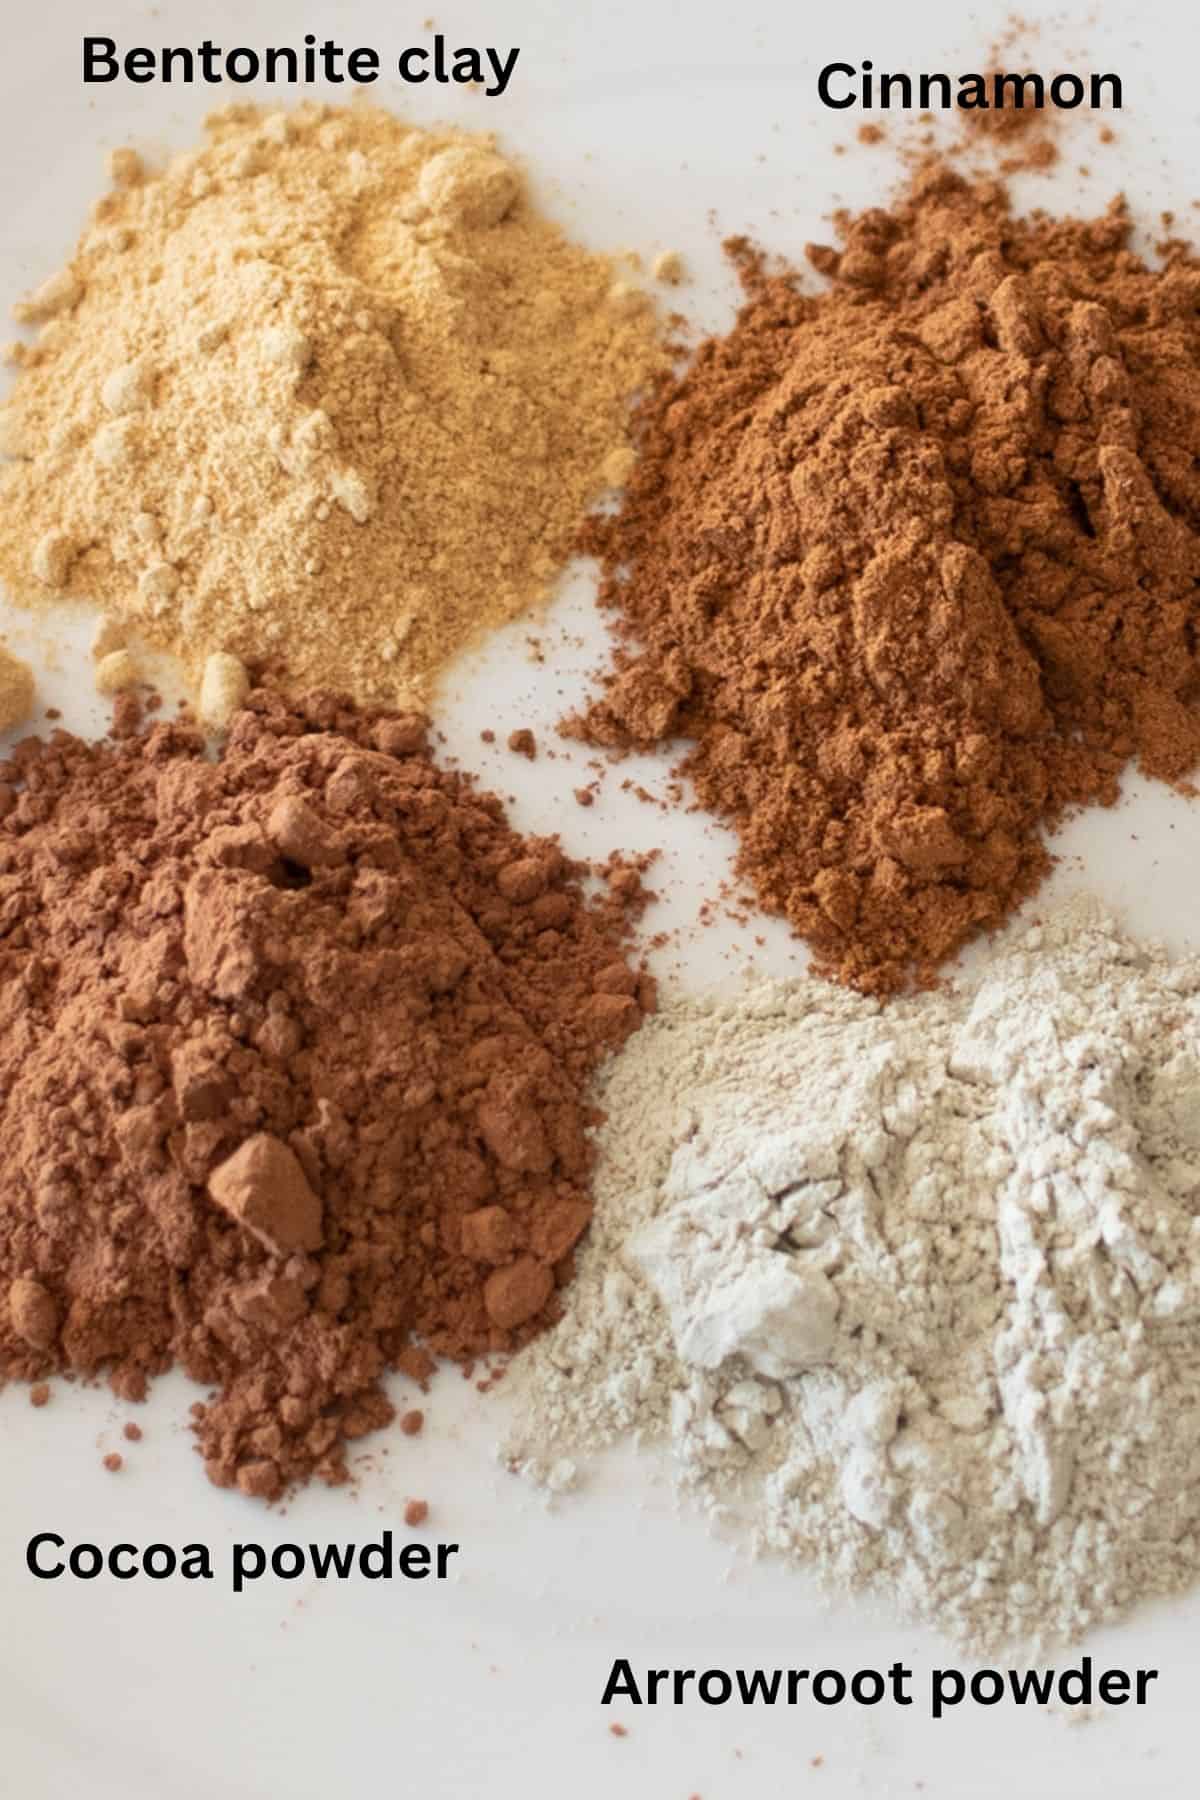
Cinnamon, cocoa powder, or arrowroot powder can be used to make the perfect skin color match in your homemade face powder.
I started making my own DIY face wash and homemade face moisturizers years ago so I could have control over what I’m putting on my skin.
Over the years, I have learned how to make my own natural deodorant recipe without baking soda, homemade hand soaps, and DIY dry shampoo for the same reason.
Making my own makeup has always been on the to-do list, and though I mastered DIY lip balm and homemade lip gloss, I never thought of making my own foundation.
After a few attempts, I found a recipe that works well for my skin and covers up skin blemishes. As usual, it was much easier than I expected. I wish I had started making it sooner.
I may even go so far as to say this is one of my favorite skincare products I’ve made yet. Well, at least my favorite of my natural makeup recipes!
Why You’ll Love Homemade Foundation
- All-natural ingredients: This recipe is made with simple, natural ingredients that you may already have on hand.
- Custom color: You’ll never waste money on the wrong color foundation again! You can keep adjusting this foundation color until it’s the perfect match.
- Save money: Making your own homemade makeup is incredibly affordable and a great way to save money.
- Eco-friendly: Reuse your container again and again to save on waste! Plus, this recipe uses only sustainable ingredients.
Ingredients
- Base: You can use arrowroot powder or cornstarch. I like the texture of arrowroot powder better, but cornstarch works, and most people already have it in their pantry.
- Cocoa powder: Cocoa powder will give this foundation a base color, which you can add to in order to match your skin tone.
- Colorant: Additional colorants will help you get the perfect match. You can use cinnamon, clove, nutmeg, bentonite clay, or iron oxides.
- Oil: This helps it stick to your skin better. You can use essential oils, vitamin E oil, or another liquid carrier oil.
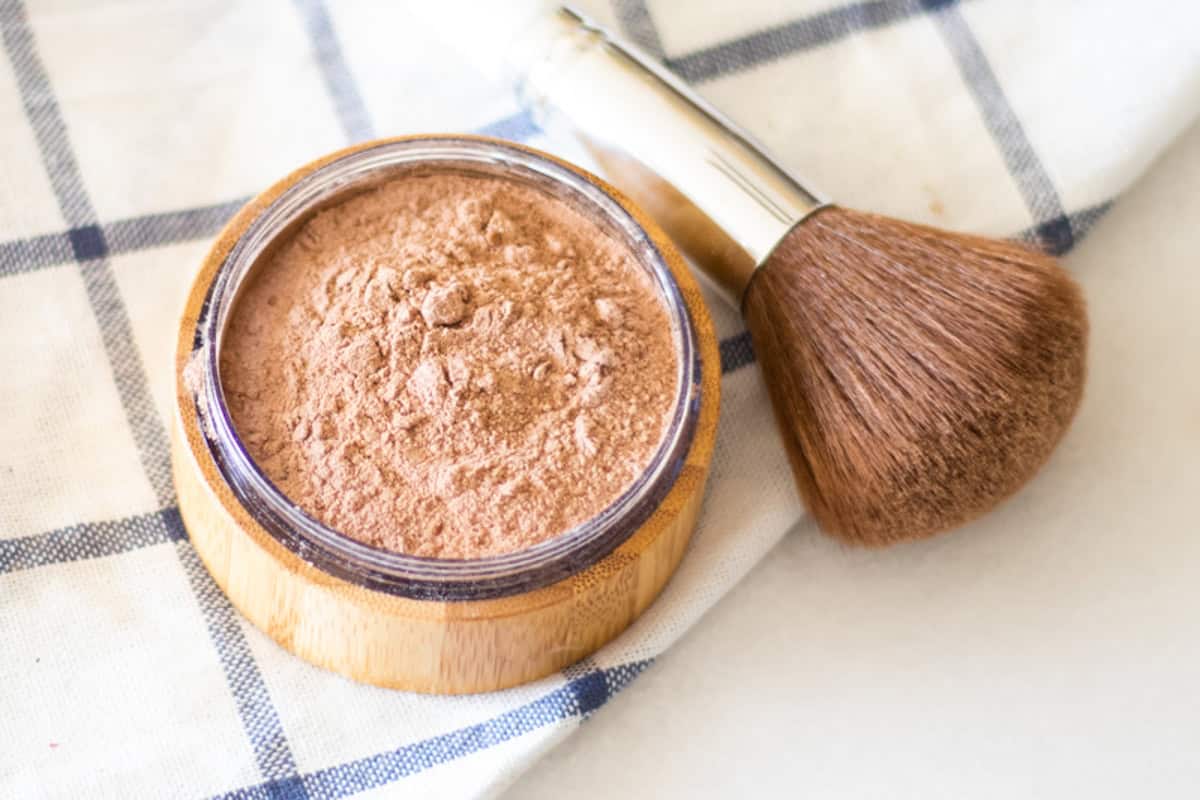
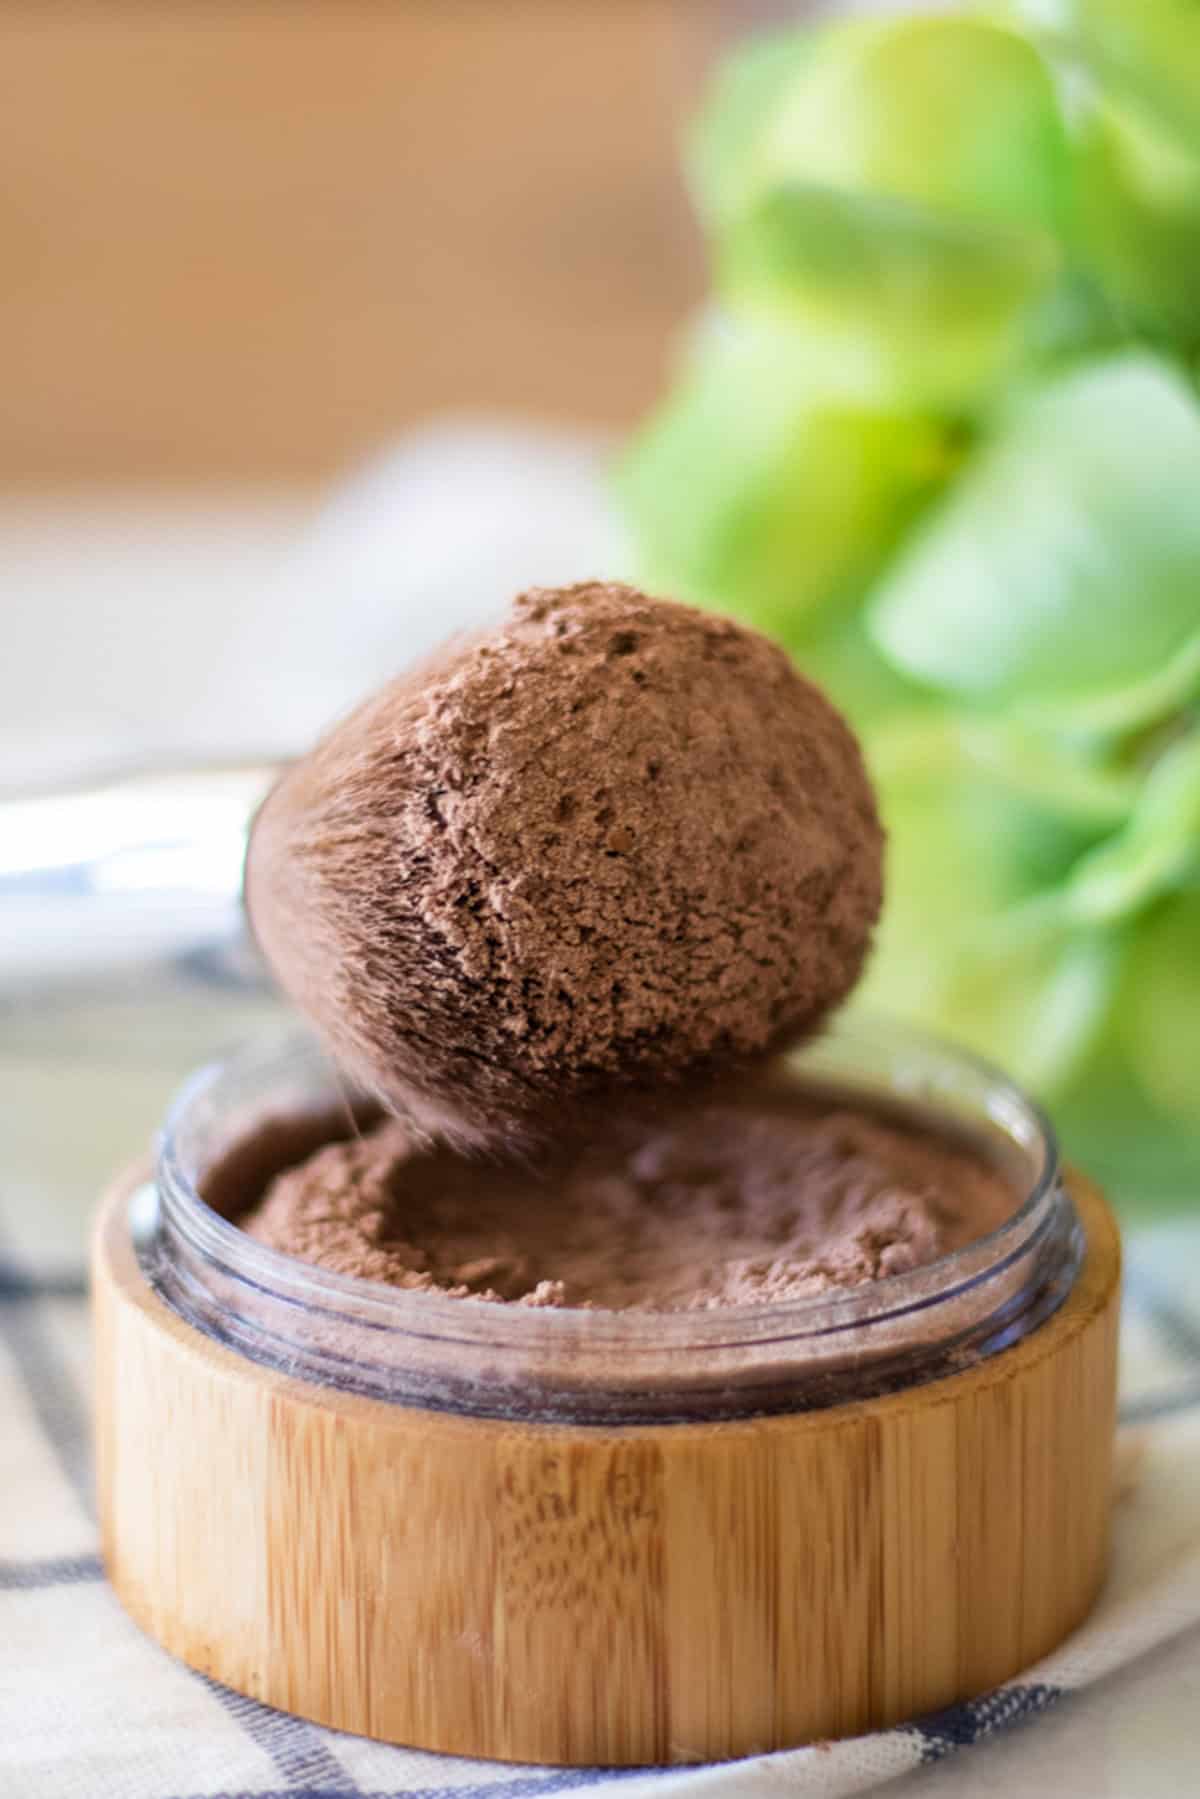
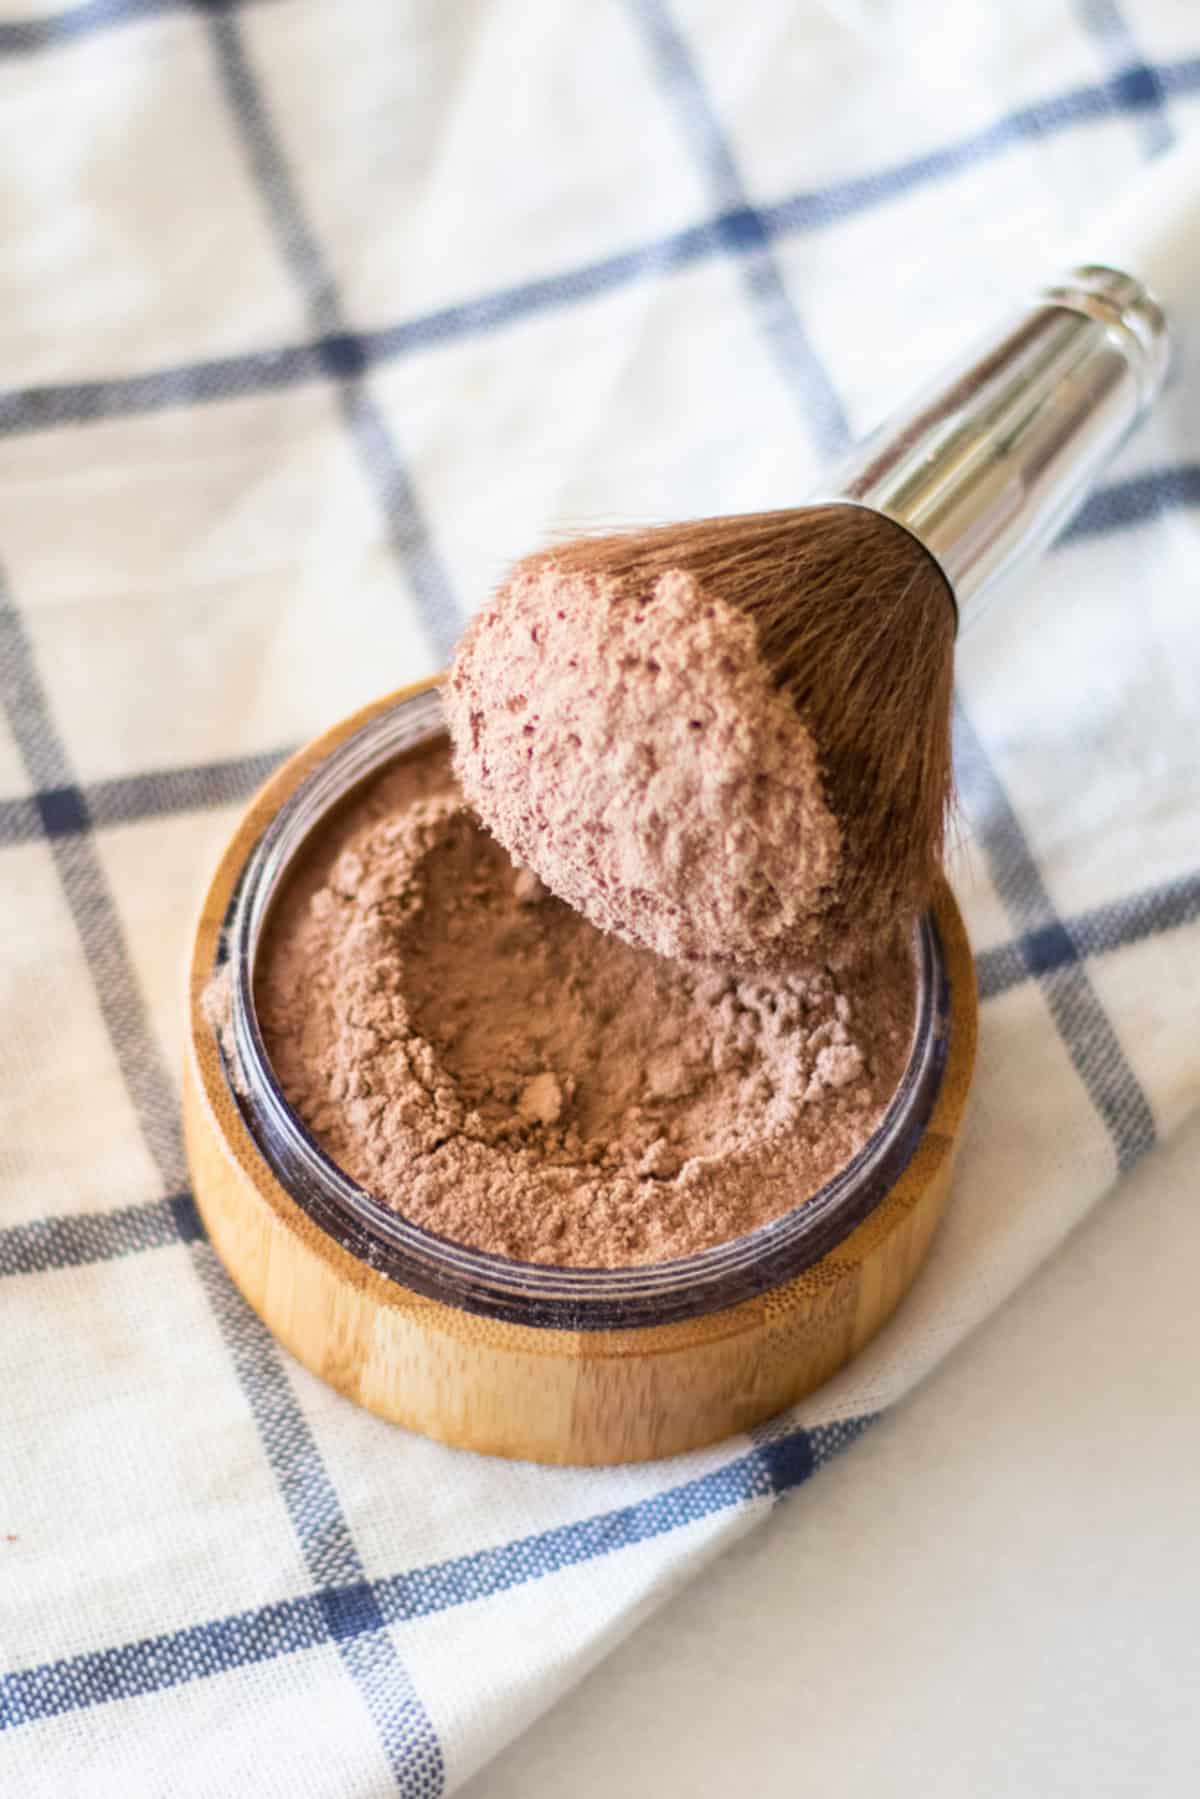
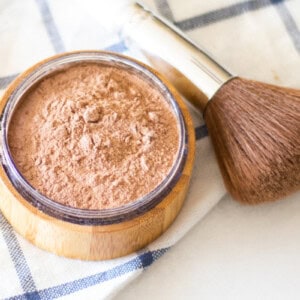
- Storage container: You can reuse an old powder foundation container or buy one. I really like this foundation storage container.
How to Make DIY Foundation
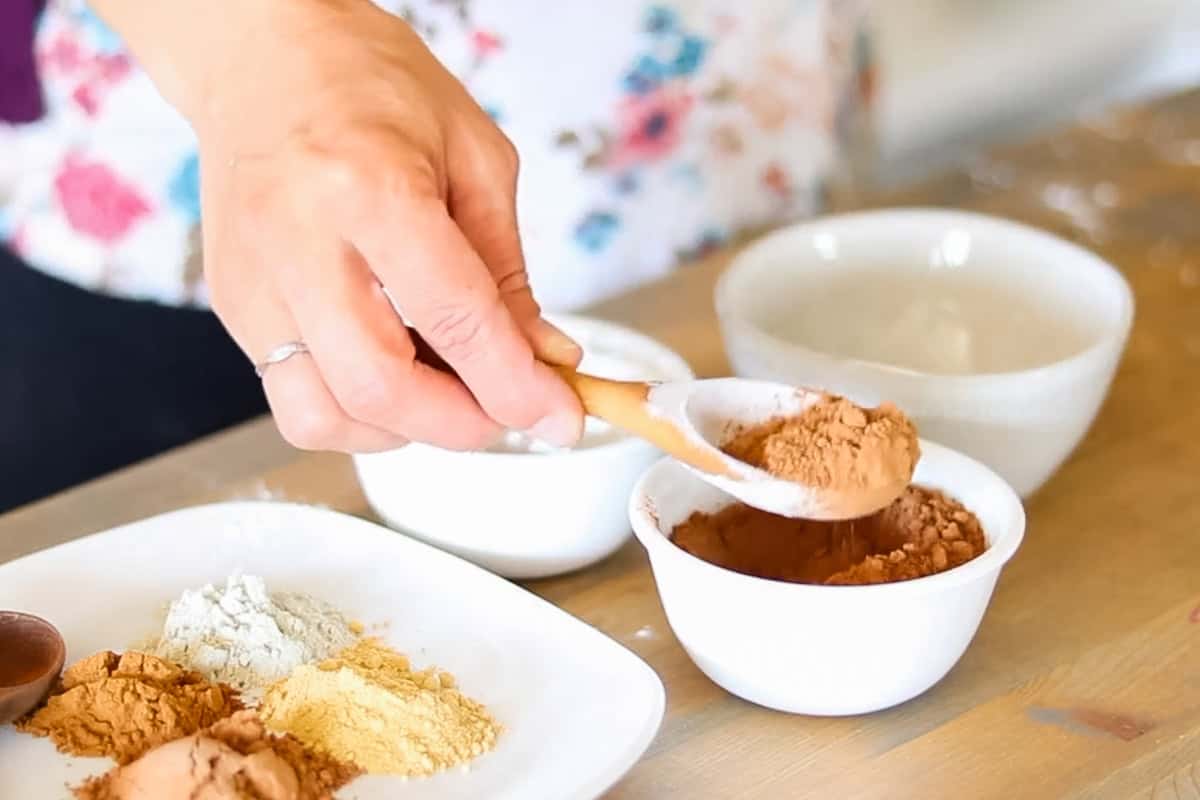
Step 1: Mix your base and cocoa powder in a small mixing bowl.
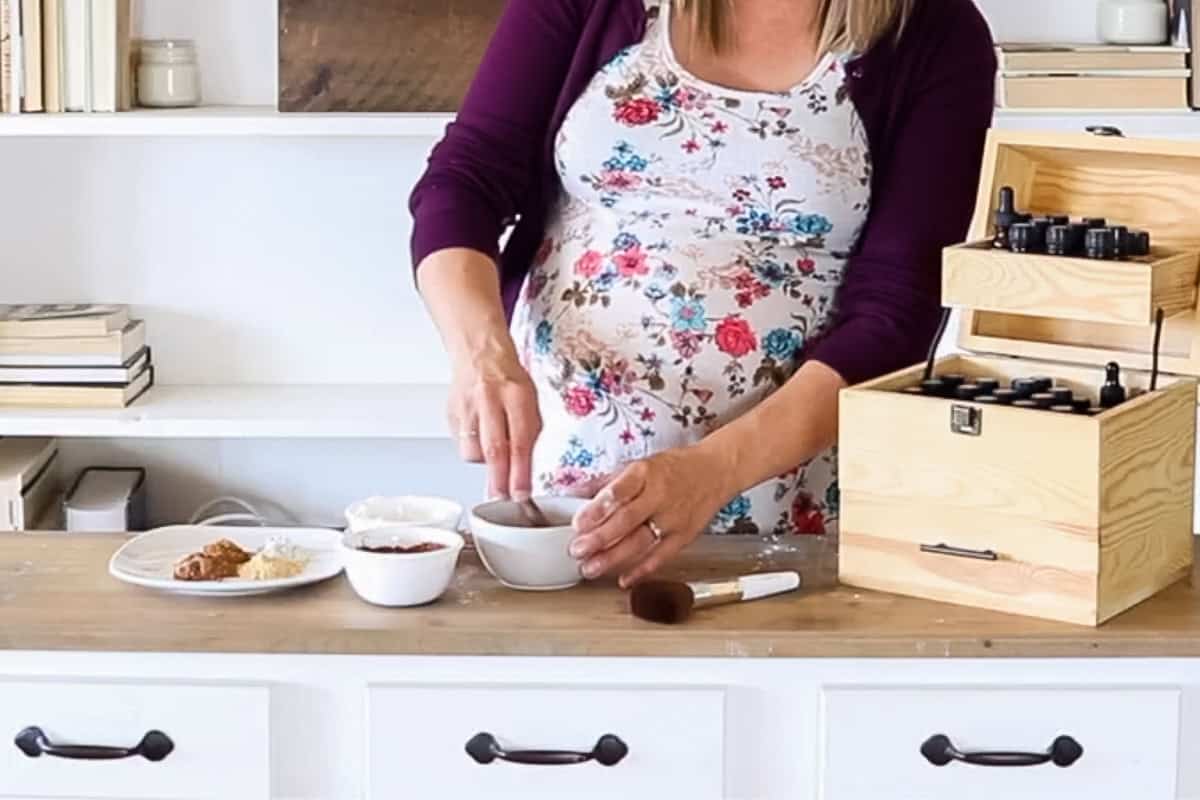
Step 2: Add in a small amount of color to match your skin tone (color list below). Rub a small amount of powder on the hand or wrist to test the color. Add more color as needed.
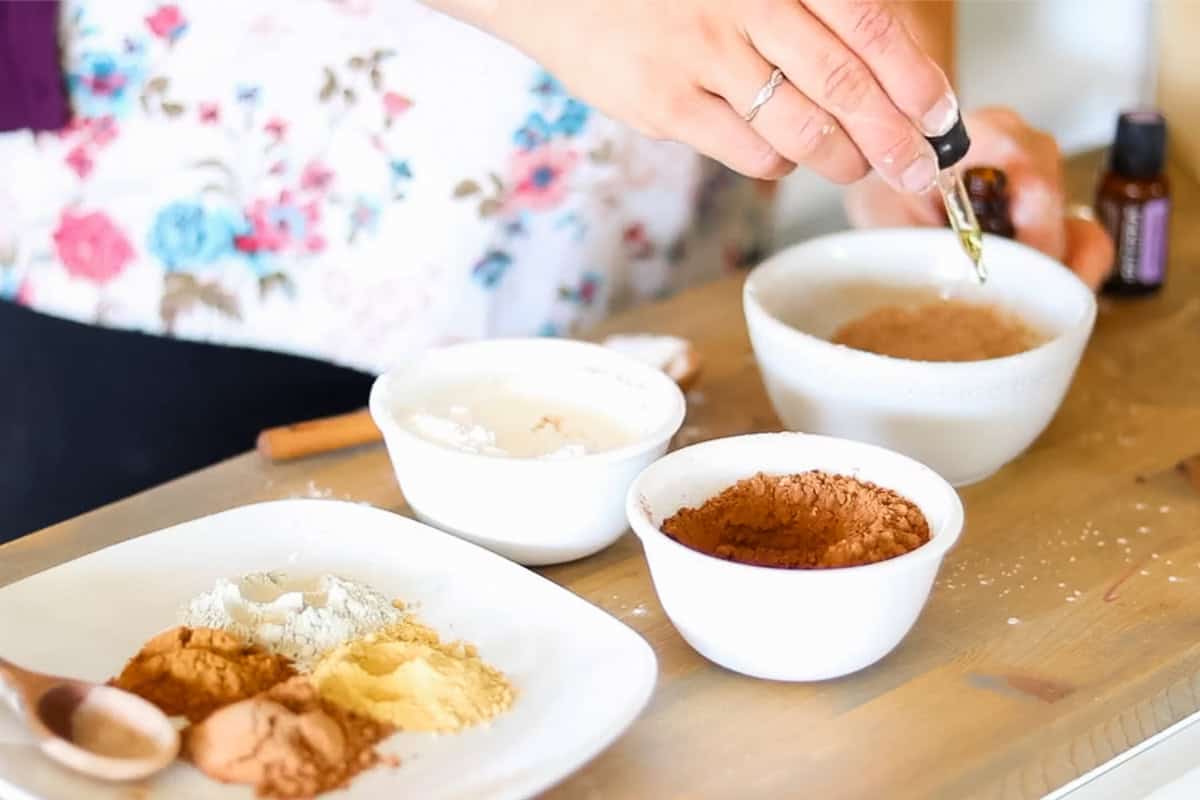
Step 3: Add in 5-10 drops of oil of choice until the desired texture is reached. (More info on this below!)
Step 4: Transfer to an airtight container.
Matching Your Color
Spices and other neutral-colored powders can be used to make the perfect foundation shades to match skin tone. You may need to play around with this part for a little while to find the perfect color for you.
Always start with less and add more as you test it. If you get too much color or the mixture gets too dark for your skin tone, add more arrowroot powder or cornstarch to lighten it up.
- Nutmeg: light brown
- Cocoa Powder: light to medium brown (this is my favorite powder)
- Clove: dark reddish-brown
- Cinnamon: for warm skin tones
- Bentonite clay: for cool skin tones
How to Apply Powder Foundation
It is always best to start with a clean and moisturized face before applying your makeup. I like to use a homemade face moisturizer.
- Begin by washing your face, then pat dry and apply a primer, or use my DIY primer.
- If using a homemade concealer, apply it under the eyes and to any areas of concern.
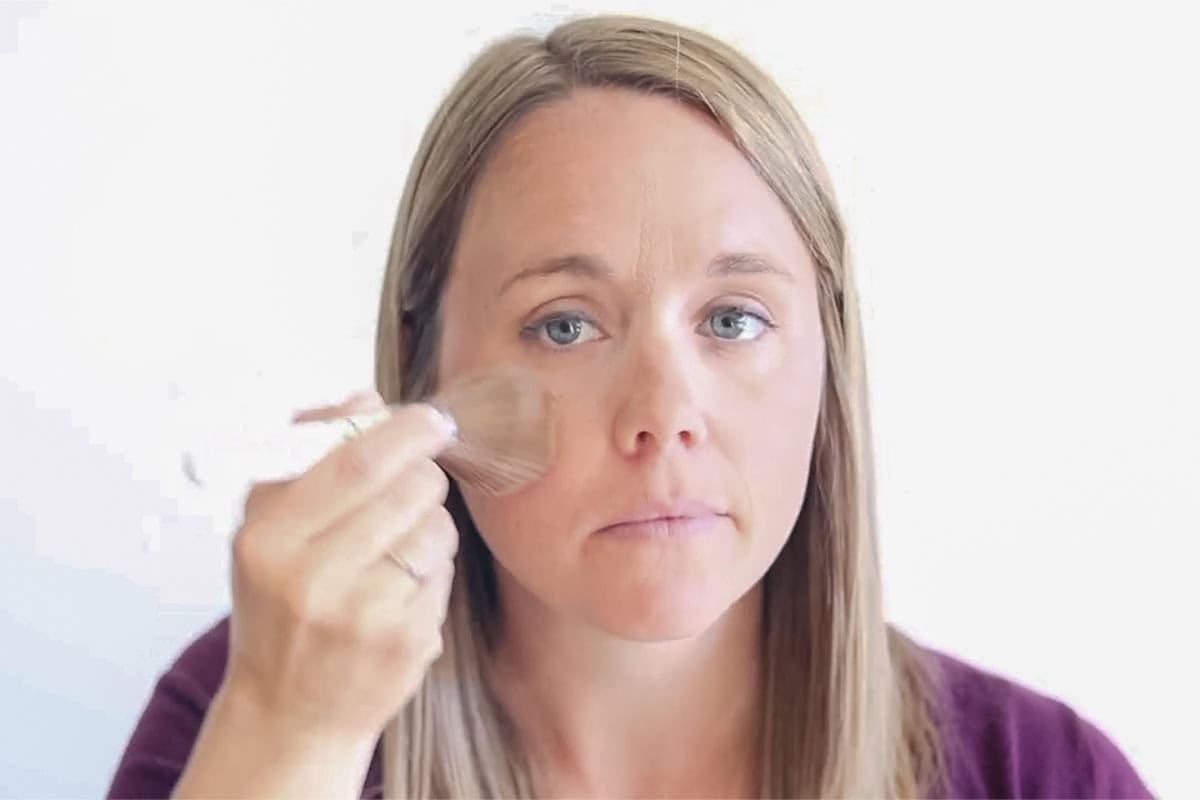
- Now, it is time to apply your foundation. Using a large makeup brush, dab it lightly into the powder foundation. Tap the brush against the container to get the extra powder off.
- Apply the foundation to the T-zone and under the eyes.
- Using a circular motion, apply the foundation to the cheeks.
- Add more foundation as needed and blend into the cheekbones and the rest of the face.
- Follow up with a homemade setting spray or DIY setting powder to keep the foundation on all day.
DIY Foundation: Powder or Liquid?
Powder foundation can be better for the skin, especially if you have oily skin or sensitive skin. If you have dry skin, a liquid foundation recipe may be a better option for you.
What kind of foundation is going to give me the best coverage?
The powdered foundation is best for light coverage, while your liquid foundation will provide a more full coverage, almost like a concealer.
It really comes down to your skin type and what you are going for.
This homemade foundation powder is great for minor blemishes or for blending the skin, while a liquid foundation is best for hiding fine lines and dark spots.
What makes the base?
For the base of this DIY foundation, you can use arrowroot powder or cornstarch. Both of these can be used as a starch thickener and have a similar texture.
If you have any sensitivity to corn, you will want to use arrowroot powder. It is best to use non-GMO organic cornstarch if that’s what you opt to use.
Both powders are white, leaving you with a blank canvas to get started. Next, we will add the color to match your skin tone.
How to Make DIY Foundation Stick Better
You can add a small amount of essential oil, carrier oil, or vitamin E oil to change the texture of the foundation.
The amount you add will depend on how much powder you use. Since everyone’s skin tone is so different, it is hard to determine the amount of powder your foundation will have compared to mine.
Start with 5-10 drops of oil, stir well, and test the foundation on your wrist or hand. Add more until the desired texture is reached.
Adding oil can help the foundation to last longer on the face and give it extra benefits for the skin.
Pro tip: Be sure to avoid citrus essential oils as they are photosensitive and could cause skin sensitivities if used in direct sunlight.
Note: I’ve had people ask about using coconut oil for the carrier oil, and I would suggest using fractionated coconut oil only, not regular coconut oil.
Tips
- Do not use shea butter or cocoa butter in place of the carrier oil. Those butters are solid and will cause clumping in the final product.
- Prep your skin ahead of time. Start with a clean, moisturized face, and consider using a primer specifically designed for powdered foundation.
- Apply powder sparingly. A little goes a long way with powdered foundation, and adding a thick layer can make your face look cakey and overdone.
- Blend well. Using short, circular motions, blend the powdered foundation into your skin to create a seamless finish.
- Remember to always remove your makeup products at the end of the day to allow your skin to breathe. I like to use homemade makeup remover.
- You can use iron oxides as an alternative to the coloring options listed above.
Recipe FAQs
It is best to store your foundation in an airtight container. You can use a small glass jar with a lid or purchase an empty powder foundation container online.
It is best to have a container with a wide mouth lid to make it easy to get your foundation out, even when it is almost gone.
You also want to make sure the container is large enough to fit your makeup brush into it.
If stored in an airtight container, your foundation can last up to one year.
Like I said earlier, making your own makeup will save you so much money! How much it costs to make depends on where you live, brand selection with ingredients, and whether you buy in bulk. That said, I can make enough foundation to last me a month for less than 50 cents. That’s right, less than 50 cents for a month’s worth of makeup!
Once you start making your skincare products, you will quickly realize how much money you can save.
Key Takeaways
This powder foundation recipe is perfect for many skin types and is so simple to make.
Just pick the right shade for your skin, and you have a recipe as good as any store-bought foundation.
Related Recipes
- How to Make Eyeliner
- All-Natural DIY Blush Cream
- Homemade Eyeshadow
- DIY Lip Gloss
- Homemade Matte Lipstick
- DIY Makeup Brush Cleaner
If you made this all-natural DIY foundation tutorial or any other tutorial on my website, please leave a 🌟 star rating and let me know how it went in the 📝 comments below. Thanks for visiting!
All-Natural DIY Foundation
Equipment
- Airtight container
Ingredients
- 1 tablespoon arrowroot powder or cornstarch, the base
- 1 tablespoon cocoa powder
- ⅛ teaspoon of color as needed
- 5-10 drops of essential oil, carrier oil, or vitamin E oil
Instructions
- Mix the base and cocoa powder in a small mixing bowl.
- Add in a small amount of color to match your skin tone.
- Rub a small amount of powder on the hand or wrist to test the color. Add more color as needed.
- Add in 5-10 drops of oil until the desired texture is reached.
- Transfer to an airtight container.
Notes
Color Chart
- Nutmeg- light brown
- Cocoa Powder- light to medium brown
- Clove- dark reddish-brown
- Cinnamon- for warm skin tones
- Bentonite clay- for cool skin tones
- Do not use shea butter or cocoa butter in place of the carrier oil. Those butters are solid and will cause clumping in the final product.
- Prep your skin ahead of time. Start with a clean, moisturized face, and consider using a primer specifically designed for powdered foundation.
- Apply powder sparingly. A little goes a long way with powdered foundation, and adding a thick layer can make your face look cakey and overdone.
- Blend well. Using short, circular motions, blend the powdered foundation into your skin to create a seamless finish.
- Remember to always remove your makeup products at the end of the day to allow your skin to breathe. I like to use homemade makeup remover.
- You can use iron oxides as an alternative to the coloring options listed above.


How long will this last until it expires or goes bad? Id hate to make too much and have it go to waste or mold.
Hi Vi! Stored in an airtight container, this foundation will last up to one year. Just keep it dry — avoid steamy bathrooms and don’t dip a wet brush into the powder — and you won’t have any issues with mold. Hope you enjoy it!
Very nice