This post may contain affiliate links. Please see our disclosure policy.
Summer is well on the way! And that means one thing; it’s time to remove the unwanted hair from my body.
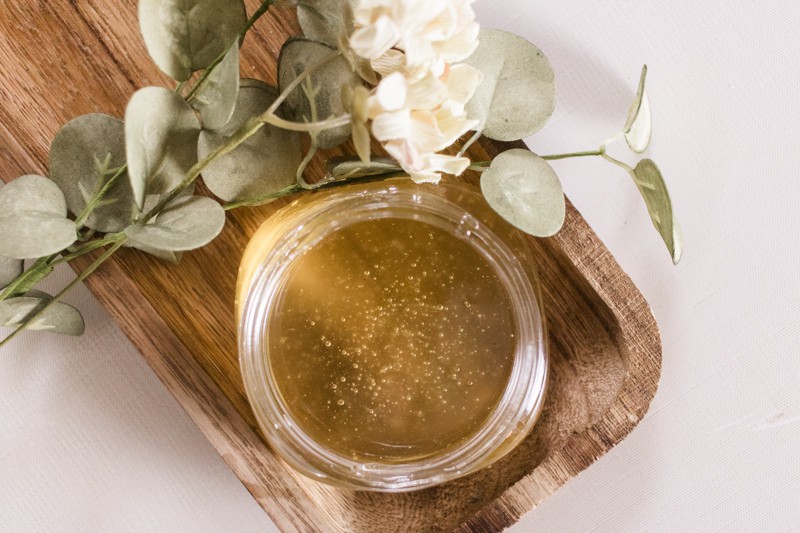
Sugar wax at home
Now, I’ll confess that I’m in two minds about waxing.
On the one hand, I don’t tolerate how much it hurts (pulling out hairs is never pleasant right?)
Nor do I enjoy the speed at which wax strips are yanked off when you visit a salon.
Yet on the flip side, I love the smooth finish, and of course, it’s amazing to be hair free for weeks – not just days.
So I was delighted when I discovered a waxing alternative called sugar waxing.
The best thing is that sugar waxing is far gentler on the skin than conventional wax as it doesn’t use wax strips.
It’s 100% natural and can be done by yourself in the comfort of your own home.
You’ve probably got the ingredients you need for sugar wax in your kitchen pantry today, so it’s simple to make a DIY sugar wax straight away.
In this post, I’ll share my favorite homemade sugar wax recipe so you can get smooth, hair-free skin in no time at a fraction of the cost of regular waxing.
What is sugar wax?
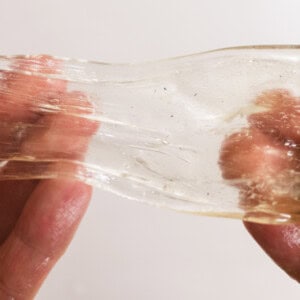
Sugar wax is a warm, sticky gel substance that forms out of melting sugar, water, and in my recipe, apple cider vinegar with tea tree essential oil. I particularly like using tea tree because of its natural soothing properties.
Sugar wax is excellent for removing hair from tricky places such as the backs of the knees and around the ankles, as it pulls the hair from the root rather than the surface of the skin.
Is sugaring less painful than waxing?
I wish the answer were yes, but I can only give my experience here, as we’re all different.
I personally tolerate sugar waxing way more than regular waxing and think it’s less painful.
But of course, you are still removing hairs from the root, so it’s never going to be pain-free.
The benefit of sugar waxing over regular waxing is that the sugar adheres only to the hair, not the skin; at least, that’s how it’s supposed to work.
All in all, the general consensus is that it is less painful but not pain-free.
Is sugar waxing safe?
On the whole, sugar waxing is very safe. It contains natural ingredients only, and most people share how they find it kinder to the skin.
The only thing you need to be cautious of is not using it straight away; else, you risk getting scalded.
Also, sugaring, as with any form of waxing, can irritate the skin and, if it’s not carried out correctly, may result in skin damage.
Follow the instructions at all times for the best results. I am not a professional and if you are unsure if waxing at home is right for you, seek out a professional to get it done.
How long does sugar wax last?
This is one of the big benefits of sugar waxing – the hair-free result and smooth skin last on average for 3-4 weeks.
Does sugaring cause ingrown hairs?
Any form of hair removal can cause ingrown hairs.
But the great thing with sugar wax is it’s exfoliating as well as removing hair from the root, so in theory, there should be fewer ingrown hairs.
But no one can stop ingrown hairs altogether (wishful thinking!)
To reduce the risk, however – you can exfoliate your skin 2-3 days after sugaring to prevent irritation and ensure the skin remains bump-free.
This post contains affiliate links, which means I make a small commission at no extra cost to you. Get my full disclosure HERE.
How to make sugar wax
Here is where I’ll share the sugar wax ingredients along with the recipe. I’ll also give extra sugaring tips in the section below for the best results.
RECIPE:
- 2 cups of cane sugar
- 1/4 cup of apple cider vinegar
- 1/4 cup of filtered water
- 3-5 drops of tea tree essential oil (optional)
INSTRUCTIONS:
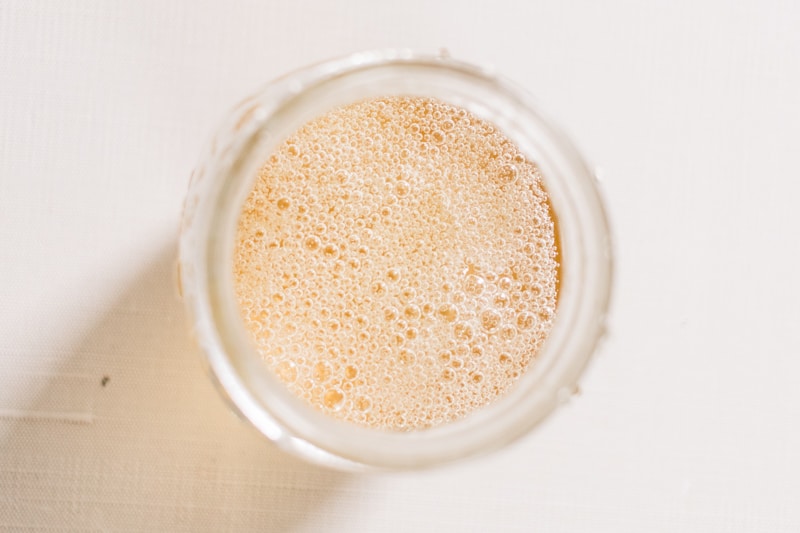
Measure and pour the sugar, apple cider vinegar, and water into a saucepan.
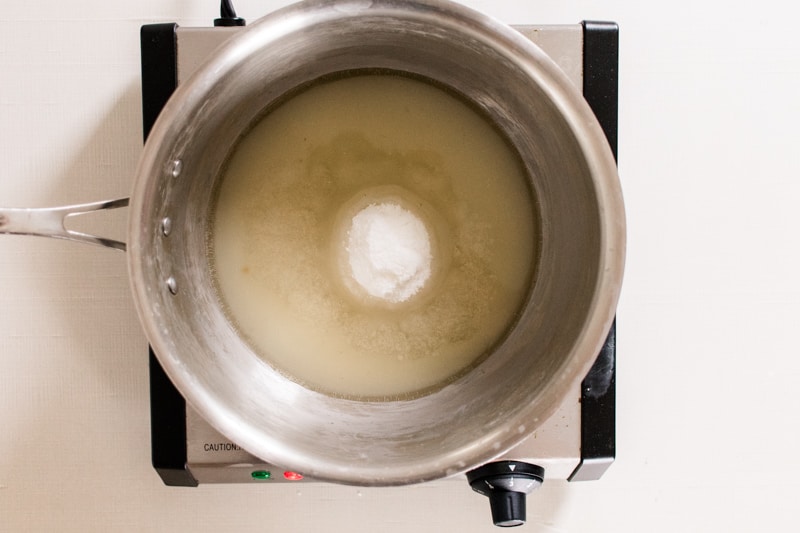
Cook over medium heat, stirring constantly until it comes to a boil.
Continue cooking until the sugar wax reaches 250 degrees. You can check this with a candy thermometer. This will take about 5 minutes.

Immediately remove the saucepan from the heat, so it stops cooking.

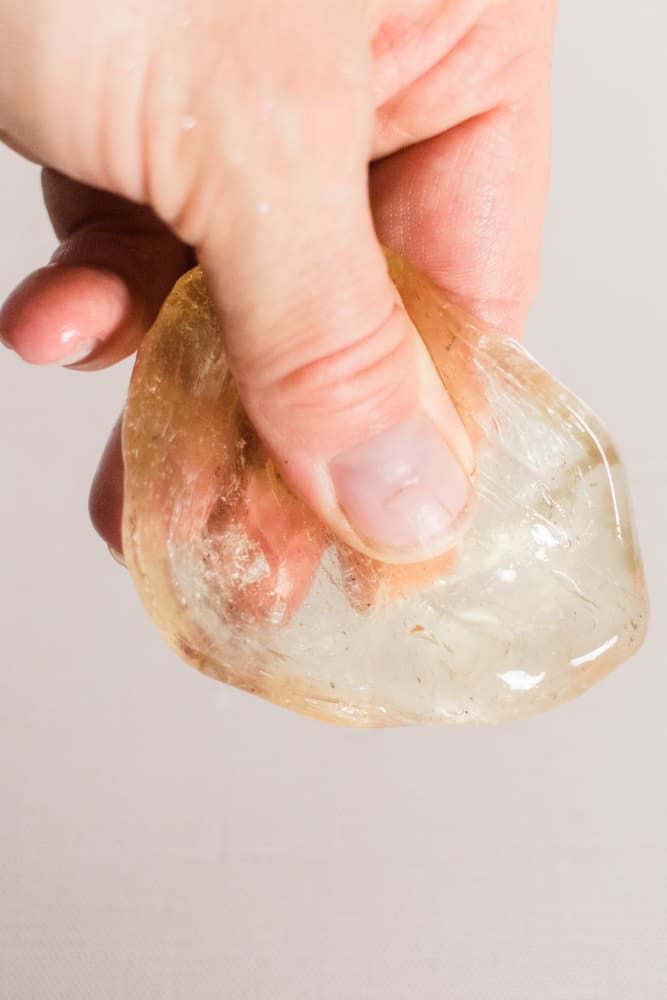
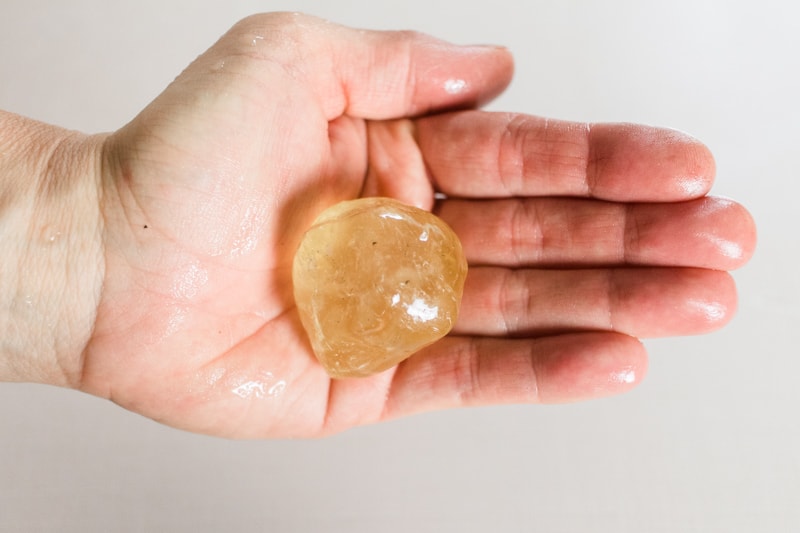
Transfer to a heat-resistant glass mason jar. The mixture will have to cool completely before use. To test the consistency, you can pour a little bit of the mixture into a ¼ cup measuring cup and place it in the freezer. Once it is cooled, you can start shaping and “working” your wax.
It should be stretchy and pliable, similar to the texture of normal wax or chewing gum.
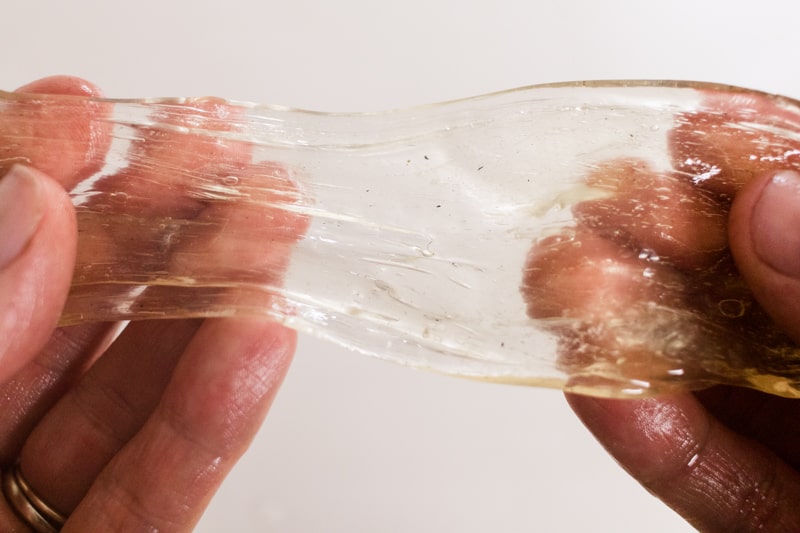
Once cooled, it is ready to use.
NOTE: If the wax is too liquidy, you can put it back into the saucepan and heat it to a higher temperature. If the wax is too hard, like candy, you will have to start over.
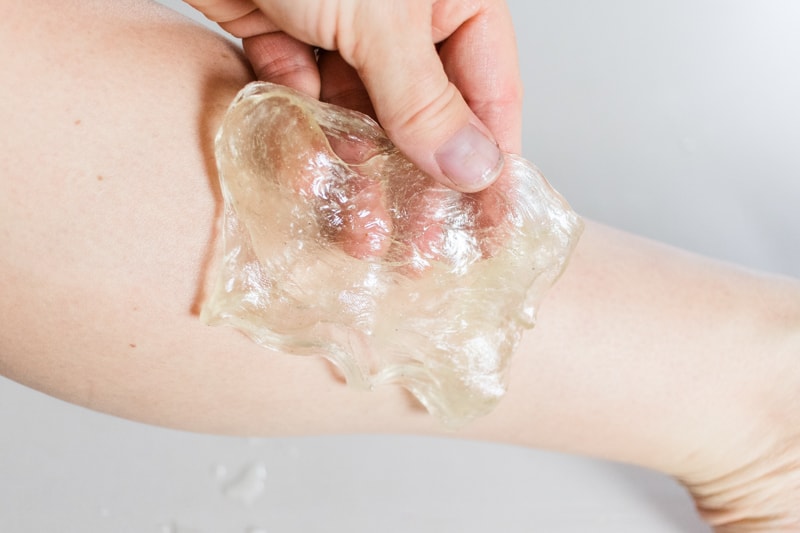
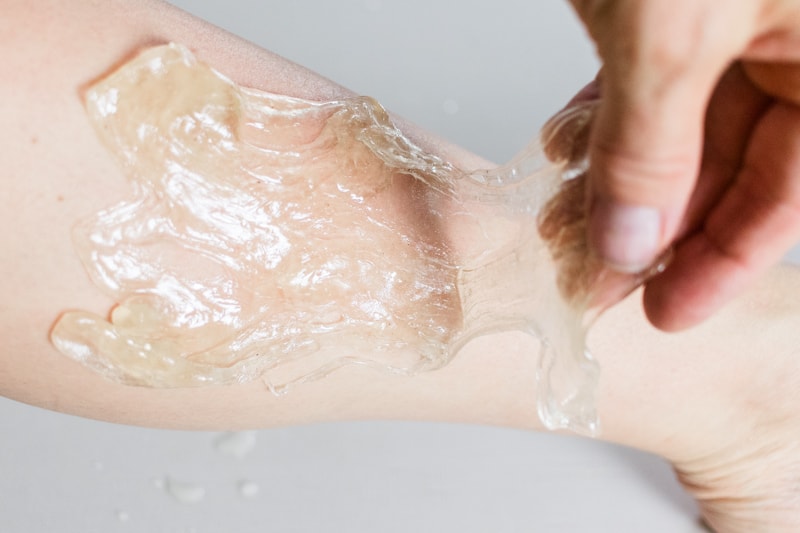
How to sugar wax your legs?
The trick with sugaring is to apply the sugar wax in the direction of hair growth and remove it in the opposite direction. Apply the wax, about ⅛ inch thick, to the skin.
I strongly recommend if this is your first time with any waxing method to try on a tiny area first (say a 1-inch area on your leg) to see how you tolerate it.
The first time is always the worst (in my experience!)
How to prep skin
It’s essential to cleanse the skin ahead of time before sugaring for best results.
The ideal length for sugaring is ¼” though I’ve done it with half that length with excellent results.
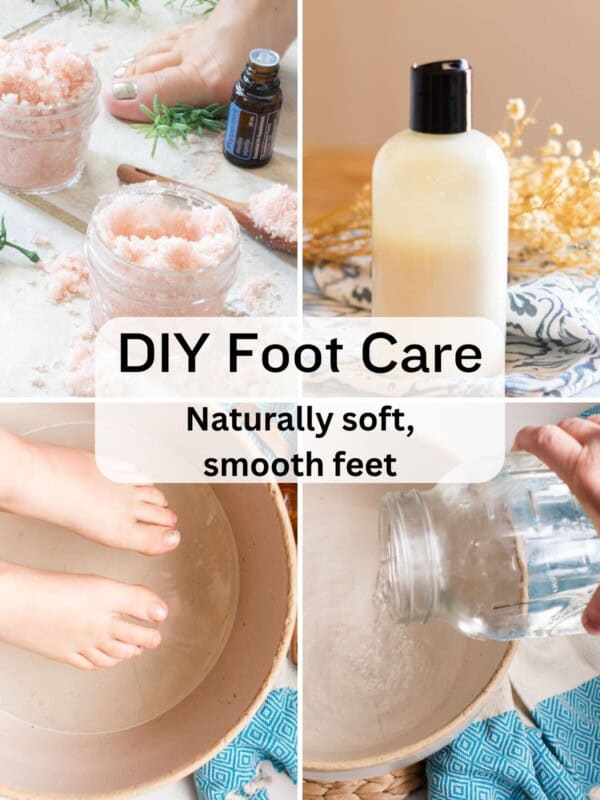
Exfoliate with a homemade whipped sugar scrub and wash the skin thoroughly with a homemade body wash. Ensure it’s completely dry before applying sugar wax.
After sugar wax care
I personally like to use pure coconut oil on my skin after sugaring. It’s antibacterial and moisturizing and leaves my skin silky smooth and smelling like a tropical vacation.
As with any waxing, the skin can become slightly irritated and red, which is why I do sugaring in the evening, to allow my skin to recover by the next morning.
I hope you enjoy making a DIY sugar wax recipe and that the results are what you hoped for.
Leave a common below and let me know how it worked for you.
Sugar wax recipe for smooth skin
Equipment
- saucepan
Ingredients
- 2 cups of cane sugar
- ¼ cup of apple cider vinegar
- ¼ cup of filtered water
- 3-5 drops of tea tree essential oil, optional
Instructions
- Measure and pour the sugar, apple cider vinegar, and water into a saucepan.
- Cook over medium heat, stirring constantly until it comes to a boil.
- Continue cooking until the sugar wax reaches 250 degrees, checking often with a candy thermometer. This will take about 5 minutes.
- Immediately remove the saucepan from the heat, so it stops cooking.
- Transfer to a heat-resistant glass mason jar to cool.


I have made this 2x now and it doesn’t look like yours just goes back to a crystalized state when it cools down. What am I doing wrong?
I’ll give the recipe five stars but I will say I don’t think it works with raw organic cane sugar for some reason my wax came out like dough it is very sticky doesn’t pull hair and not very mailable. Idk what I did wrong if it’s the sugar type or what any pointers?
I agree, I’m sticking it in the freezer to see how that goes. I made it yesterday so it’s definitely cool.
Thank you so much for this recipe. However, my wax became very sticky and not gummy or strechy at all.
I poured the essential oil drops with all other ingredients though, could this be the reason?
I just finished making this recipe, but how do I get the remaining wax out of the sauce pan? 😂😅
At what point of the process can we introduce the essential oil? Do you think that adding Lavender would also be beneficial or is it better to aplly it after the waxing with fraccionated coccunut oil, for example?
I add it in when the wax is cooled down just slightly.
How long will the sugar wax last if I don’t use it all? Or do I need I need to discard it and make it fresh each time?
I suggest making a new batch each time.