This post may contain affiliate links. Please see our disclosure policy.
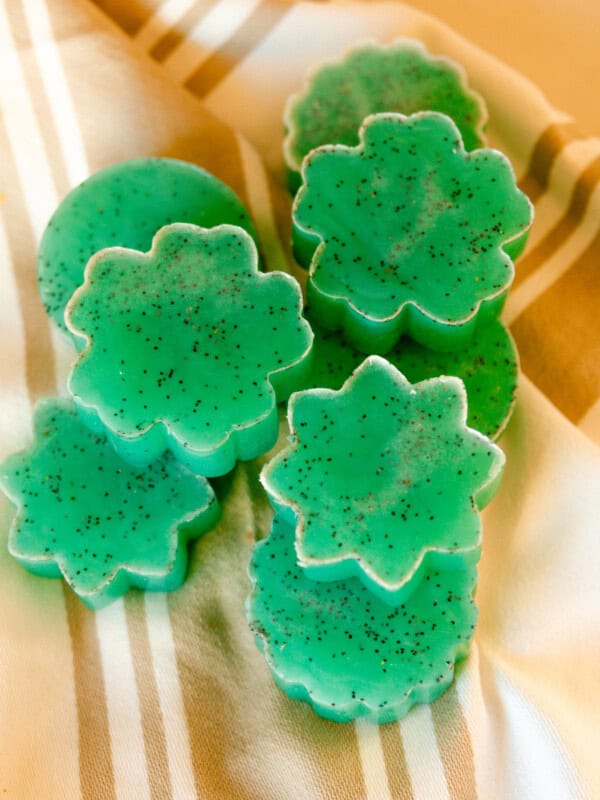
Making bath bombs might seem tricky at first, but it’s easier than you think! With this straightforward bath bomb recipe, you’ll have them ready for the tub in just a few simple steps.
I have seen bath bombs at Bath and Body Works, farmer markets, and even booths at the fair, and I even bought a few.
And while I love a nice relaxing bath, I think my kids love them even more! They get really excited to watch them fizz and take turns holding it in their hands to feel the bubbles.
Now, I admit this was one DIY I had no desire to tackle. Frankly, it just looked difficult to me! One of my friends is a “bath bomb expert” and assured me there was nothing to it.
So, I ordered the stuff and decided to give it a try. Yup, she was right! Nothing to it, and it was fun. Now, I can customize each batch to get the scent and the look I am going for!
If you have ever felt that making homemade bath bombs would be tough, don’t worry. I have detailed step-by-step images and even a video tutorial below to make things as easy for you as possible!
I even made several variations, including coconut oil-free bath bombs and my kid’s favorite, homemade tropical bath bombs!
Why you will love this recipe
- You are going to love how simple this is to make, even if you’re new to DIY projects. The ingredients are easy to find, the process is straightforward, and the end result works fantastically.
- You’re going to love this bath bomb recipe because it’s made with simple, plant-based, and sustainably sourced ingredients that are gentle on both your skin and the environment!
- These bath bombs are easy to store and last a long time when kept in a dry area, making it simple to have them on hand whenever you’re ready to enjoy a relaxing, spa-like soak!
Recipe Ingredients
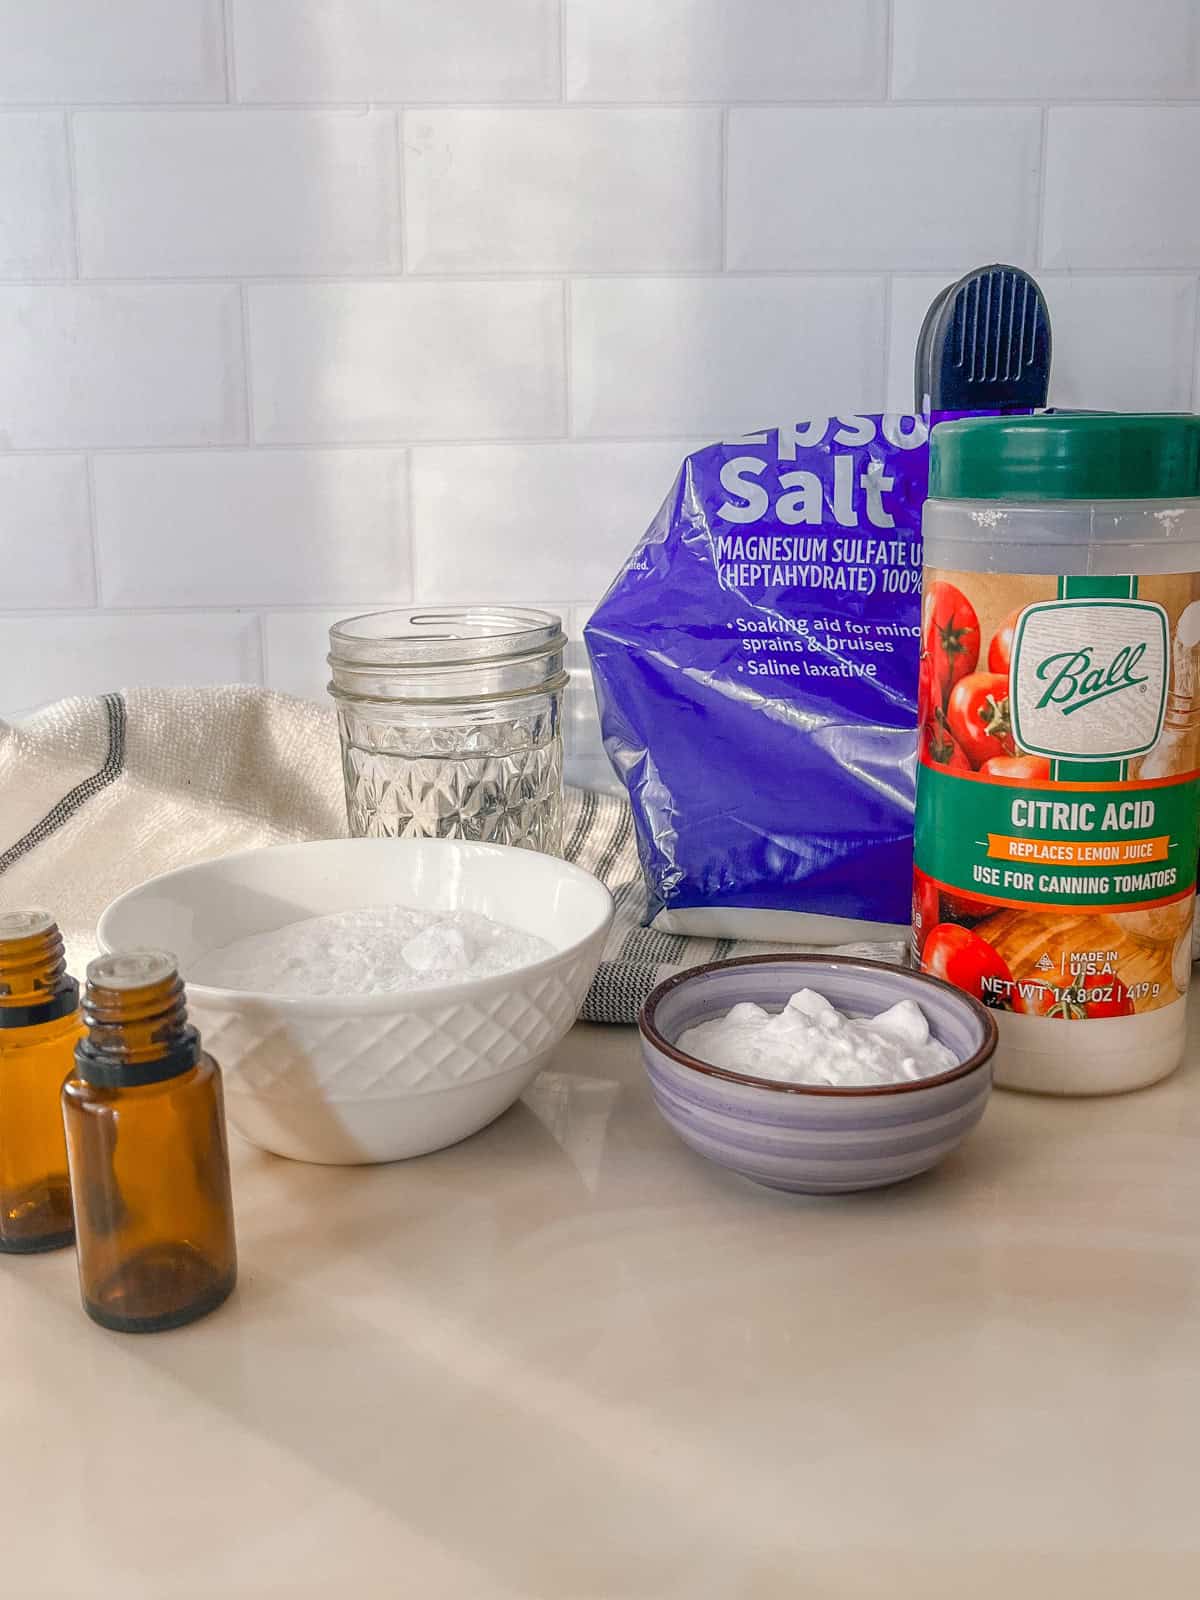
- Baking soda
- Citric acid: The citric acid will react with the baking soda once it hits the water, giving us that fizzing reaction!
- Cornstarch
- Epsom salt
- Coconut oil: For these bath bombs to work, you must use regular coconut oil, not fractionated coconut oil.
- Essential oils: These are totally optional, and you can definitely make these fragrance-free if you prefer! If you do choose to use them, check out my favorite blends below.
- Water: A small spray bottle to mist the ingredients will be totally necessary, but you can use any clean spray bottle you have on hand.
- Vanilla extract: I have made this with and without vanilla extract, but I do love the beautiful scent it gives! You can also check out my ultimate relaxing bath bomb recipe for more fragrance ideas!
Simple Bath Bomb Recipe
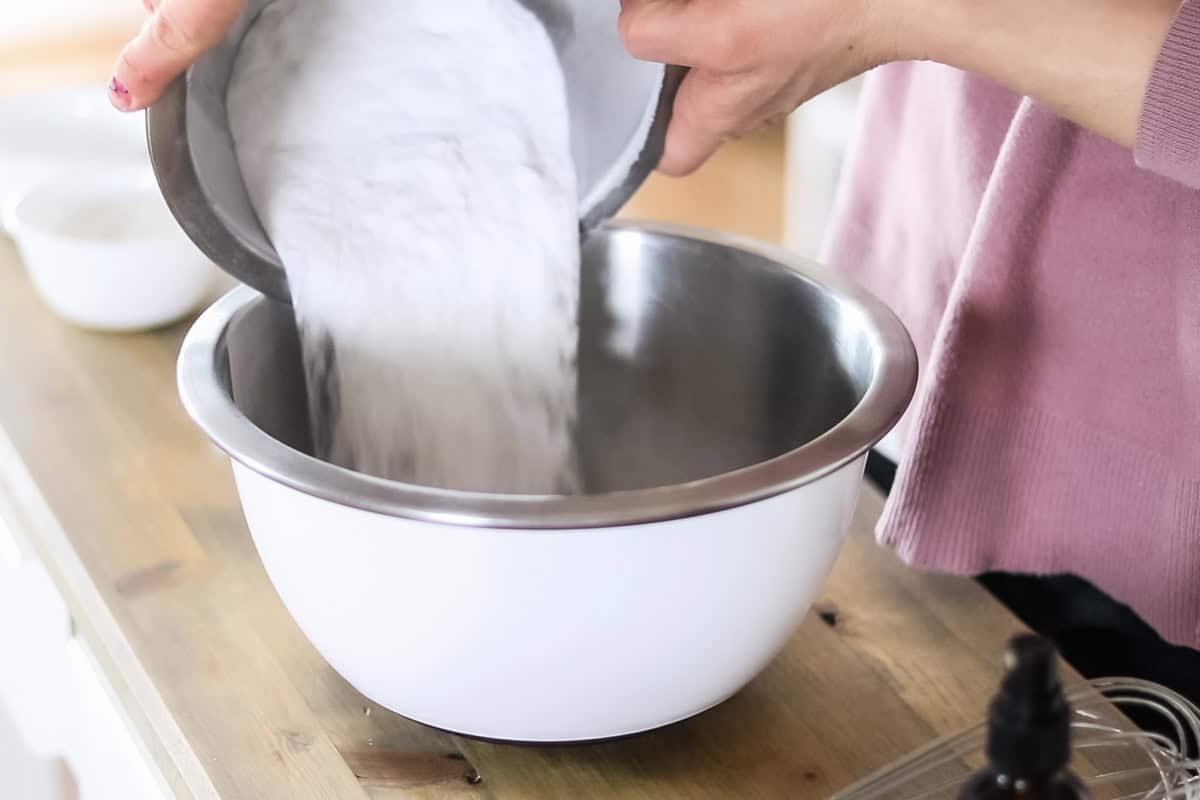
Step 1: Mix all the dry ingredients together in a medium-size bowl. Stir until well incorporated.
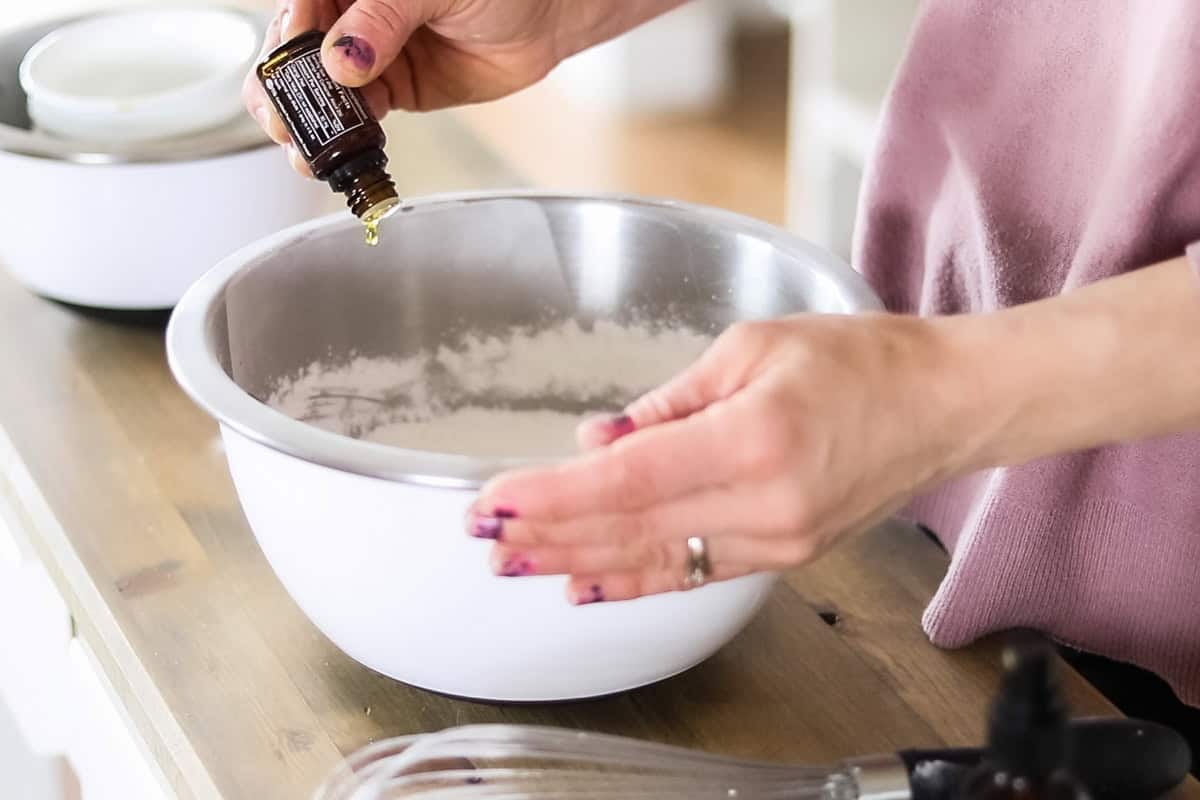
Step 2: Add in the coconut oil, essential oils, and vanilla. Whisk together until well combined.
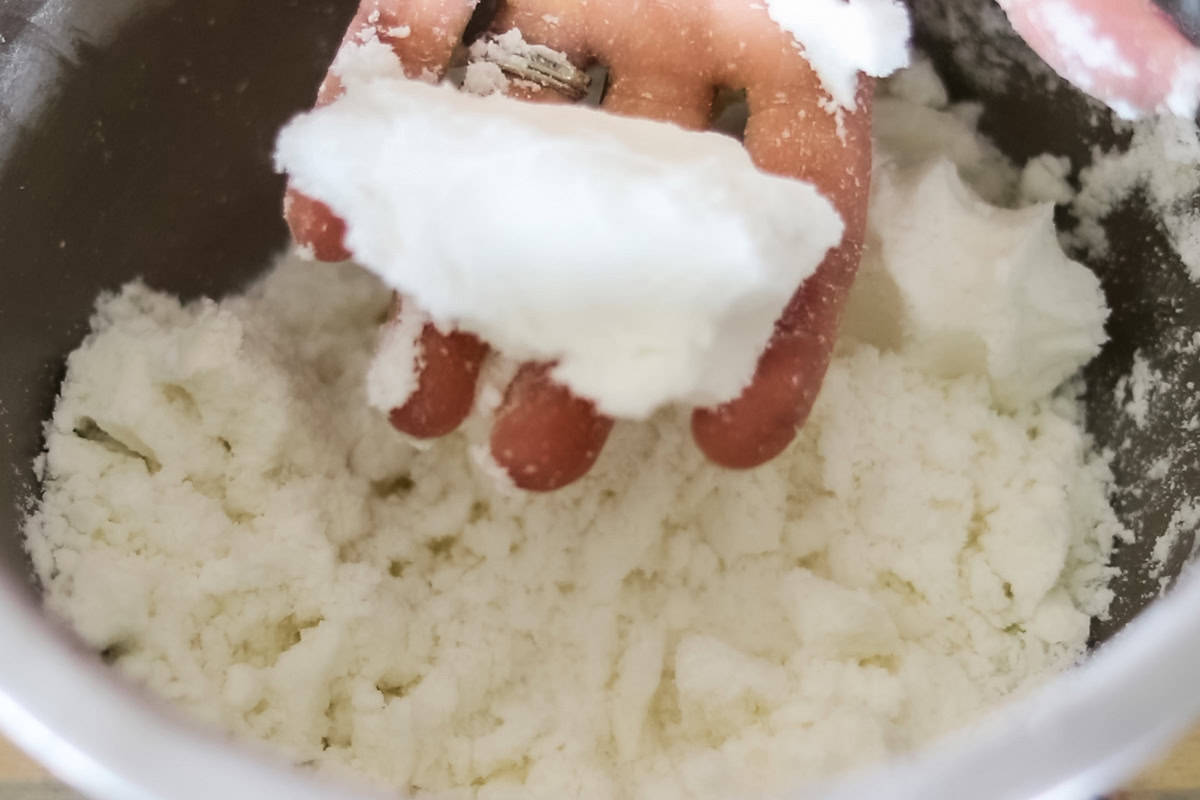
Step 3: With a spray bottle, spray the mixture with water until the ingredients hold together when squeezed in your hands. Only do one spray at a time so it doesn’t get too wet. (see tips below)

Step 4: Press the mixture into both halves of your lightly greased bath bomb molds until it is overflowing. Then, press the two halves together. Wipe the excess mixture off the sides and set it aside. Allow it to dry for 24-48 hours before popping out of the molds.
Expert Tips
- You don’t want to use too much liquid, or the baking soda and citric acid will begin to react, causing your bath bombs to expand prematurely. Just lightly mist one spray at a time and mix well. Then, with gloves, lightly squeeze some of the mixture together. It should just hold its shape without crumbling and falling apart.
- Make sure you overflow each side of the mold with the mixture so that you can firmly compact the ingredients for the best result.
- If the molds don’t pop off easily, you can lightly tap the sides with the blunt end of a butter knife to break it free.
- Getting the perfect texture can be challenging if this is your first time making these. I highly recommend watching my video in the recipe card below before getting started.
Recipe FAQs
Tap the sides of the mold with the back of a butter knife and then pull it straight apart or slightly twist while you pull.
Think of it like wet sand at the beach. We want it completely damp and to be able to hold itself together, but no more.
The citric acid is what is going to create the fizzing part of the bath bomb when mixed with the baking soda and water.
Bath bombs will last up to 6 months when stored in a cool, dry place.
Adding essential oils to your bath bombs
Essential oils are what make these bath bombs, the bomb! 😉 As they fizz in the water, the essential oils are released. It makes for the ultimate relaxing spa night. Try any of these blends below!
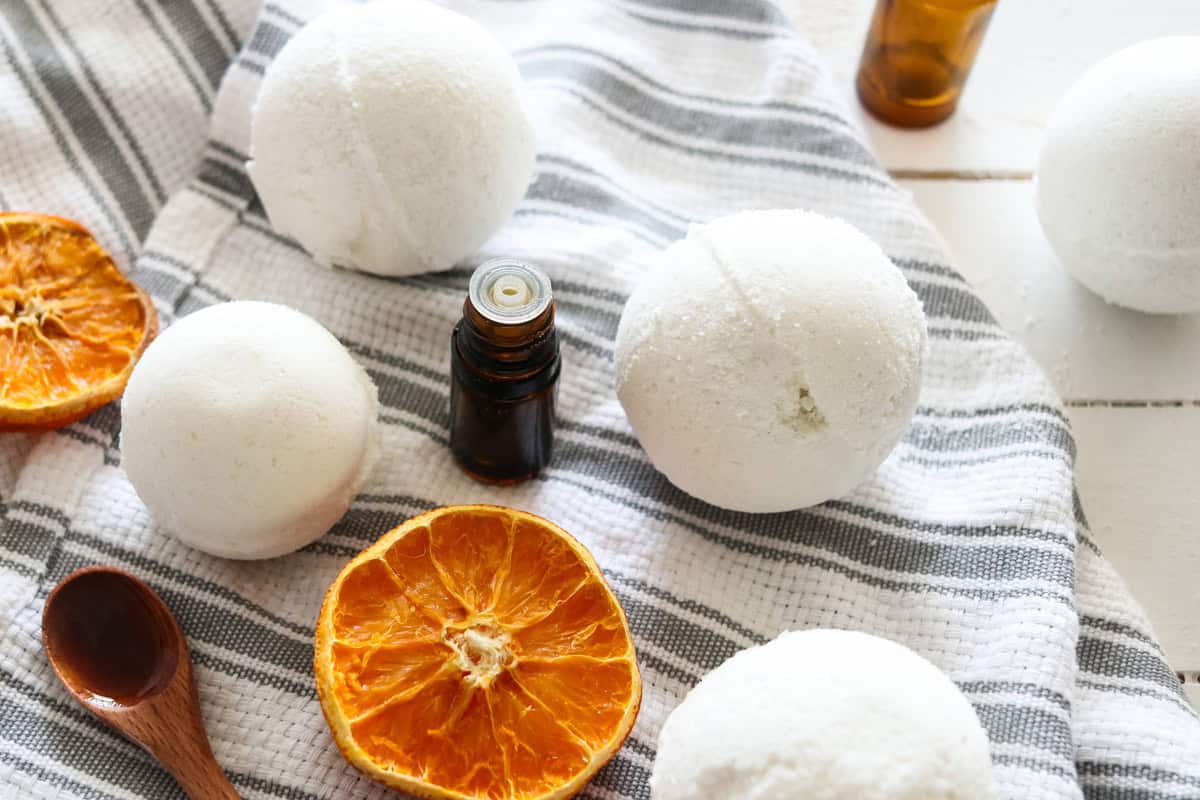
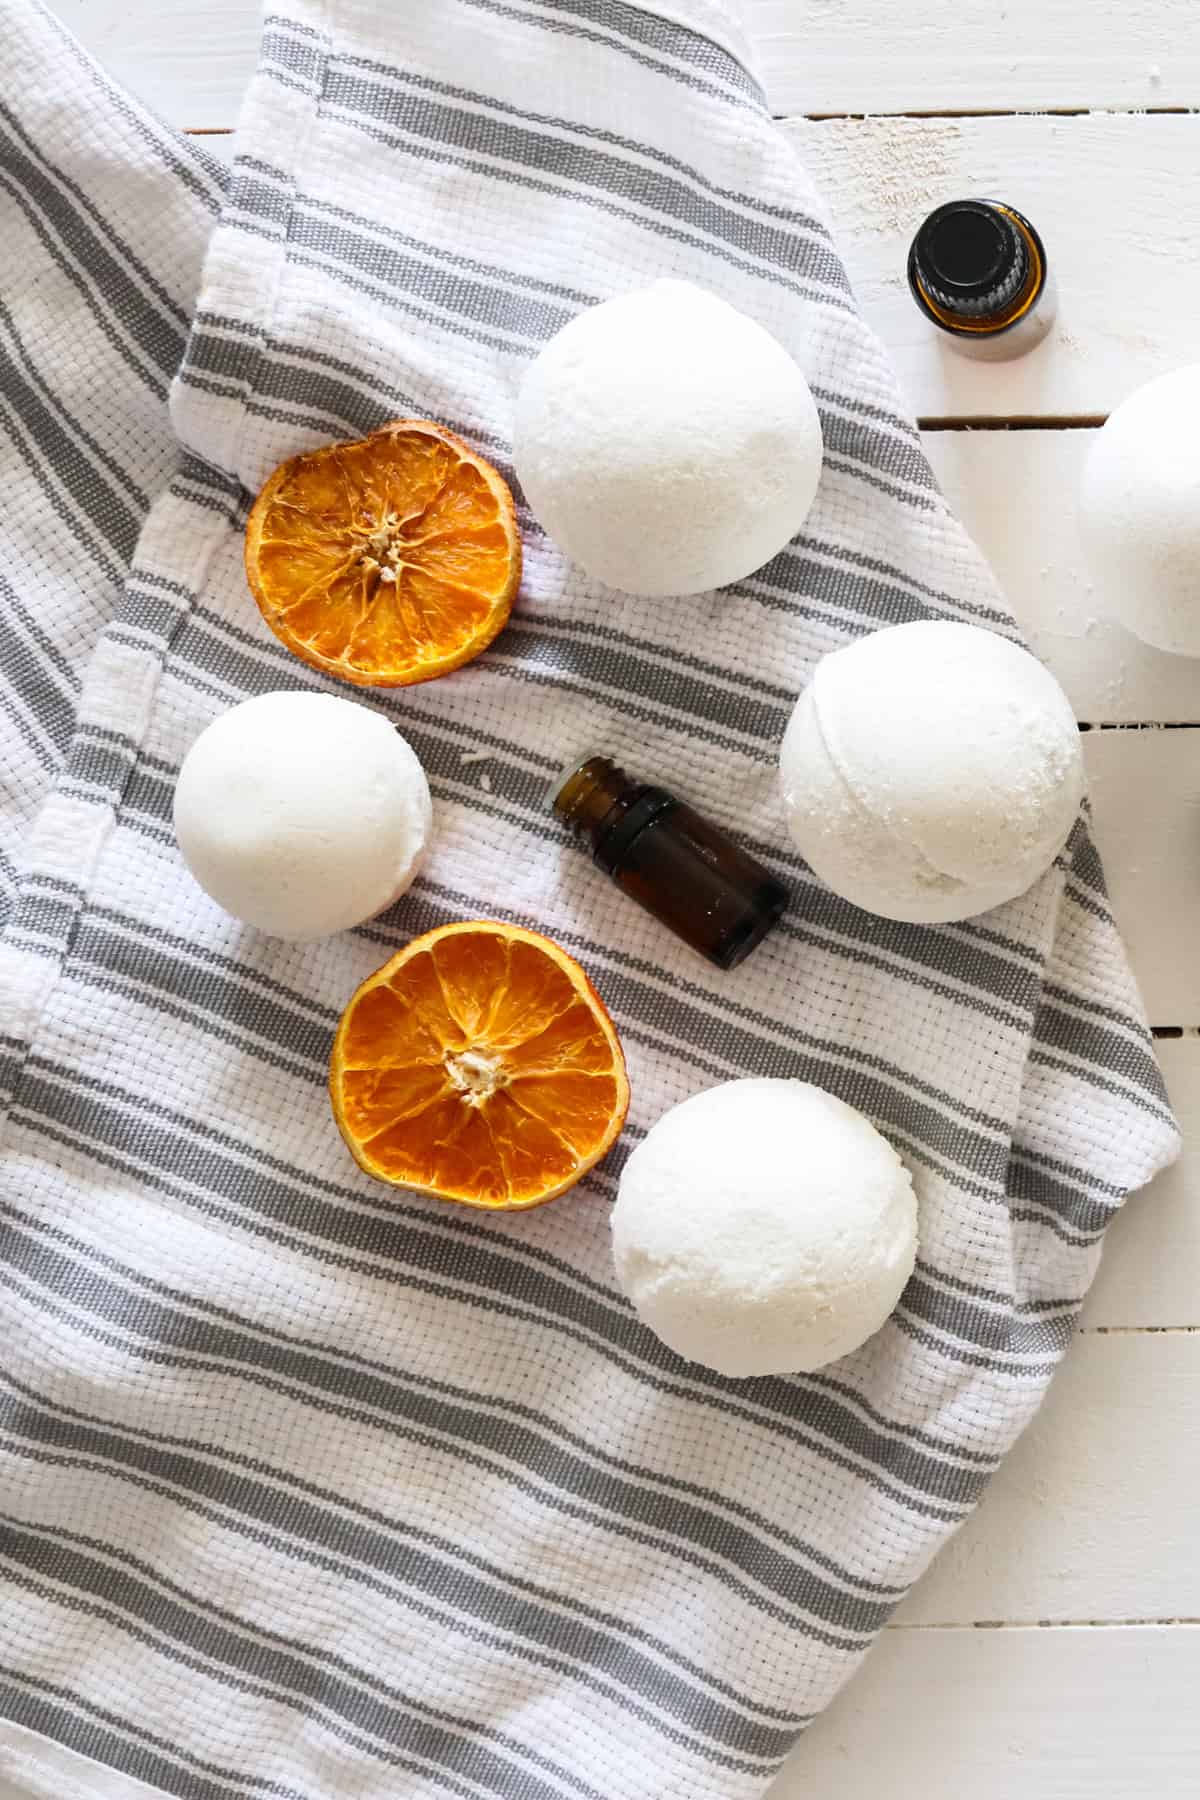
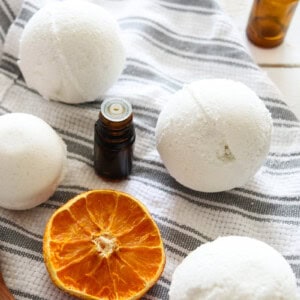
Orange creamsicle
- 1 teaspoon of vanilla extract or 5 drops of vanilla essential oil
- 15 drops of orange essential oil
It smells like an orange creamsicle! Get extra fancy and add a couple of teaspoons of orange zest to the dry ingredients for added color and texture.
Ultimate relaxer
- 10 drops lavender
- 5 drops sandalwood
- 3 drops vetiver
- 2 drops Roman chamomile
This blend reminds me of my moisturizing homemade bath truffles, perfect for winding down after a long day.
The cooling blend
- 10 drops eucalyptus
- 5 drops peppermint
- 5 drops Siberian Fir
Field of flowers
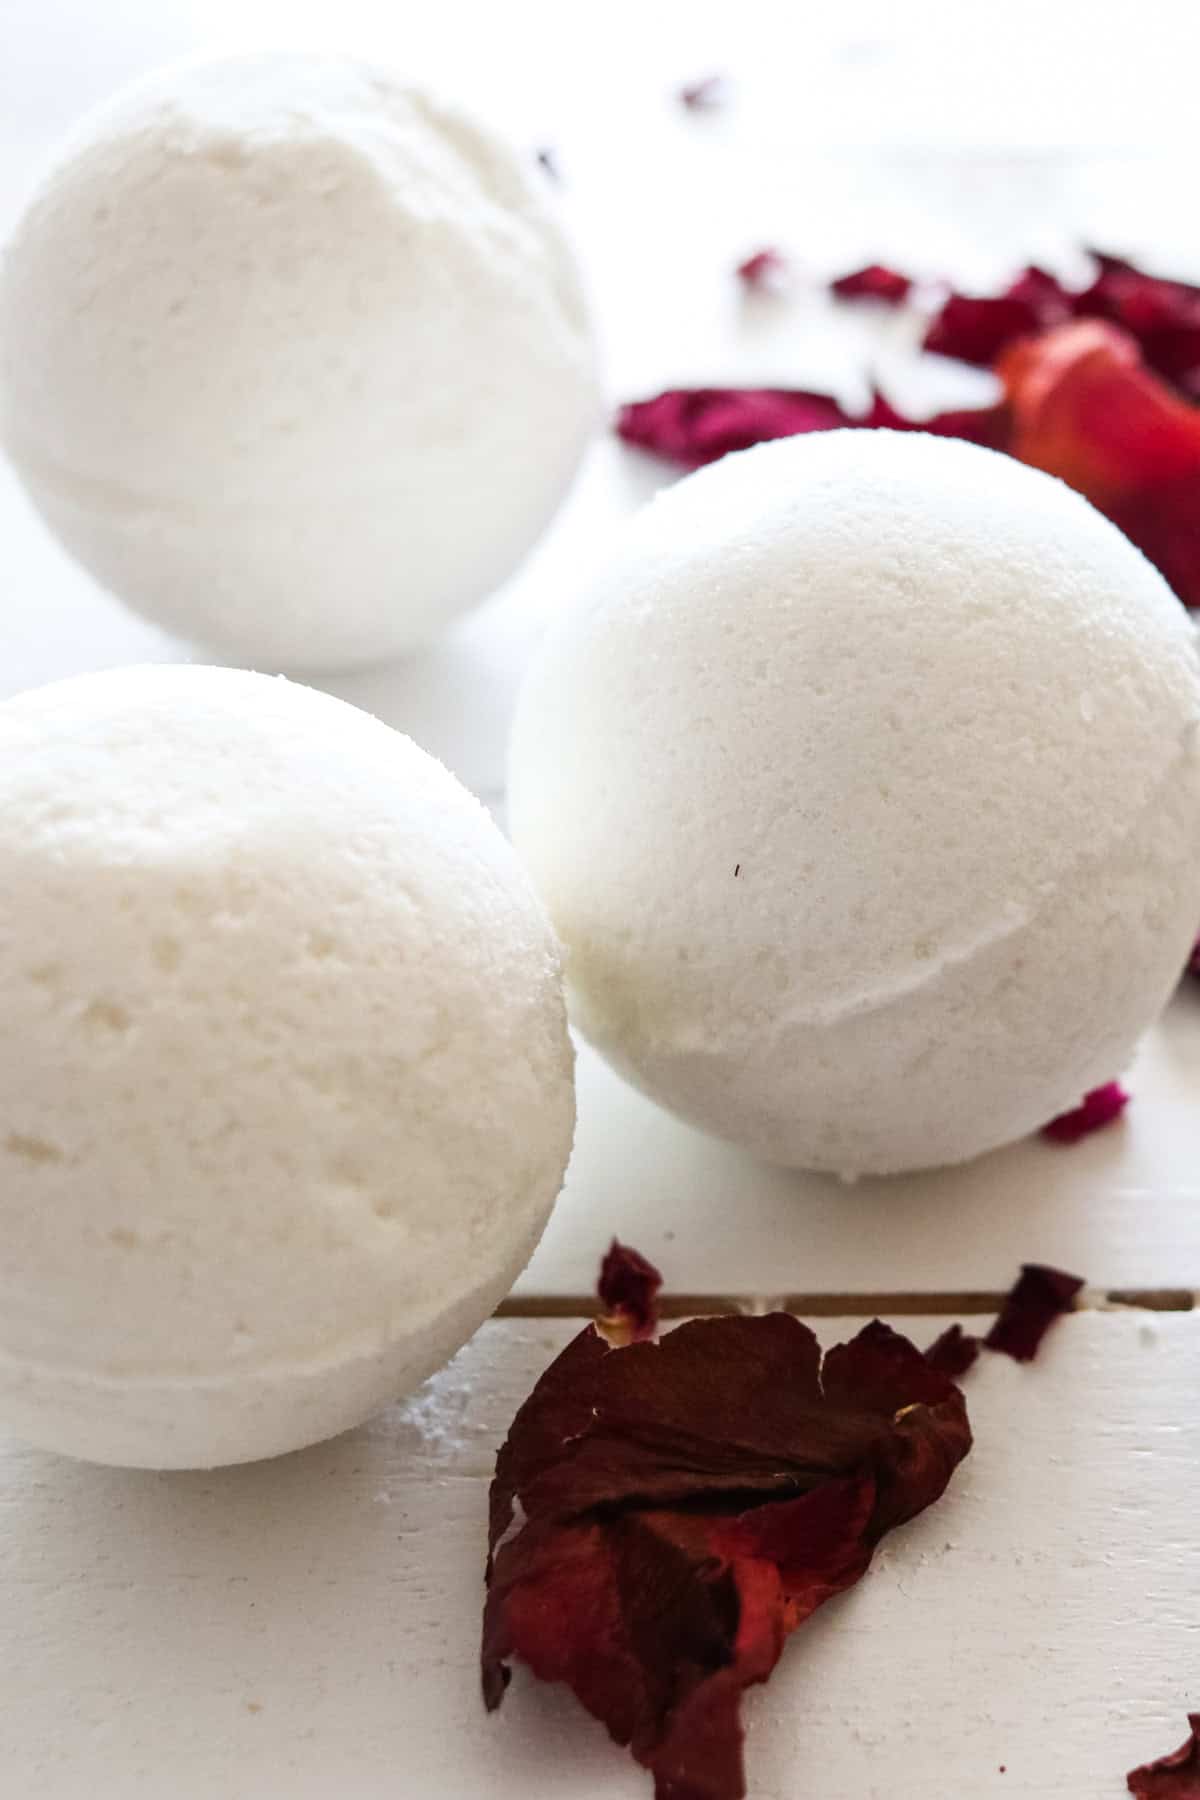
I love making a beautiful blend of floral essential oils for just about everything. Floral blend room sprays, diffuser blends, and now bath bombs.
- 5 drops lavender essential oil
- 5 drops geranium essential oil
- 5 drops jasmine essential oil
- 5 drops rose essential oil
You can add dried rose petals for a unique look. I have done the added rose petals, but beware that it isn’t the best after the bath is over because it requires a little cleaning.
Tiny tots
- 10 drops lavender
- 5 drops orange
Blending lavender and orange essential oil is another favorite for my kids and for me, too; I actually use this blend in my rainbow bath bombs for kids recipe!
Related DIYs
- Homemade shampoo
- Calming bath salts
- 3 bath tea recipes
- Homemade baby shampoo and wash
- Simple lotion bar recipe
- DIY lip gloss
If you tried this Bath Bomb recipe or any other tutorial on my website, please leave a 🌟 star rating and let me know how it went in the 📝 comments below. Thanks for visiting!
DIY Bath Bombs
Equipment
Ingredients
- 1 cup baking soda
- ½ cup citric acid
- ½ cup cornstarch
- ¼ cup epsom salt
- ¼ cup coconut oil, 2 oz melted
- 15-20 drops essential oils, optional
- 1 tsp vanilla extract, optional
- Water
Instructions
- Add dry ingredients to a medium-sized bowl and stir well.
- Mix in the coconut oil, essential oils, and vanilla. Whisk together until well combined.
- Using a spray bottle, spray the mixture with water until the ingredients hold together when squeezed in your hands. Just do one spray at a time (it is easy to oversaturate). See notes below.
- Prepare your bath bomb molds by lightly greasing them with oil.
- Press the mixture into both halves of your lightly greased bath bomb molds until it is overflowing. Then, press the two halves together. Wipe the excess mixture off the sides and set it aside.
- Allow it to dry for 24-48 hours before popping out of the molds. See notes below for removing them from the molds.
Video
Notes
-
- If you are having trouble getting the right consistency for the mixture, you may want to check out the video tutorial in the post above!
- You don’t want to use too much liquid, or the baking soda and citric acid will begin to react, causing your bath bombs to expand prematurely. Just highly mist 1 mist at a time and mix well. Then, with gloves, lightly squeeze some of the mixture together. It should just hold its shape without crumbling and falling apart.
-
- Make sure you overflow each side of the mold with the mixture so that you can firmly compact the ingredients for the best result.
-
- If the molds don’t pop off easily, you can lightly tap the sides with the blunt end of a butter knife to break it free.


Can you use arrowroot powder instead ?
These came out perfect! I did have to tap on the side of the mold and then twist to get them out of the molds.
By far my favorite bath bomb DIY! I found you defiantly want to use less water than you would think!
I found it works best if they are more crumbly than wet. Otherwise they will expand in the molds. Just 2-3 mists is all you need.
This is my go to bath bomb recipe! I absolutely love it!
I love this simple bath bomb recipe! I have been making it for years with my daughter and we just can’t get enough. Thank you!