This post may contain affiliate links. Please see our disclosure policy.
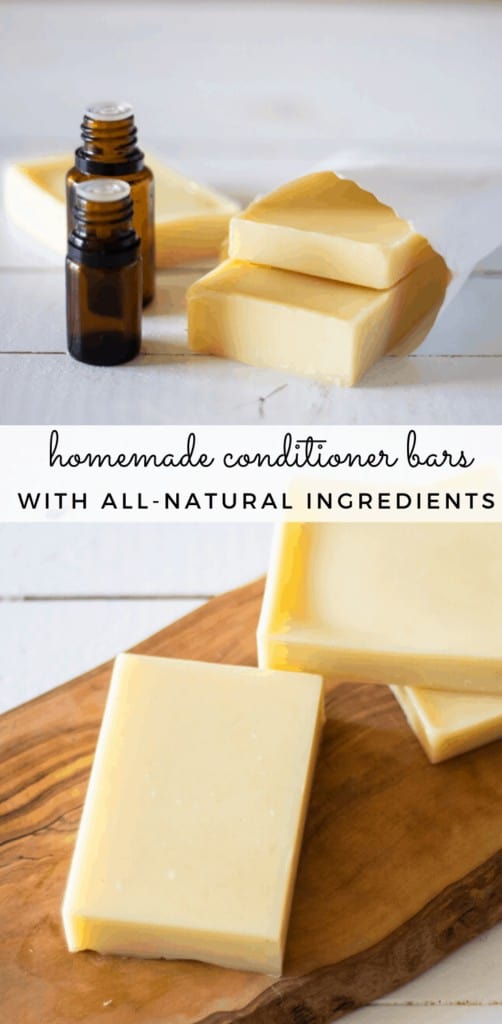
Homemade hair conditioners are great for keeping your hair soft and shiny. And while many commercial products contain harsh chemicals, artificial fragrances, and dyes that can damage your hair over time, this homemade hair conditioner bar contains minimal, natural ingredients to nourish and strengthen hair.
This post was originally published on July 7th, 2020, and has been updated with more relevant information and a revised recipe.
Making these homemade conditioner bars was certainly a process of getting the perfect recipe nailed down.
In the end, though, I think we finally have the perfect solid conditioner bars to moisturize and repair damaged hair.
Beginning my hair care journey years and years ago with a simple DIY dry shampoo spray, I had made it a goal to convert all the hair products I used at the time (and ones I’ve added since) over to a more natural alternative.
What is a hair conditioner bar?
A hair conditioner bar is essentially a homemade hair conditioner in a solid form. They are becoming increasingly popular for a number of reasons, including they are great for travel and are inexpensive to make.
I’ve even made melt and pour conditioner bars!
Homemade conditioner bars are straightforward to make and will last forever! Well, not quite forever, but a little goes a very long way compared to liquid conditioner.
Why make your own hair conditioner bars?
Let’s face it; it would be a whole lot easier to go the natural route by simply buying natural, organic hair care products.
But as you probably know, without your personal money tree, it’s hardly practical.
In addition, many products labeled ‘natural’ often turn out to be not all that natural after all.
This post contains affiliate links, which means I make a small commission at no extra cost to you. Get my full disclosure HERE.
Conditioner bar recipe
What You Will Need
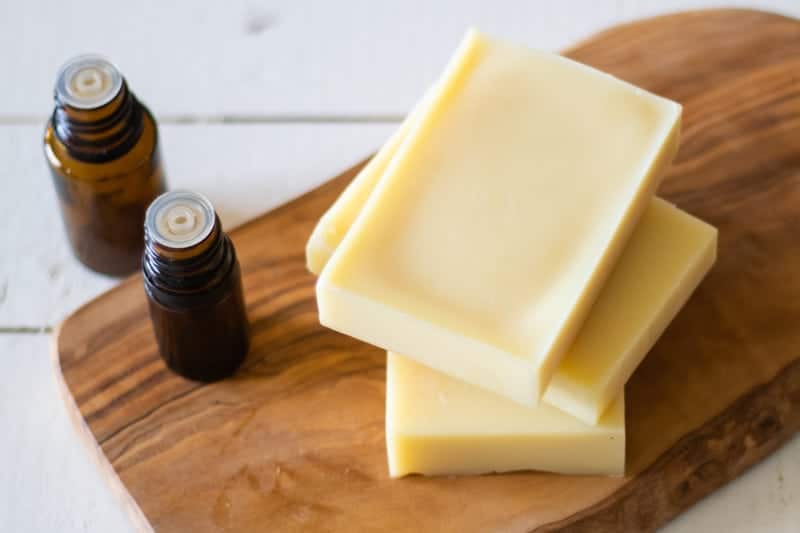
- Cocoa butter
- Coconut oil
- Emulsifying wax
- Vitamin B5
- Vitamin E oil
- Essential oils (optional)
- Double boiler or a small glass bowl and saucepan
- Silicone molds
INSTRUCTIONS
Add the cocoa butter, coconut oil, and emulsifying wax to a double boiler. If you don’t have a double boiler, you can place a glass bowl over a pot of water and bring it to a boil.
Once the ingredients are melted, remove the bowl from the heat and allow the mixture to cool slightly. You don’t want it to ‘set up’ just cool enough to work with.
Finally, add the remainder of the ingredients in with the oils and stir well.
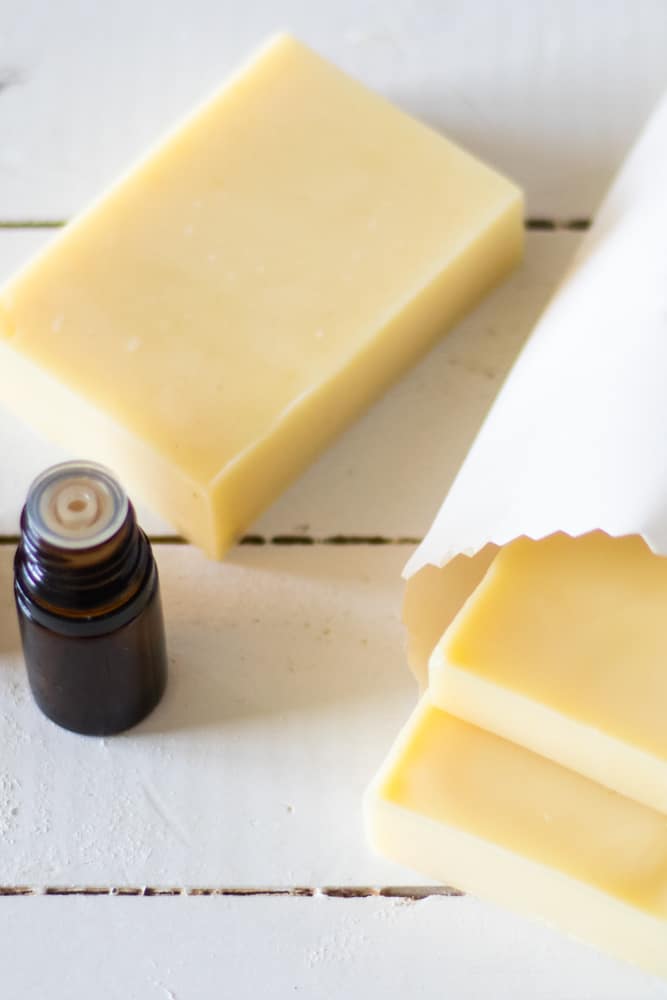
Transfer the melted conditioner into silicone molds to harden.
They should be ready to pop out of the molds in just a few hours but definitely allow the conditioner bars to harden for 2-3 days before using to receive the maximum life out of them.
How to use conditioner bars
Rub your homemade conditioner bar between your hands and apply it to the hair. Use a wide-tooth comb to evenly distribute the conditioner for curly or thick hair.
Leave the conditioner in the hair for several minutes before rinsing with warm water.
For tangly hair, follow up with a DIY hair detangler spray.
Why I chose these ingredients
Each of the ingredients listed below are necessary for making a long-lasting, effective hair conditioner bar.
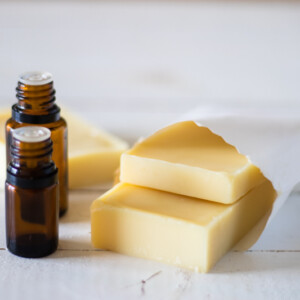
Cocoa butter
Cocoa butter smells as good as it sounds. It is very versatile with incredible benefits for the skin and hair.
With its fantastic moisturizing properties, cocoa butter works excellently at conditioning the hair. In addition, it provides shine, protects against split ends, and softens hair.
And best of all, any leftover cocoa butter can be used to make homemade chocolates!
Coconut oil
Oh, the superfood coconut oil! You probably would be more shocked if it didn’t appear in this conditioner bar recipe. I buy coconut oil in bulk and use it daily for skin care, hair care, and even in the kitchen.
Coconut oil is one of my go-to ingredients for hair care. It pairs beautifully with my DIY scalp scrub for dandruff when your scalp needs a refresh, and it can also help improve the look and feel of damaged strands, making it a great companion to my DIY protein hair mask for hair breakage.
I even have a full post with DIY hair masks if you’re in the mood to give your hair a little extra TLC.
Essential oils (fragrance)
Essential oils are a great way to add a beautiful scent to your conditioner. And the sky is the limit when it comes to which oils to choose. In this case, I went with the refreshing citrus aromas of tangerine and lemon.
Give this combination a try, make up your own blend or give one of the blends below a try.
Choosing the fragrance
Wild Forest for men
- 6 drops sandalwood
- 3 drops rosemary
- 3 drops lemongrass
Floral Fresh for women
- 5 drops lavender
- 3 drops of clary sage
- 2 drops of wild orange
- 2 drops lime
Gentle and Calm
- 3 drops lavender
- 1 drop of Roman Chamomile
Why you will love these conditioner bars:
Have a super long shelf-life. Homemade conditioner bars are one of my favorite products to make. I love that they can last for years with very little money out of my pocket.
Little to no impact on the environment. These conditioner bars are made using eco-friendly ingredients naturally derived from plants.
The recipe can be adjusted even after the bars are made. So while this conditioner bar recipe will work for most hair types, If you do find the need to fine-tune some of the ingredients, simply melt it back down, make your adjustments and let it reharden back in the molds.
A travel-friendly hair care product. Your hair deserves so much more than a travel-sized hotel shampoo/conditioner. Bring your conditioner bar with you for your next holiday travels or last-minute work trip.
P.S. Don’t forget your travel-friendly DIY shampoo bar to take along with you.

FAQs/Tips
- The conditioner bars will last between 60-100 washes. Remember, less is best.
- These bars are very effective, perfect for anyone who washes their hair once or twice a week.
- Shelf life is right around 2 years when stored properly. I.e., a cool, dry place.
- Cocoa butter can be substituted for shea or mango butter. Note: using shea butter will result in a softer bar.
- Coconut oil will melt at temperatures over 76°. If that is the case, you will need to store these bars in the fridge or a cooler area in the home.
Wrapping up
As with any natural conditioner, if you are making the switch from conventional products, there will be an adjustment period as your hair adapts to the new routine.
Be patient and trust me; it is totally worth it, and you will be thrilled with the results!
During this transition time, remember that this DIY dry shampoo is your friend and washing with a homemade natural shampoo is a must.
Please note, that this is an updated recipe. I have had many readers comment that their hair felt greasy after using.
And while training your hair to adapt to natural products or more infrequent washes, the hair is going to be more greasy. I was able to make a few adjustments to help with it.
Thank you for reading. I hope that you found this hair conditioner bar recipe to be just what you were looking for. And if you love natural hair care products, be sure and check out some of these popular products below!
- Homemade nourishing hair serum
- DIY hair spray
- Natural DIY clarifying shampoo
- Cold-process shampoo bars or hair growth mask
- DIY leave-in conditioner
- DIY green tea hair rinse
Homemade Conditioner Bars
Equipment
Ingredients
- ½ cup of cocoa butter
- ¼ cup coconut oil
- 1 teaspoon of emulsifying wax
- 1 teaspoon of vitamin B5
- 10 drops of vitamin E oil
- 8 drops of tangerine essential oil
- 4 drops of lemon essential oil
Instructions
- Melt cocoa butter, coconut oil, and emulsifying wax in a double boiler. Or make your own double boiler by placing a glass bowl over a pot of water and bringing it to a boil.
- Once the ingredients are melted, remove the bowl from the heat and allow the mixture to cool slightly. You don't want it to 'set up' just cool enough to work with.
- Finally, add the remainder of the ingredients to the bowl and mix well.
- Transfer the melted conditioner to the molds to dry.


Hello Laura, do I have to use tangerine oil, or is another oil ok as well ?
Yes, any skin safe oil is fine!
I was just looking at the emulsifying wax you have listed here and it contains polysorbate 60. Polysorbate (20, 60, or 80) are not healthy at all as they are a nurotoxin. I’m bummed, I thought I was finally finding something healthy.
go to nz page pureFX
This easy to use vegetable derived wax is used as an emulsifier which blends oils and water together for making creams, ointments, lotions, hair care products etc.. It is a carefully balanced combination of selected fatty alcohols and polyethylene glycol esters.
It is an excellent choice as the main emulsifying system in a wide range of cosmetics and toiletries, such as hand creams, day creams, skin lotions, cleansing creams, hair conditioners, etc. It may be used along with an emollient or a cleansing oil such as glycerin or a vegetable oil.
Vegetable derived.
Formally known as Polawax GP200
USAGE: Approximately 2-25% of your formulation.
Use in the Oil Phase.
Hi Laura,
Thank you for the recipe. I have accidentally put 1/2 cup of coconut oil instead 1/4, and I only realised when it was in the molds. Can you please tell me how to fix it? Should I melt again and add more of the other ingredients or should I give this one a go?
Thank you
Hi, I’ll be making this bar tommorow. Im just wondering…can you use the bar on dry hair as a leave in conditioner?
Hi! I would only use on wet hair.
Hi Laura
I have tried your conditioner bar recipe. I followed the recipe and made sure to measure my ingredients right.
So far the soap has not set, and it is still very soft and like a very thick liquid.
The room where it is placed to cure is cool. Why is it not setting properly?
You could try placing them in the refrigerator to harden.
thanks for the recipe. I had a quick question on how you figure out emulsfying wax to oil ratio. I didn’t have cocoa butter but had shea so went with that. added some bees wax to help with hardness, but theyre still pretty soft. Should I add more beeswax you think or since I’m adding the beeswax could need more of the emulsfying wax?