This post may contain affiliate links. Please see our disclosure policy.
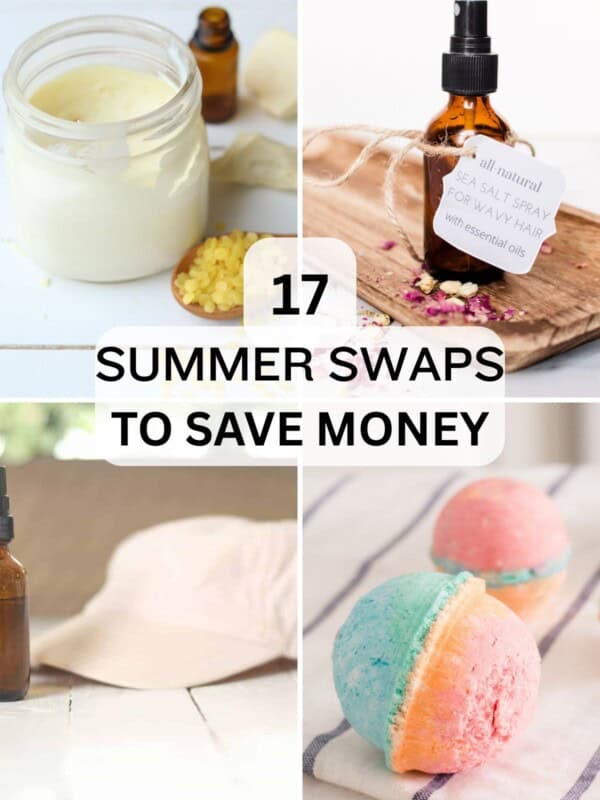
Learn how to make beeswax wraps with just 2 ingredients and 4 easy steps! Homemade beeswax wraps are a great way to save money and reduce waste in your kitchen. They are made with natural, sustainable materials and allow you to skip the cling wrap and opt for reusable instead!

When I first got married, I spent a lot of time thinking up ways to save us money.
Reusable materials like homemade reusable cleaning wipes or reusable DIY dryer sheets were one of the most effective ways.
By making the small upfront investment, I could avoid buying so many household staples (like cling wrap or disposable wipes).
That’s how I stumbled onto beeswax wraps. They’re made of wax-coated fabric that can be used to seal up a bowl or wrap up food for storage. One beeswax wrap can save an unbelievable amount of cling wrap, plastic bags, and foil!
As I continue to dive into sustainable living, I only love beeswax wraps more! They save so much waste in my kitchen, and they’re made with 100% eco-friendly, natural ingredients.
You can purchase beeswax wraps, but they are pricey. Plus, why buy something when you can make it yourself?!
I’ll show you just how easy it is to make your own beeswax wraps for your sustainable and cost-effective kitchen!
Why You’ll Love Them
- Eco-friendly: I feel great every time I use my reusable wraps, because it’s another piece of waste I’m keeping out of the landfill. These beeswax wraps are made with biodegradable, natural ingredients like 100% cotton fabric and pure beeswax.
- Save money: While cling wrap and plastic bags may not make up a huge percentage of your budget, replacing them with reusable alternatives really does add up over time! Additionally, making your own beeswax wraps is a huge money-saver when you compare the cost to the price of store-bought beeswax wraps.
- Natural materials: I love that these homemade food wraps are made with just beeswax and fabric. I don’t have to worry about anything weird coming in contact with my food, and by making them myself, I’m certain the materials are the highest quality.
Materials Needed

- Fabric (cut into squares or circles): I used 100% cotton scrap fabric that I had on hand. This is a great way to use up small pieces of fabric from other projects!
- Beeswax pellets or shredded beeswax: You can buy beeswax pellets or grate a block of wax with a cheese grater.
Tools
- Scissors or rotary cutter: The sharper the better when it comes to cutting fabric.
- Paintbrush (or a piece of cardboard): Use a paintbrush you don’t mind getting wax on. A piece of cardboard can also work well, and it’s disposable afterwards.
- Baking pan
- Parchment paper
How to Make Beeswax Wraps

Step 1. Preheat your oven to 175°F. Cut your fabric into squares or circles. You can use plates, bowls, or pans as a guide for sizing.

Step 2. Line a baking pan with parchment paper and place the fabric on top.

Step 3. Sprinkle a thin layer of beeswax evenly over the fabric. You want the pellets spread out with space between them, not completely covering the fabric. If using a block of beeswax, shred it first. Place the pan in the oven for about 5 minutes, or until the beeswax is fully melted.

Step 4. Carefully remove the pan from the oven and quickly spread the melted beeswax evenly across the fabric using a paintbrush or piece of cardboard. The wax hardens fast, so work quickly.

Step 5. Hang the fabric or lay it flat until completely hardened.

Step 6. Once hardened, use as a bowl cover or food wrap.
How to Use Beeswax Wraps
Beeswax wraps are so easy to use for covering food containers or wrapping food items, such as half of an avocado or an onion. Here’s how to do it:
- Place the wrap over a bowl, plate, or food item.
- Press gently with your hands to help it seal.
- The warmth from your hands will soften the wax slightly so it molds into place.
When you’re finished using your beeswax wrap, hand wash it in cold water and hang it to dry. It’s very important to use only cold water, as warm or hot water can melt the wax. A mild dish soap, such as homemade liquid dish soap, is fine.
Expert Tips
- It’s hard to give an exact amount of beeswax since fabric sizes vary. You only need a light layer of pellets spread across the fabric (see images).
- Work quickly once the fabric comes out of the oven since the beeswax begins hardening almost immediately.
- Be careful when handling the hot pan and melted wax. Use hot pads or oven mitts while working.
- When cleaning up, be very careful to avoid any beeswax going down your sink drain!

Recipe FAQs
If you notice the wraps feel more pliable and aren’t holding their shape anymore, you can refresh them with more beeswax! Just follow the same process you used to make them and add a little more beeswax to give the wraps a second life.
Yes, these wraps are a great way to store bread! You can make an extra-large beeswax wrap and simply wrap up your loaves, or sew the wrap into a bread bag and roll the top to seal it up. I recommend making the wrap about twice the size of your bread loaves.
Great question — never, ever use your beeswax wrap with warm or hot food. You want the food to be completely cooled first. I also don’t recommend using them with raw meat or fish.
Related Recipes
- Homemade Wood Balm
- DIY Beeswax Furniture Polish
- How to Make Candle Wax Melts
- How to Make Beeswax Soap
- 15+ Creative Ways to Use Beeswax
If you tried these Homemade Beeswax Wraps or any other tutorial on my website, please leave a 🌟 star rating and let me know how it went in the 📝 comments below. Thanks for visiting!
Homemade Beeswax Wraps

Equipment
- Scissors or a rotary cutter
- Paintbrush or a piece of carboard
- Baking pan lined with parchment paper
Ingredients
- Fabric, cut into squares or circles
- Beeswax pellets or shredded beeswax
Instructions
- Preheat your oven to 175°F. Cut your fabric into squares or circles. You can use plates, bowls, or pans as a guide for sizing.
- Line a baking pan with parchment paper and place the fabric on top.
- Sprinkle a thin layer of beeswax evenly over the fabric. You want the pellets spread out with space between them, not completely covering the fabric. If using a block of beeswax, shred it first. Place the pan in the oven for about 5 minutes, or until the beeswax is fully melted.
- Carefully remove the pan from the oven and quickly spread the melted beeswax evenly across the fabric using a paintbrush or piece of cardboard. The wax hardens fast, so work quickly.
- Hang the fabric or lay it flat until completely hardened.
How to Use Beeswax Wraps
- Place the wrap over a bowl, plate, or food item.
- Press gently with your hands to help it seal.
- Allow the warmth of your hands to soften the wax slightly so it molds into place.
Notes
- Hand wash beeswax wraps in cold water and hang them to dry. It’s very important to use only cold water, as warm or hot water can melt the wax.
- It’s hard to give an exact amount of beeswax since fabric sizes vary. You only need a light layer of pellets spread across the fabric (see images in the post above).
- Work quickly once the fabric comes out of the oven since the beeswax begins hardening almost immediately.
- Be careful when handling the hot pan and melted wax. Use hot pads or oven mitts while working.
- When cleaning up, be very careful to avoid any beeswax going down your sink drain!
- When the beeswax wraps stop clinging well, refresh them by reapplying beeswax following the same method.


Wouldn’t it be easier to melt the beeswax in a glass jug and then pour it on the fabric to spread, instead of using the oven?
Hi Sonya! Great question. You absolutely can melt the beeswax in a glass jug and pour it on — some folks do it that way. The reason I stick with the oven method is that beeswax hardens really fast once it leaves the heat, so poured wax tends to set before you can spread it evenly, leaving thick spots in some places and bare patches in others. Warming the fabric and the wax together in the oven lets the wax soak down into the fibers instead of just sitting on top, which gives you a more even, flexible wrap. (Bonus: you skip the wax-coated jug, which is no fun to clean!) If you do want to try pouring, just work fast and have your brush ready to spread it the second it hits the fabric. Hope that helps — happy wrapping!
i have seen these before but never made them! thank you for the clear instructions!
Let me know how they turn out! 🙂
I am always trying to reduce my one time use plastics! Thanks so much!
Of course, hope you find these useful!