This post may contain affiliate links. Please see our disclosure policy.
Looking for a unique and thoughtful Christmas gift or a way to pamper yourself? This DIY essential oil bracelet is the perfect project. Using air-dry clay, string, and your favorite essential oils, you can create a custom accessory that’s both stylish and functional.
Making your essential oil diffuser bracelet is so easy and fun. You can customize it for any style, pick your color, and put your favorite essential oil blends on it when it is finished. This essential oil bracelet can be as “DIY” as you want it to be. I will share how to make your own beads using airdry clay or which beads are best if you prefer to buy them.
I don’t wear much jewelry, mainly because my hands are either in the dishwater or digging in the garden. However, wearing a diffuser bracelet is not uncommon for me.
I love the aromatic benefits you can receive from a diffuser bracelet. It is a good option for using essential oils when out and about for the day. Plus, they are really pretty!
PIN IT FOR LATER
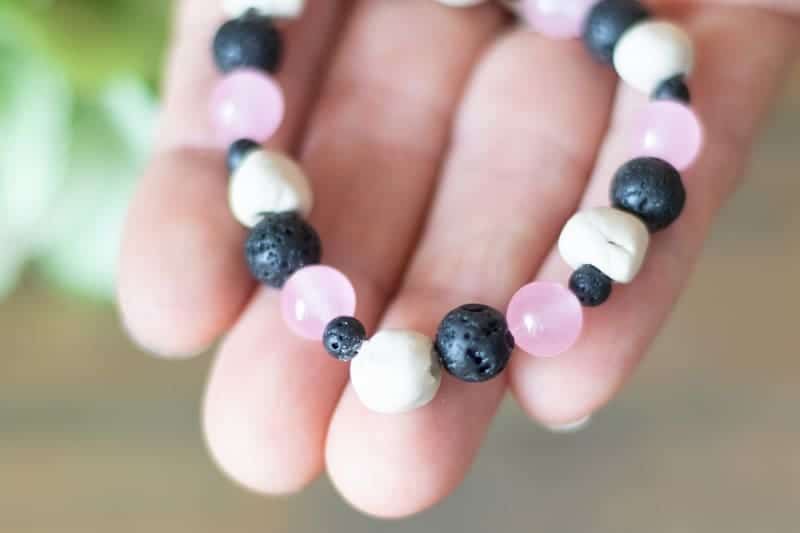
ESSENTIAL OIL DIFFUSER BRACELET

An essential oil bracelet is made out of porous beads that can easily absorb essential oils. These beads can be strung onto elastic string, hemp, or nylon string. They are really no different than a homemade diffuser ornament but on a much smaller scale.
You can purchase essential oil beads or make your own. The best beads to use are lava stone, wood, leather, or clay. You can make your own beads using airdry clay.
Essential oil diffuser bracelets or homemade diffuser necklaces can be worn for aromatic benefits or as a DIY body spray. You can even make a bug-repellent diffuser bracelet that can naturally repel insects!
HOW TO MAKE DIFFUSER BRACELETS
The first step is gathering your supplies. What you get will depend on your own preference. You can make your diffuser bracelet as simple or complex as you want. If you decide to make your own beads, you can leave them plain or paint them.
This post contains affiliate links, which means I make a small commission at no extra cost to you. Get my full disclosure HERE.
SUPPLIES YOU WILL NEED:
Air Dry Clay (if you are making your own beads)
Bamboo Skewers (if you are making your own beads)
Decorative Beads (optional)
Paint (optional)
HOW TO MAKE CLAY DIFFUSER BEADS
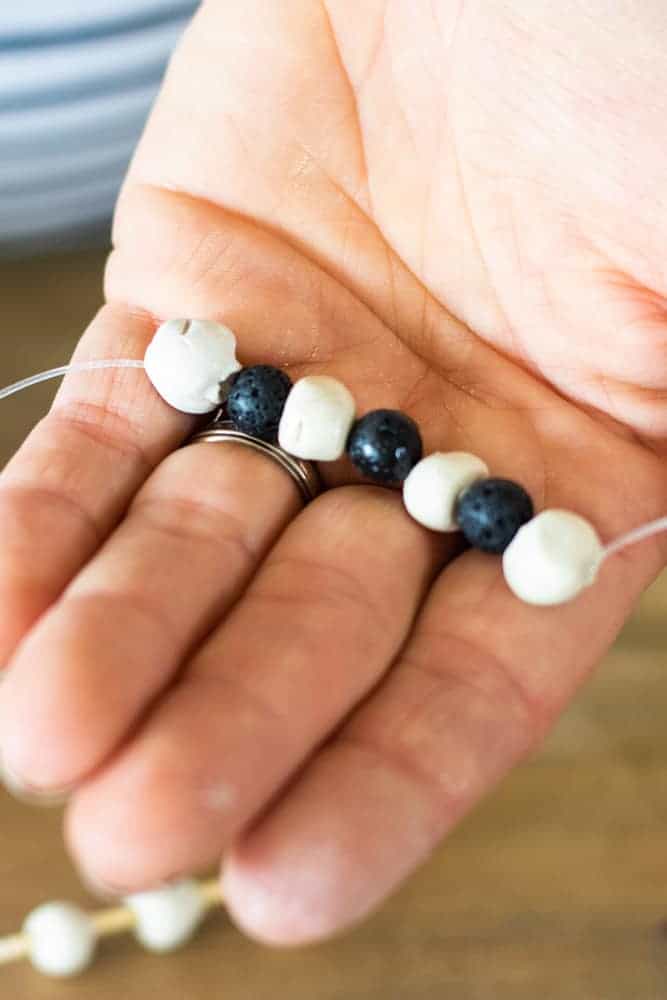
For my bracelet, I am using a combination of handmade clay diffuser beads and store-bought lava beads.
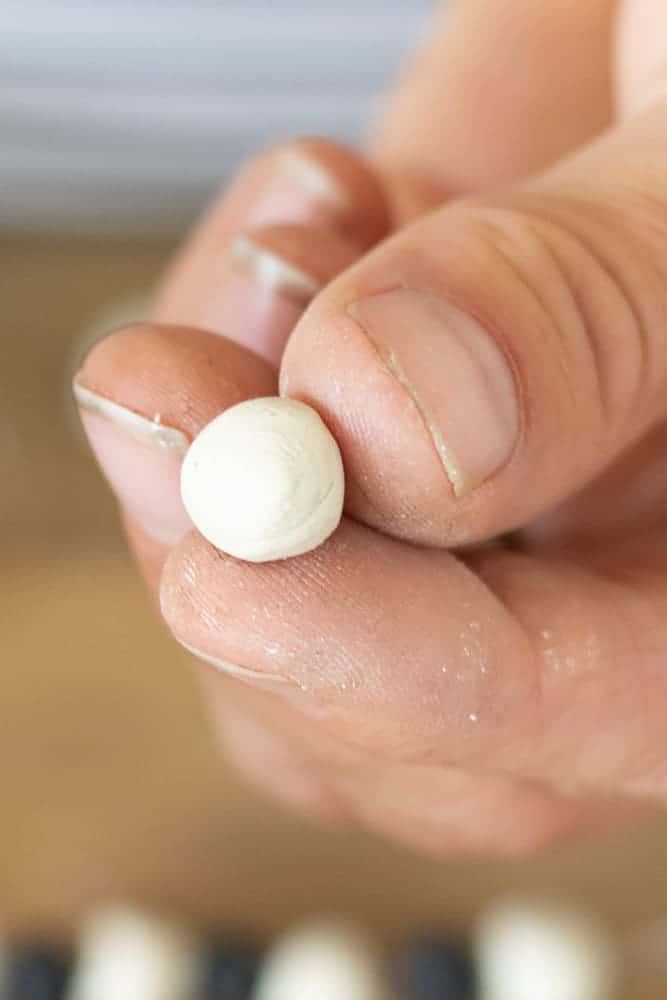
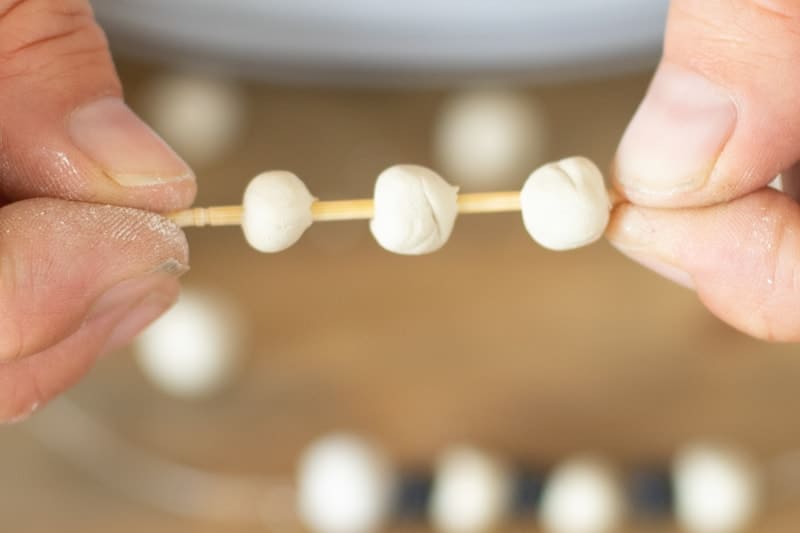
Start by taking a small piece of clay and rolling it into a ball. If using other decorative beads, make the clay bead about the same size.
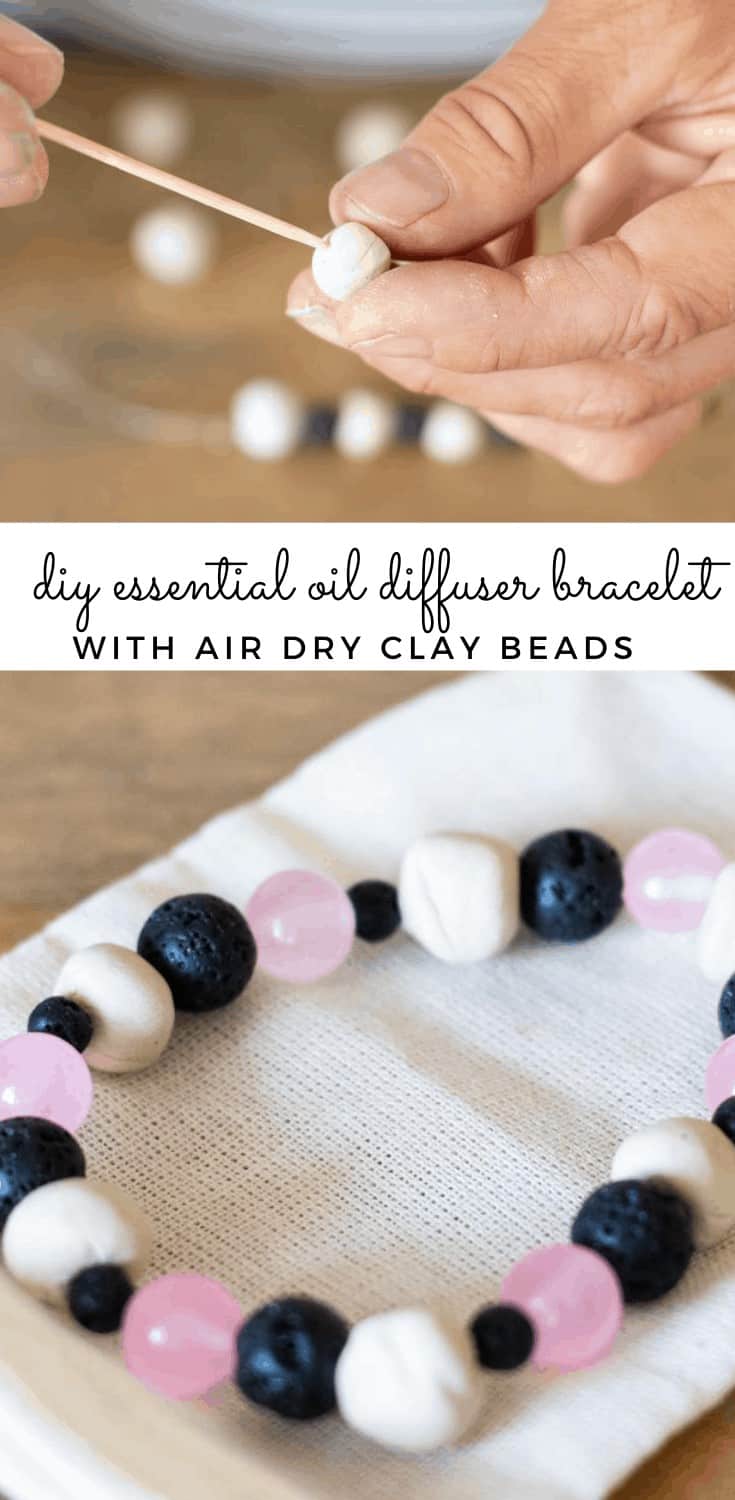
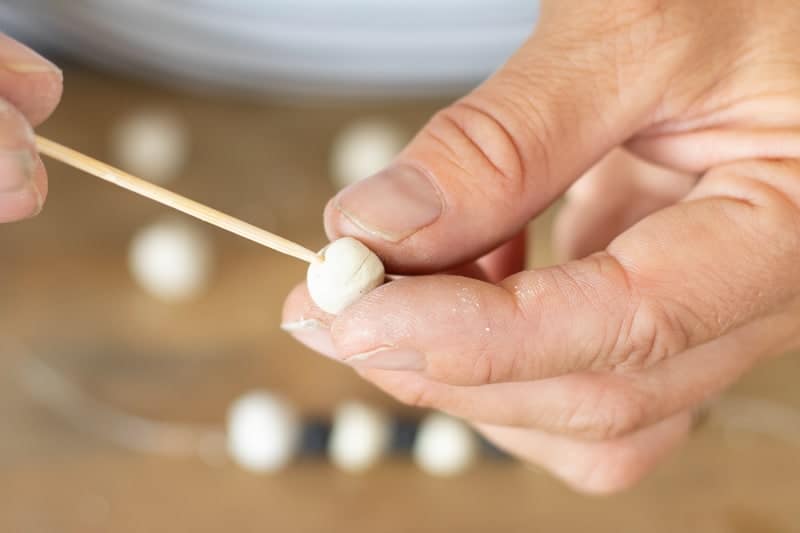
Thread the beads through a toothpick or a bamboo skewer to make a hole through it.
Let the beads dry for 12-24 hours. Once they are completely dry, remove them from the skewer.
At this point, you can paint them if you wish!
Take a piece of hemp cord or elastic string to make your bracelet. String the clay beads and decorative beads onto the string. Measure around your wrist and cut the size you need.
NOTE: If you are using elastic string and the string starts to ravel, just add a little clear nail polish to the string to stop it from raveling. This also makes it easier to string the beads.
You do not have to use all diffuser beads on your bracelet. Regular metal or plastic beads can be used for the majority of the bracelet as long as you have a few porous beads to add some essential oils too. I would suggest spreading them out so you can add essential oils throughout the bracelet.
ESSENTIAL OIL BRACELET
Of course, your diffuser bracelet will need essential oils! The type of oil you use is completely up to you. I will share some of my favorite single oils to use and some of my favorite blends to try.
BEST ESSENTIAL OILS FOR DIFFUSER JEWELRY
- Lavender
- Roman Chamomile
- Ylang Ylang
- Patchouli
- Jasmine
- Tangerine
- Wild Orange
- Bergamont
- Lemon
- Sandalwood
- Cedarwood
- Cypress
- Vetiver
ESSENTIAL OILS TO AVOID
Be cautious with hot oils such as oregano, clove, cinnamon, thyme, and cassia. If you want to use these oils for a particular blend or aroma, you can dilute them first before adding them onto the beads to avoid skin irritations.
To dilute essential oils for your bracelet, place the drops of oils in a teaspoon of carrier oil and roll the bead in it.
You will also want to be cautious with citrus essential oils. Citrus essential oils are some of my favorites to add to my diffuser bracelet as they have wonderful aroma and benefits.
However, citrus essential oils are photosensitive and need to be used with caution in direct sunlight. If you plan to wear your bracelet outside and exposed to the sun, you may want to avoid using citrus essential oils.
BEST ESSENTIAL OIL BLENDS FOR DIFFUSER BRACELET
CITRUS
- Lemon
- Grapefruit
- Lime
FLORAL
- Lavender
- Patchouli
- Roman chamomile
FRESH
- Lemon
- Rosemary
- Spearmint
MINTY
- Spearmint (or peppermint)
- Eucalyptus
- Wintergreen
CALMING AND RELAXING
- Lavender
- Roman Chamomile
- Vetiver
- Lavender
- Frankincense
- Sandalwood
SOOTHING BLEND
- Peppermint
- Eucalyptus
- Siberian Fir
EARTHY
- Sandalwood
- Cedarwood
- Eucalyptus
HOW TO USE BRACELET WITH ESSENTIAL OILS
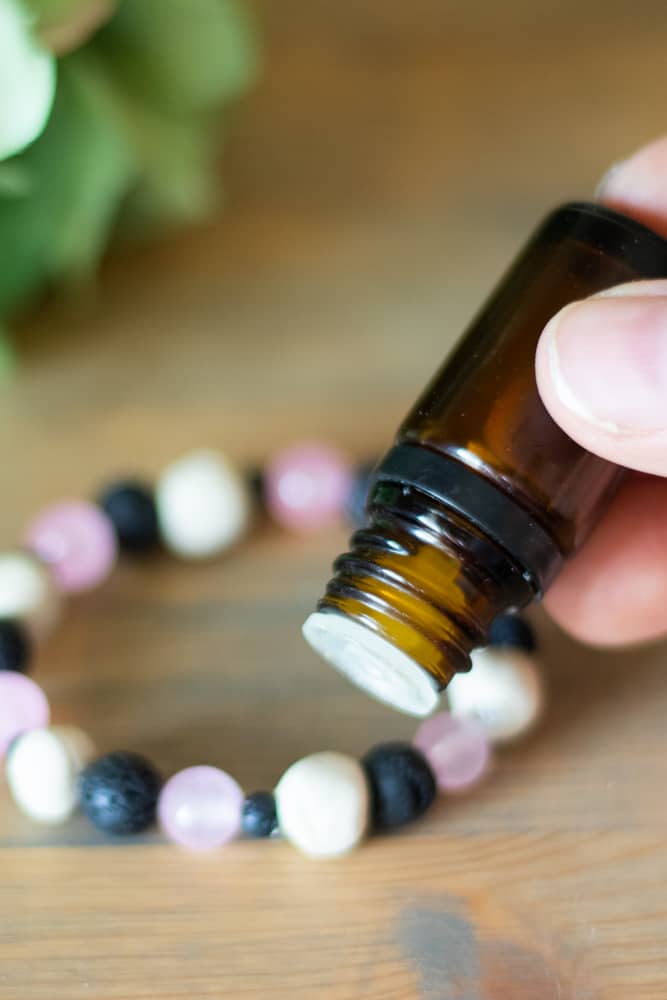
To use your essential oil diffuser bracelet add 3-5 drops of essential oil to the beads for a total of 15 drops on the bracelet. As you wear the bracelet, you will receive benefits from the essential oils.
It is best to apply the essential oils on the part of the bead that is facing away from the skin as essential oils are very concentrated. This will help to avoid any skin irritations.
You can add more essential oils to the bracelet throughout the day or evening as needed. Depending on the essential oil you choose to add to your bracelet will depend on how often you will have to reapply. Some aromas will linger longer than others.
CAN DIFFUSER BRACELETS GET WET?
Similar to my homemade bug repellent bracelet, if the beads are made with clay, it is best to keep it out of water. Airdry clay will change shapes and break when wet.
If you purchase lava beads, you can get your bracelet wet, but it is still recommended not to submerge it in water.
MORE HOMEMADE DIYS
Homemade Essential Oil Diffuser Bracelet
Ingredients
- Air Dry Clay, if you are making your own beads
- Bamboo Skewers, if you are making your own beads
- Hemp Cord or elastic string
- Decorative Beads, optional
- Paint, optional
- Essential Oils
Instructions
- Start off by taking a small piece of clay and rolling it into a ball. If using other decorative beads, make the clay bead about the same size.
- Thread the beads through a toothpick or a bamboo skewer to make a hole through it.
Let the beads dry for 12-24 hours. Once they are completely dry, remove them from the skewer. - At this point, you can paint them if you wish!
- Take a piece of hemp cord or elastic string to make your bracelet. String the clay beads and decorative beads onto the string. Measure around your wrist and cut the size you need.


Can you string these beads on metal instead of hemp or elastic
I haven’t done it that way, but it should be fine.
Thank you. What knot do you use to Tye the bracket together?
I just did 3 regular knots and it holds great! I guess this kind of depends on the string you choose too!