This post may contain affiliate links. Please see our disclosure policy.
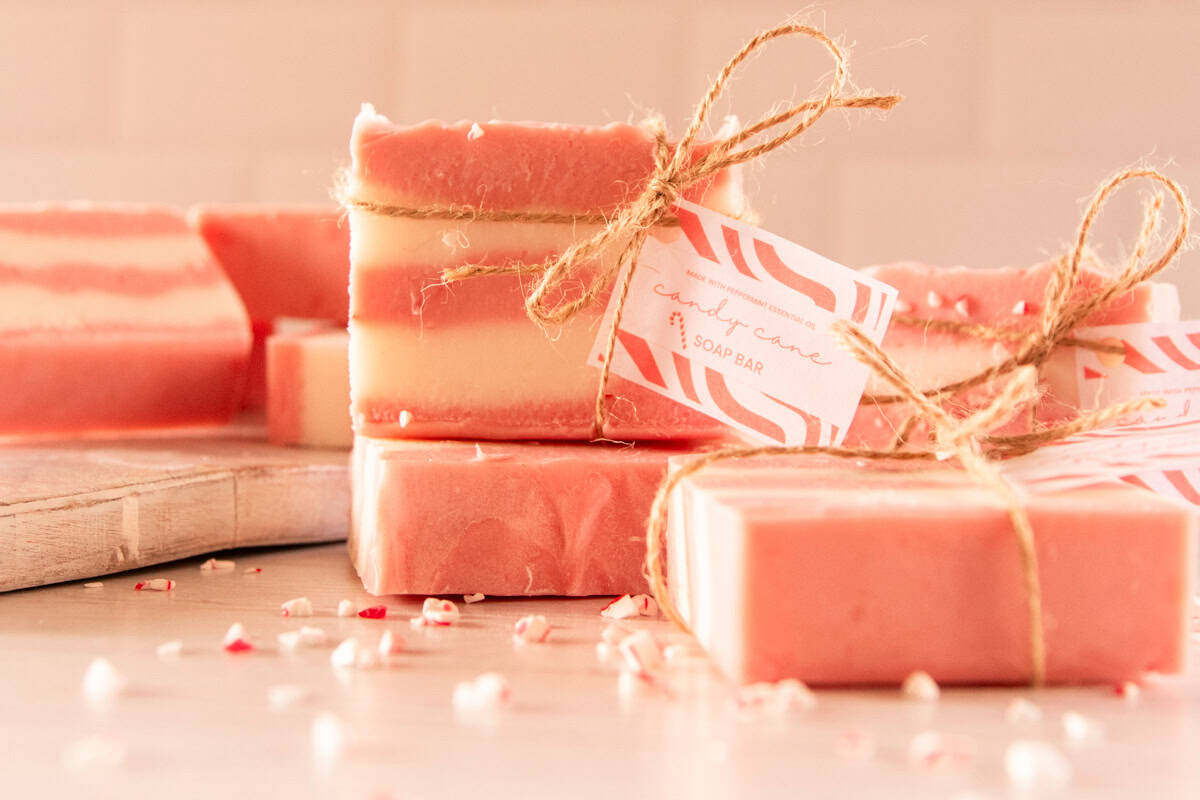
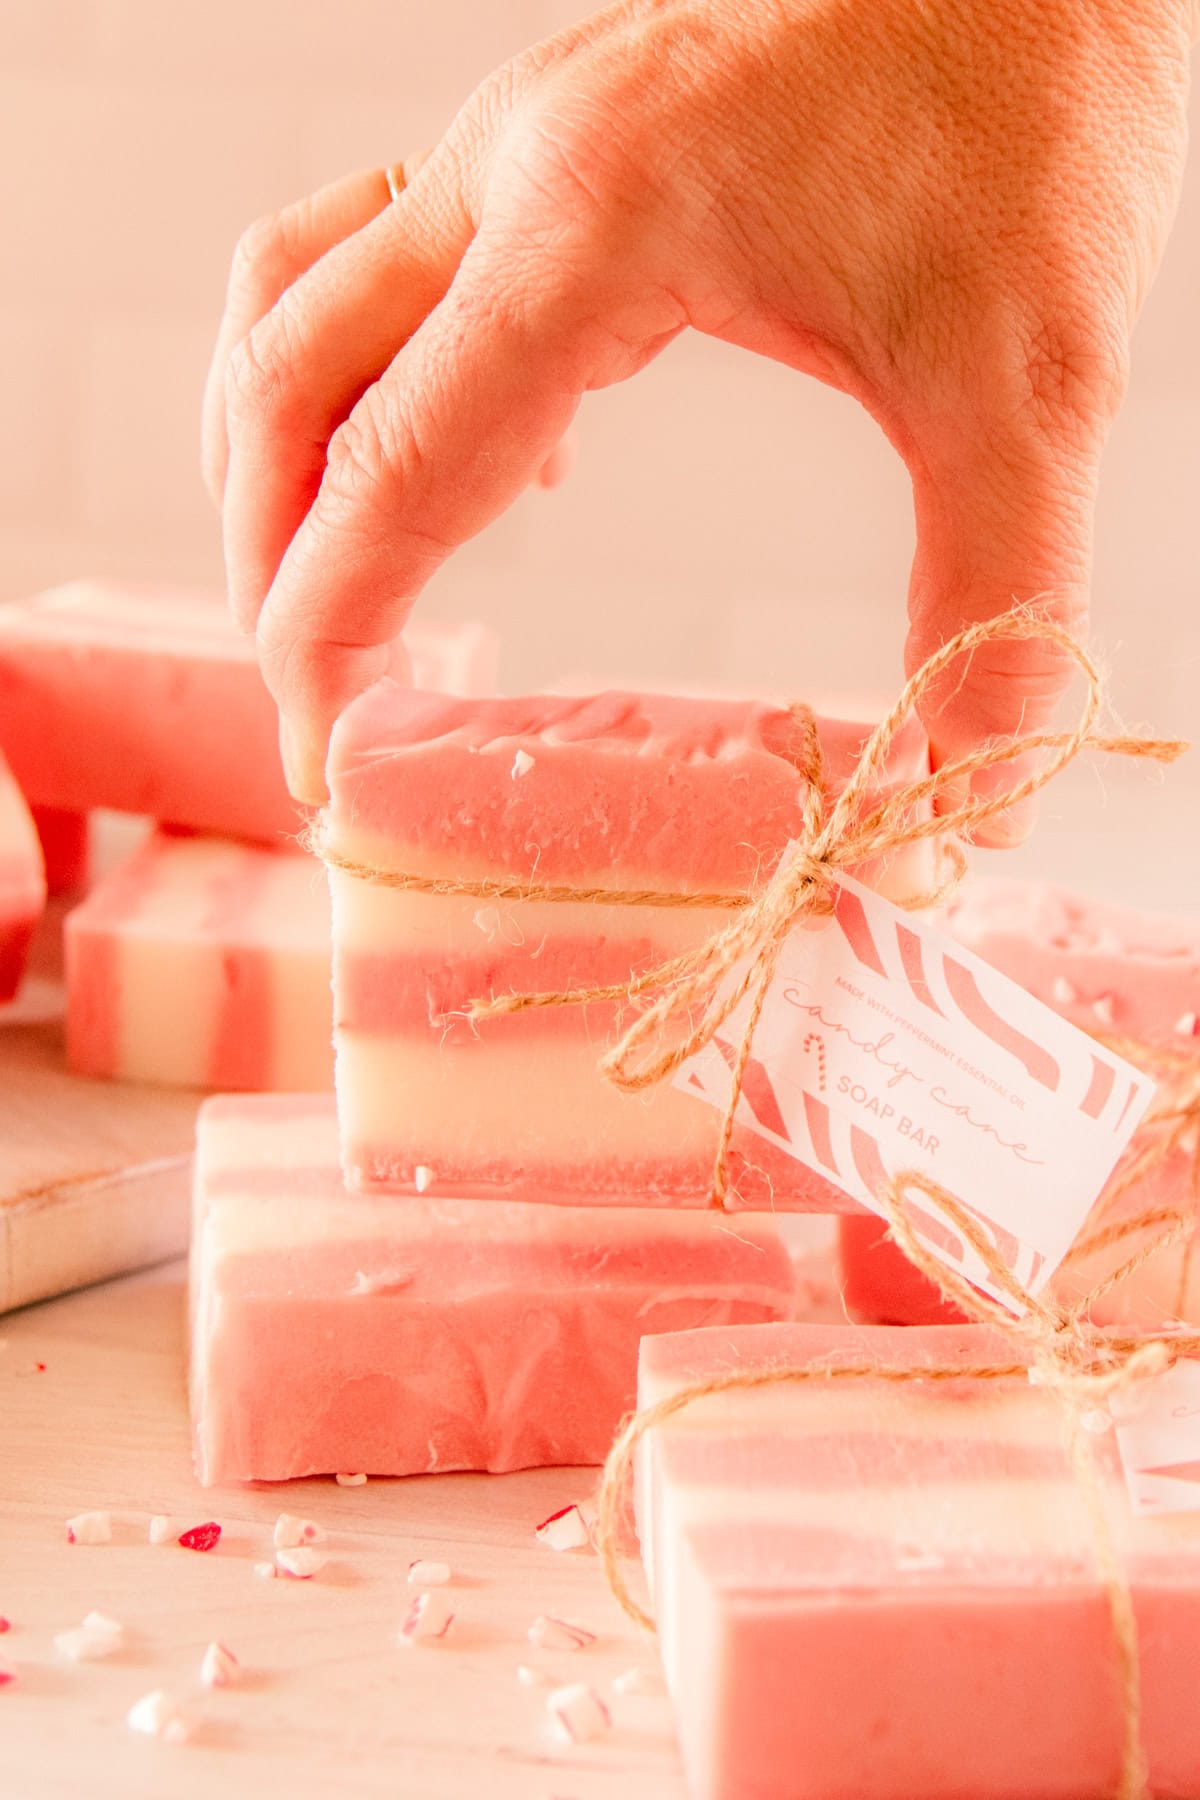
Just in time for the holidays, homemade candy cane soap looks and smells like a Christmas treat! This cold-process soap bar is ultra-nourishing to the skin with lard, plant-based oils, and peppermint essential oil.
Whenever I think of Christmas, candy canes are one of the first things that come to mind! I always crave the smell and flavor of peppermint this time of year.
After making homemade peppermint bath salts, I really wanted to make a peppermint soap next.
Candy cane soap is beautifully festive and smells delightful! The peppermint oil gives the soap cooling and soothing properties that make it so refreshing to use.
You’ll love making this soap just as much as you love using it!
Why You’ll Love It
- Nourishing ingredients: With lard and a variety of plant-based oils, this soap is highly moisturizing and nourishing to the skin. I love making soap from scratch, so I know exactly what is in it.
- Homemade gift: Making your own gifts for Christmas is fun, thoughtful, and thrifty. Homemade soap is the perfect gift for just about everyone on your list!
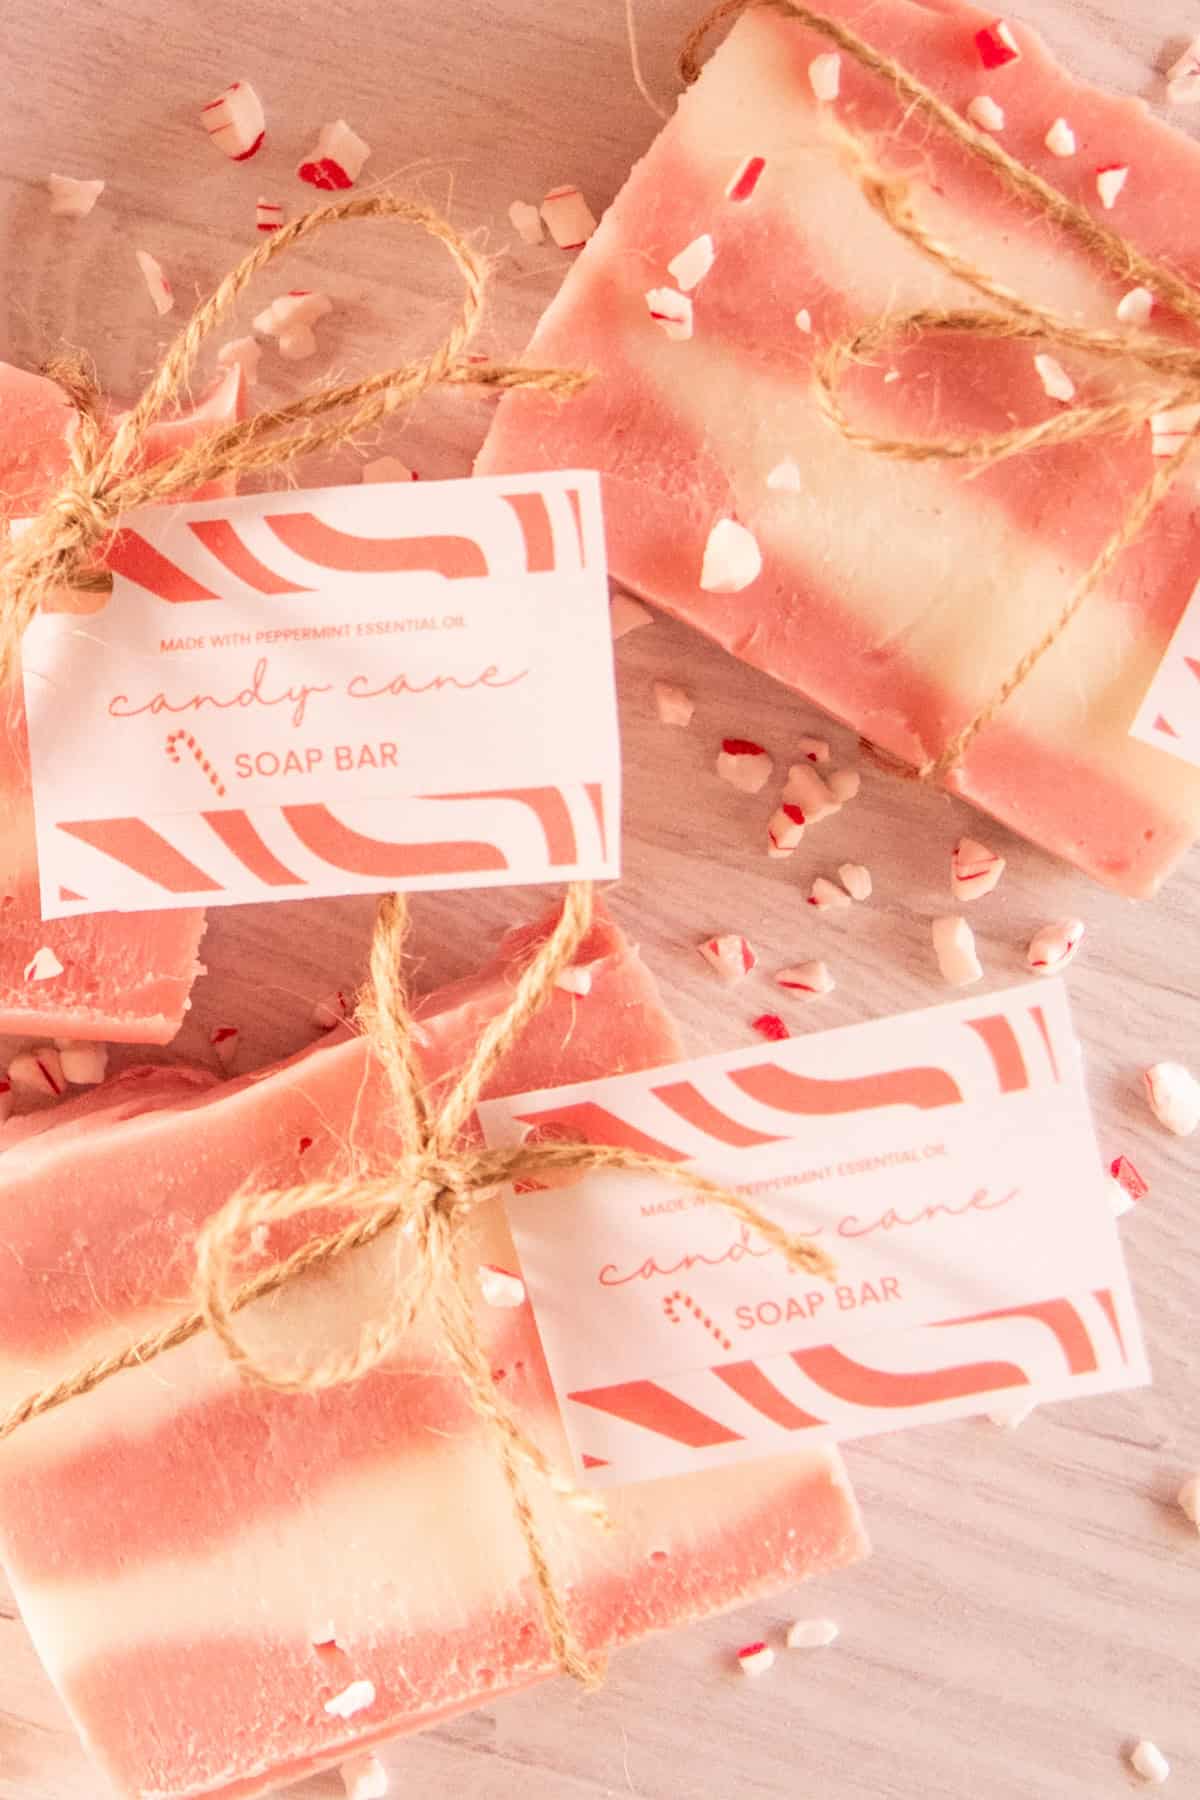
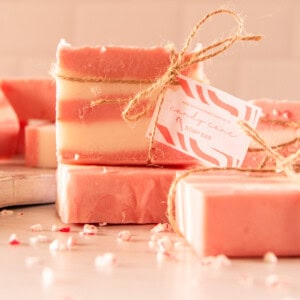
- Festive soap: It’s so much fun to make seasonal bath and beauty products, especially during the holidays! With layers of red and white and lots of cooling peppermint fragrance, this soap is the ultimate Christmas DIY.
What Goes Into This Recipe

- Lard: I love using lard in soap because of its immense moisturizing properties. Lard is a fat that is very similar to our natural skin oils, so it has a great effect on dry skin.
- Coconut oil: Coconut oil gives this soap a rich, frothy lather and amazing benefits for the skin. Coconut oil is moisturizing, anti-inflammatory, and has antimicrobial properties that may help with acne and other skin conditions.
- Avocado oil: It’s not just for cooking; avocado oil also has loads of benefits in skincare. The vitamins in avocado oil can be very nourishing to the skin while also reducing dryness.
- Castor oil: Another plant-based oil, castor oil is derived from the ricinus plant. Castor oil contains antioxidants that can prevent signs of aging and maintain healthy skin. It is soothing, moisturizing, and anti-inflammatory.
- Water
- Lye: An essential part of soapmaking, lye reacts with fat in a process called saponification. Lye is a caustic substance, so proper protection and careful handling are important.
- Essential oil: Peppermint essential oil makes this soap smell like a candy cane! Peppermint is a cooling oil that can soothe skin irritations and muscle aches.
- Mica powder: We will use red mica powder in half of the soap to give it that candy cane look. Many mica powders are unethically sourced, so be sure to do your research before purchasing mica. I exclusively use Mad Micas because their ethics statement covers all of my concerns.
Essential Safety Notes
- Making soap is not something to be afraid of, but it does require safety precautions and carefulness. Be sure to read all of the safety notes before proceeding with your soapmaking.
- Always wear proper protective gear when making soap, including goggles, a mask, and gloves.
- Work in a well-ventilated area, especially when handling the lye.
- Keep children and pets out of your workspace. Store ingredients in a safe place out of reach of children.
- Never add water to lye. Rather, put the water in a jar and slowly add the lye to that. Adding water to the lye can cause a dangerous reaction.
- Do not deviate from the recipe. If you wish to swap out any of the ingredients or change the recipe, you’ll need to recalculate with a soap calculator.
How to Make Candy Cane Soap
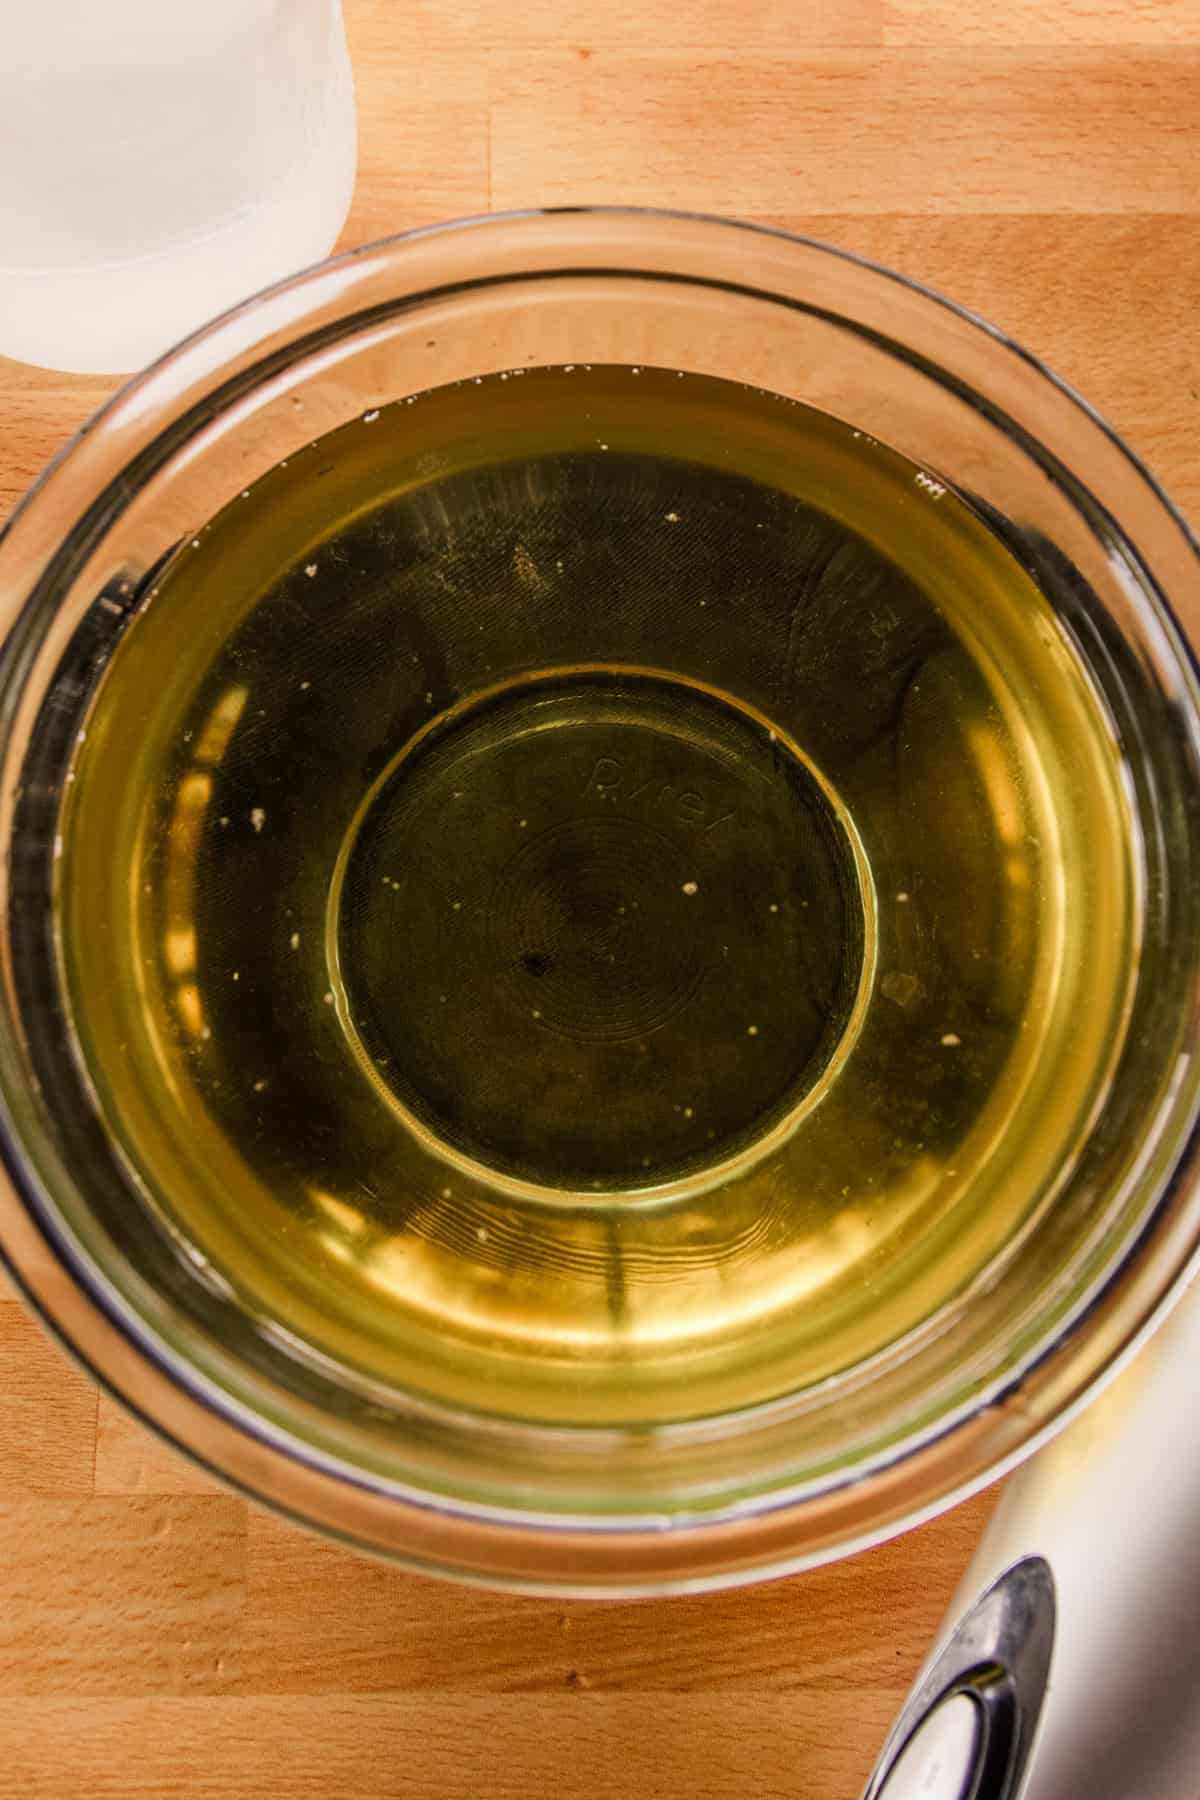
Step 1. Melt lard, coconut oil, avocado oil, and castor oil in a double boiler. Set aside to cool.
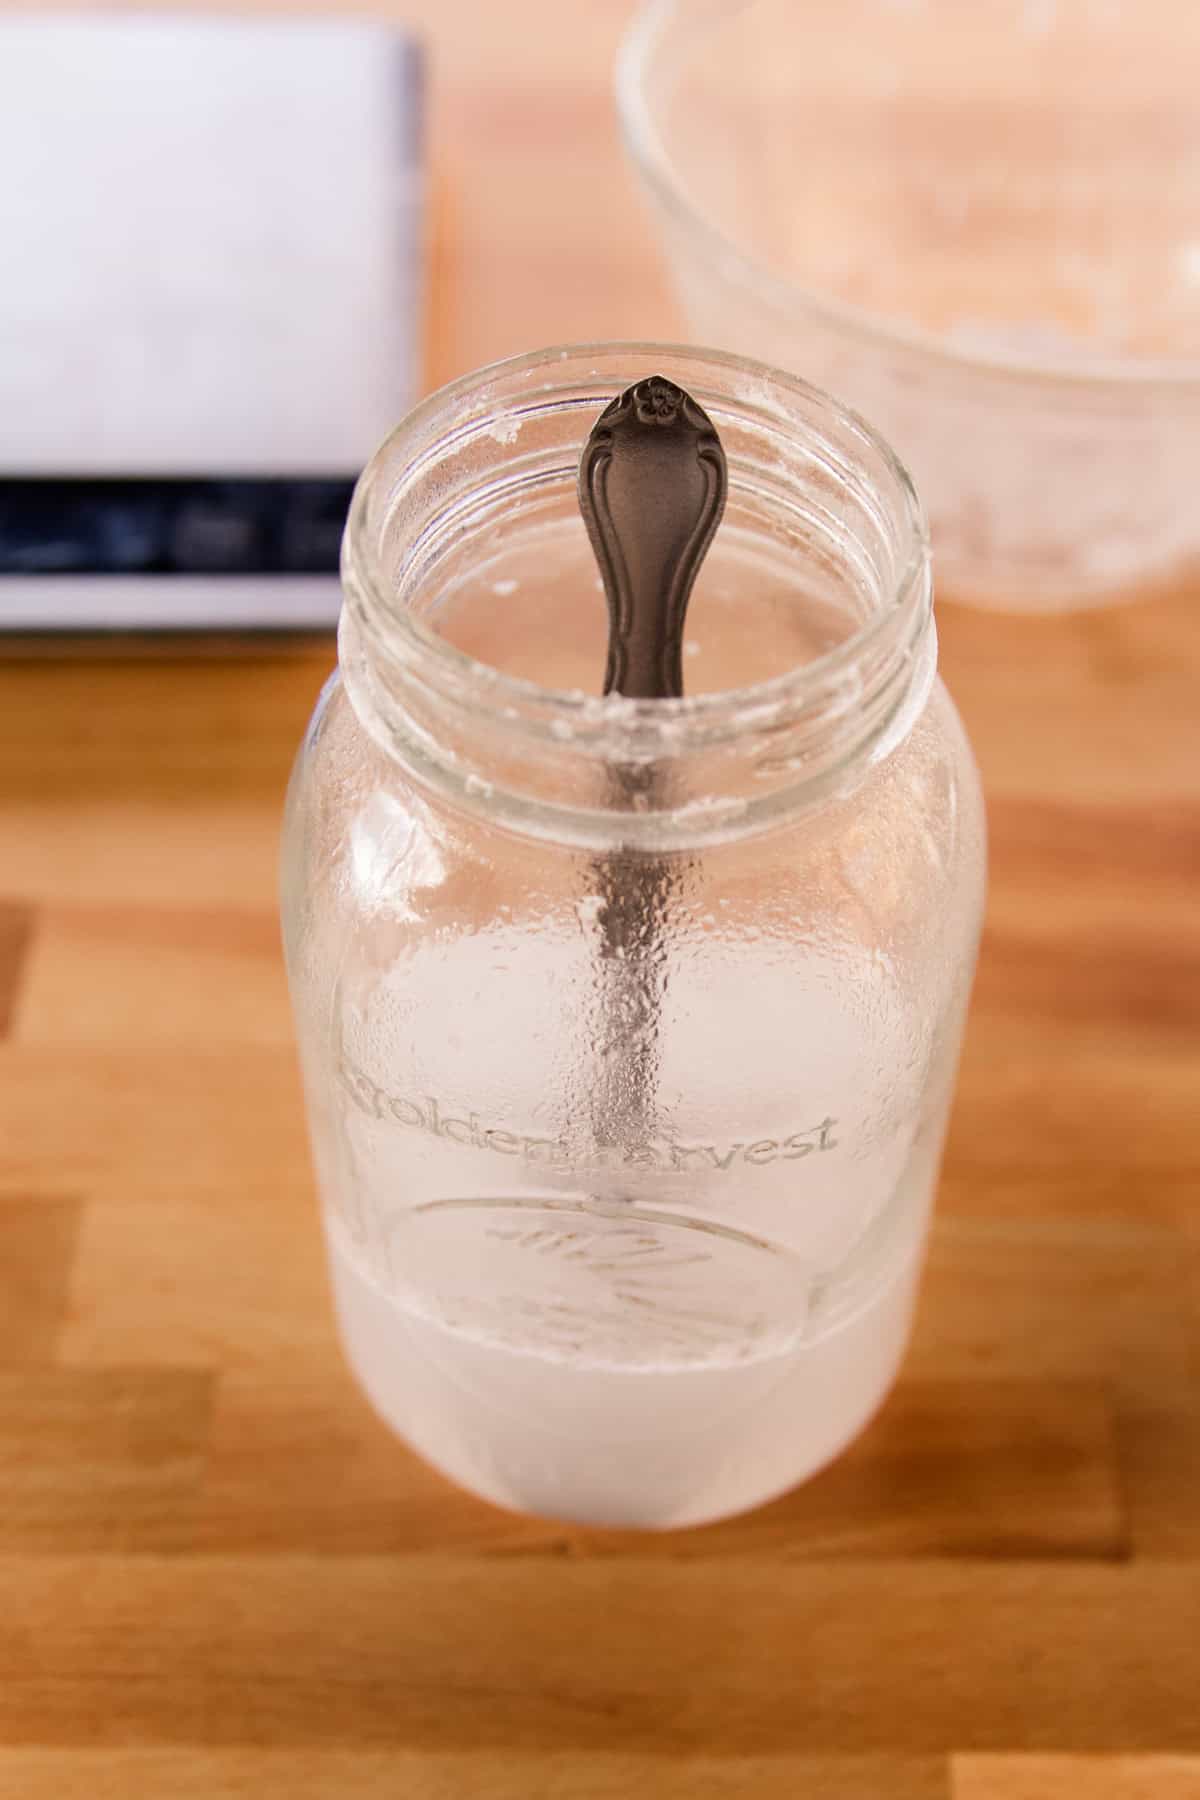
Step 2. In a separate container, slowly add the lye to the water. Stir the ingredients together gently. Set aside in a safe area to cool.
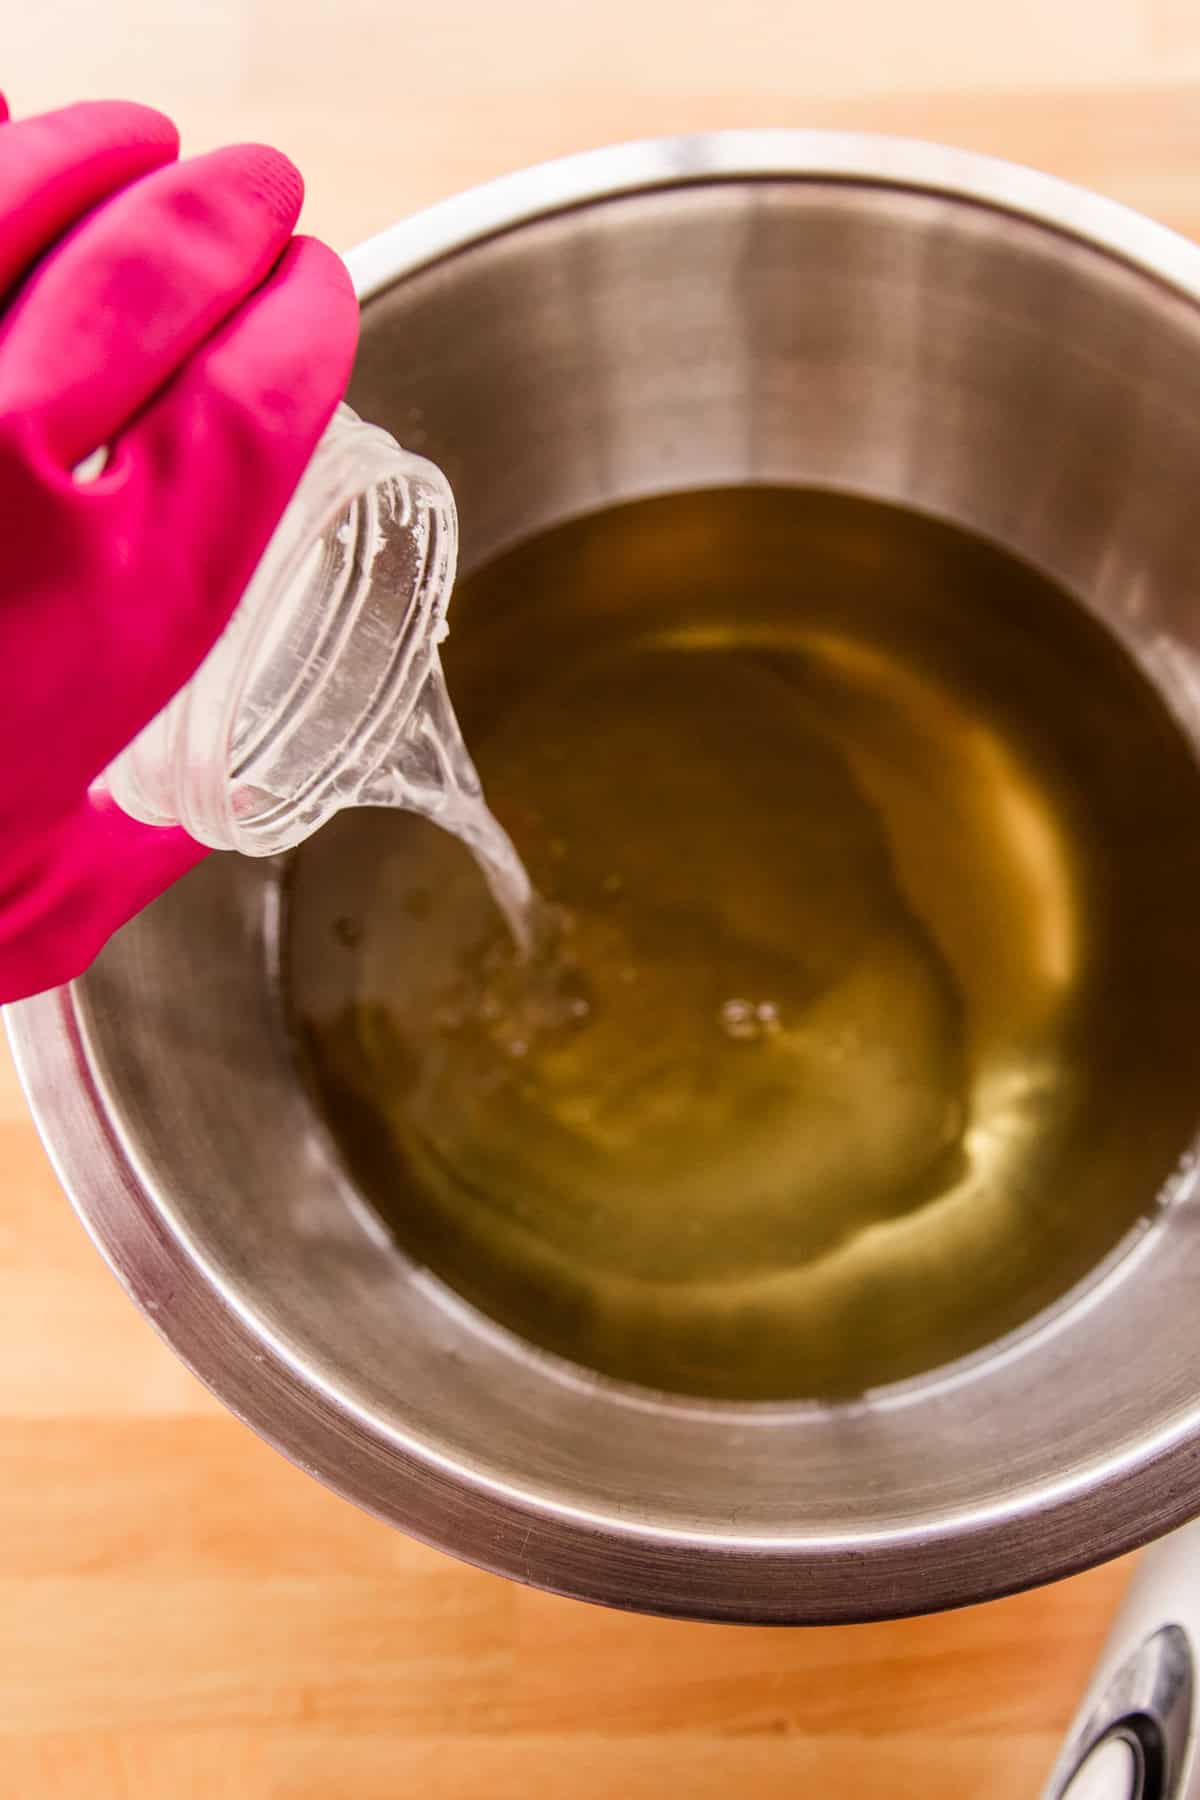
Step 3. Once both the oil and lye solution have cooled to around 100°F, slowly pour the lye solution in with the oils.
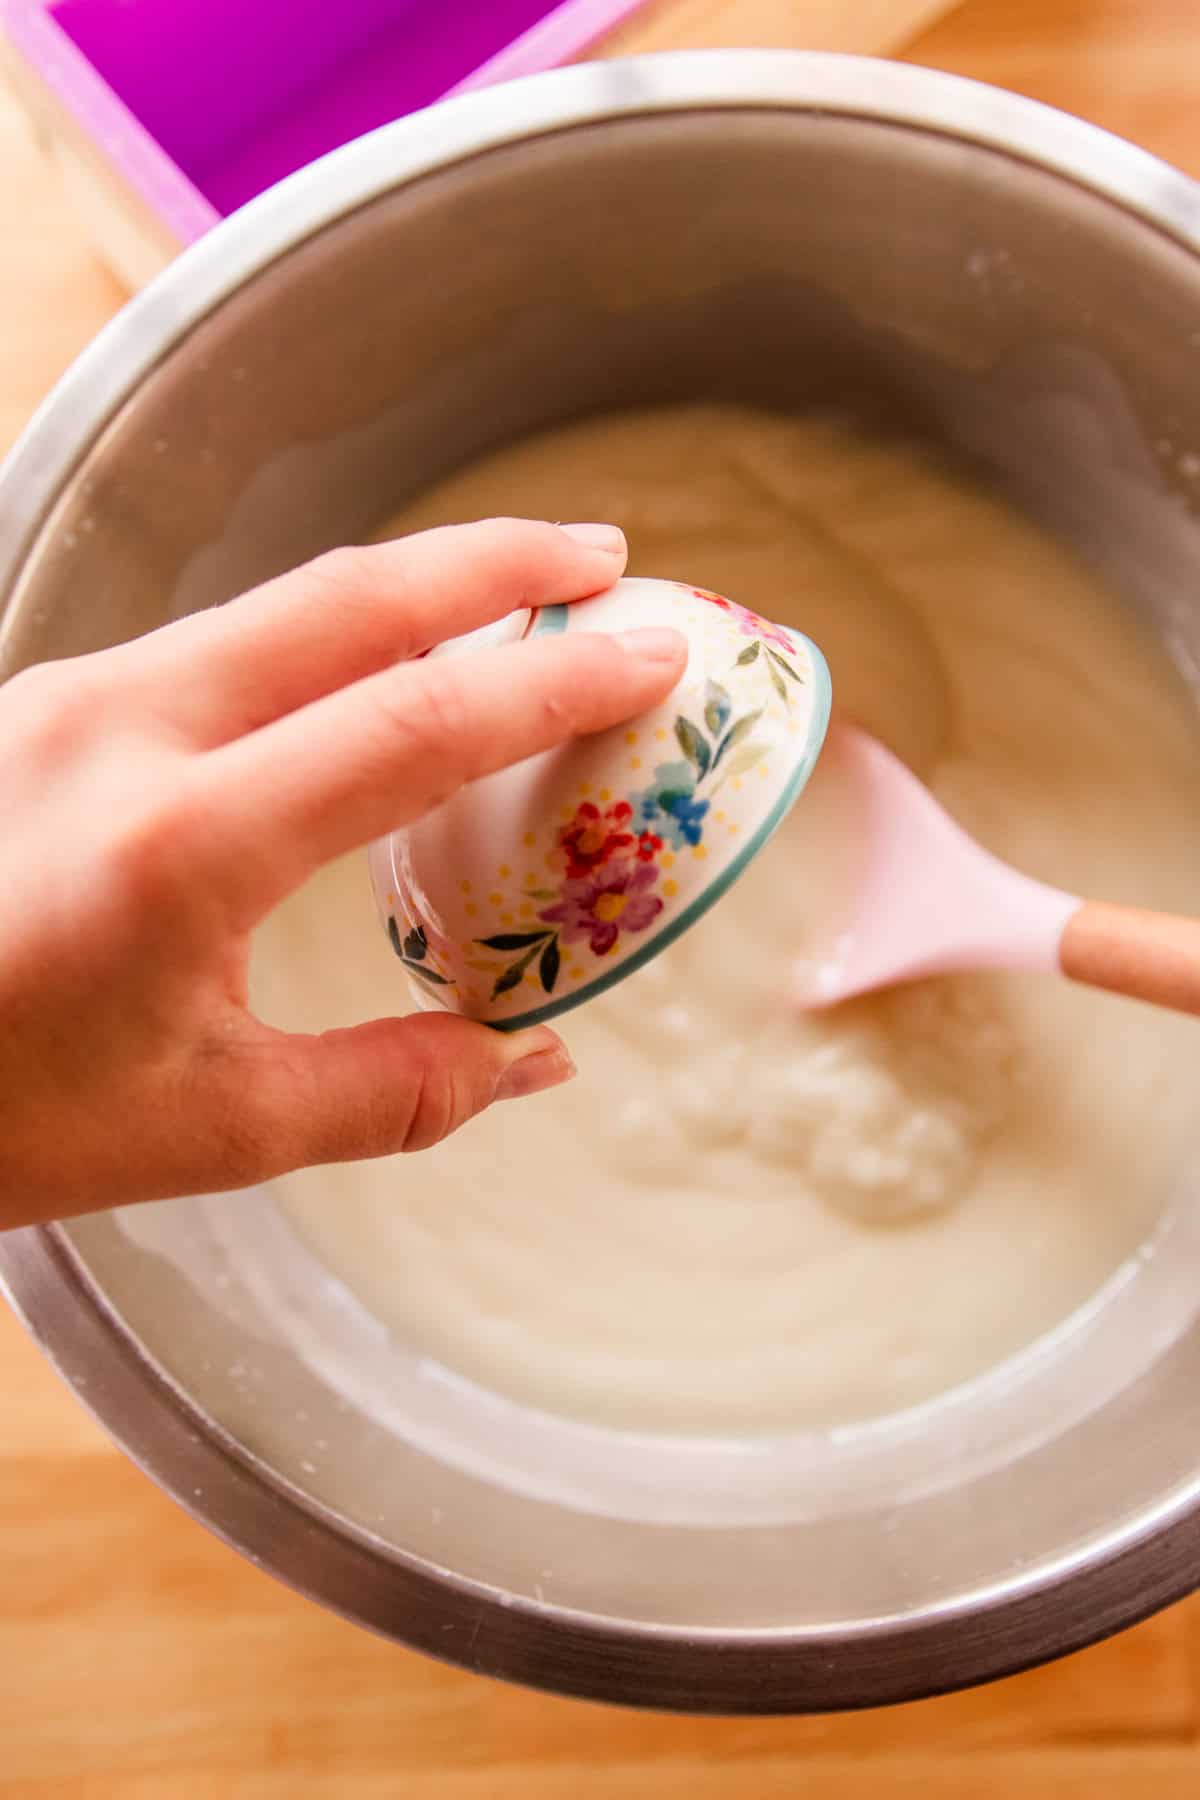
Step 4. Mix with an immersion blender until it comes to a light trace, and add your fragrance.

Step 5. Continue mixing with the immersion blender until it reaches a medium trace.
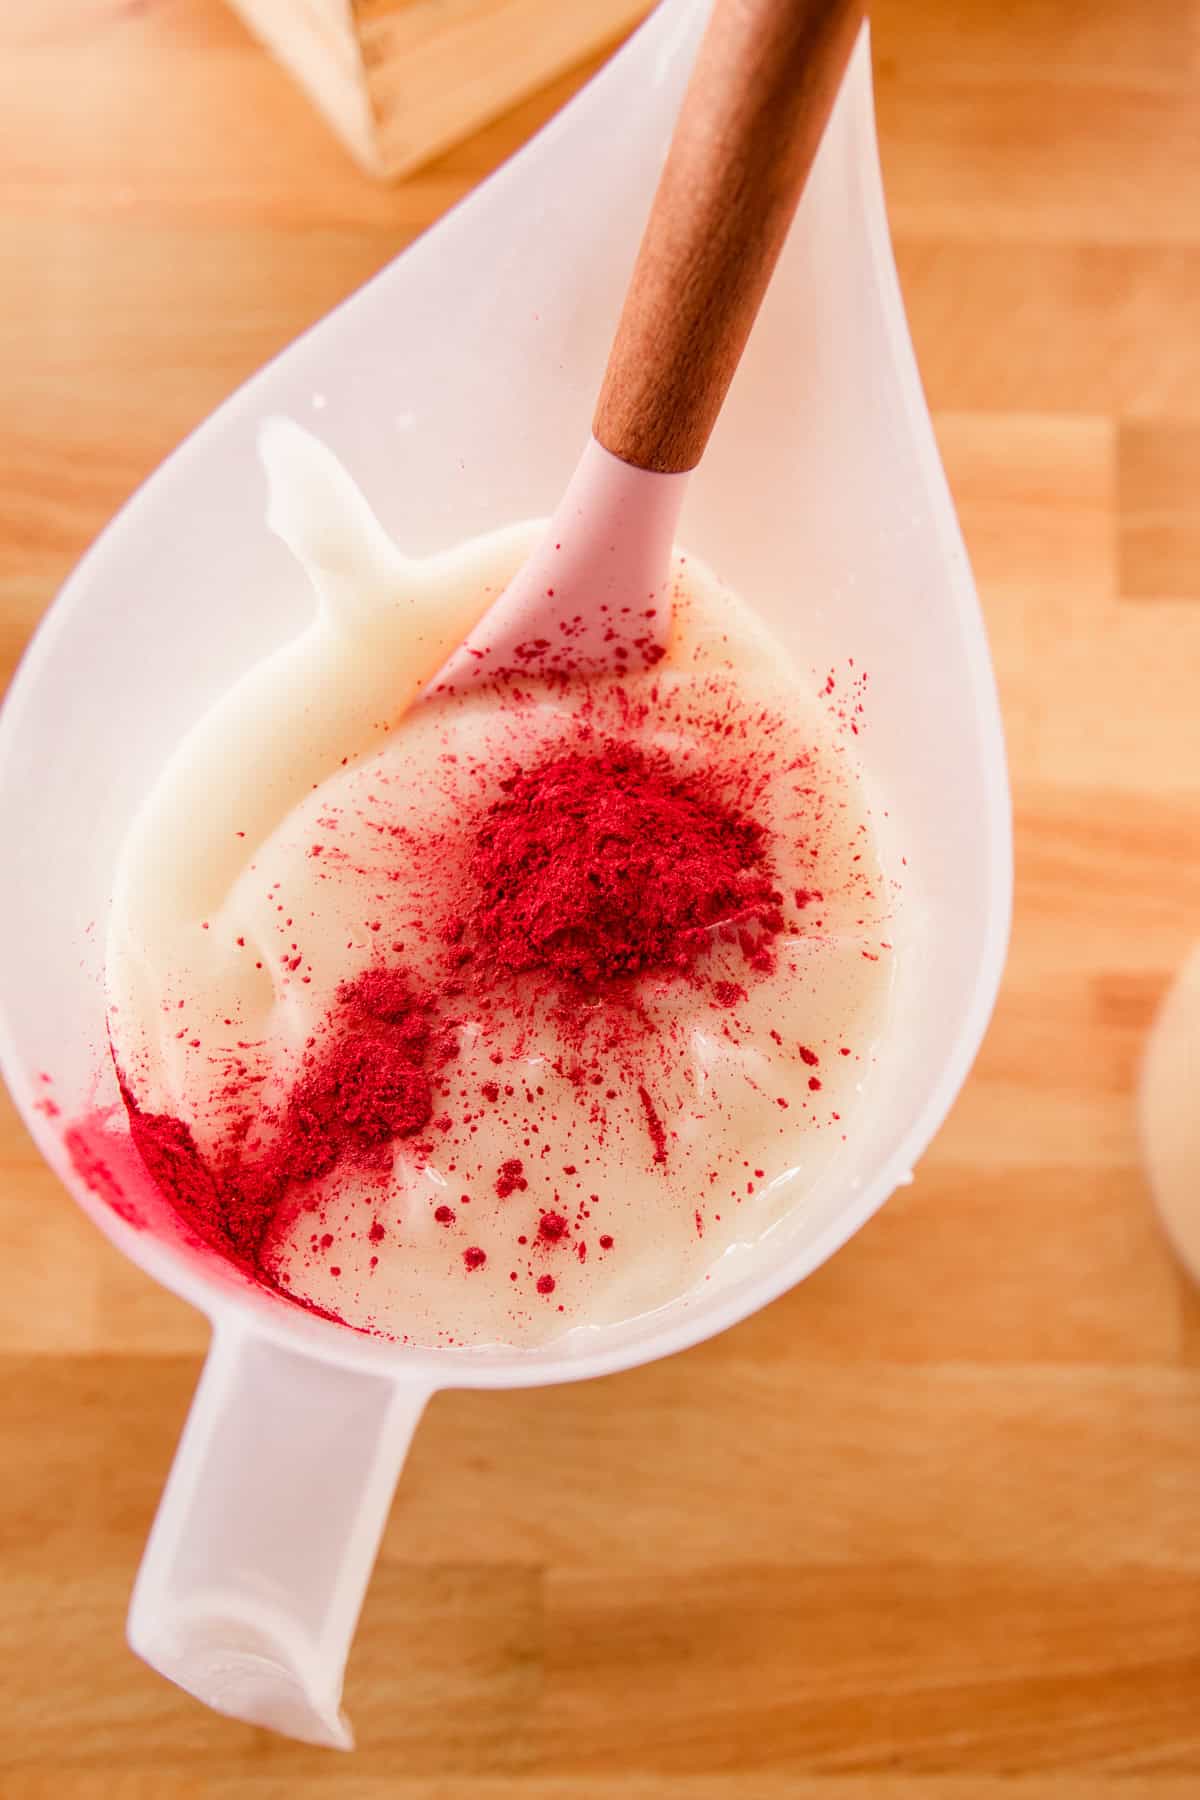
Step 6. Separate the soap into two batches. Add your red mica powder to one of the containers and stir it in well.
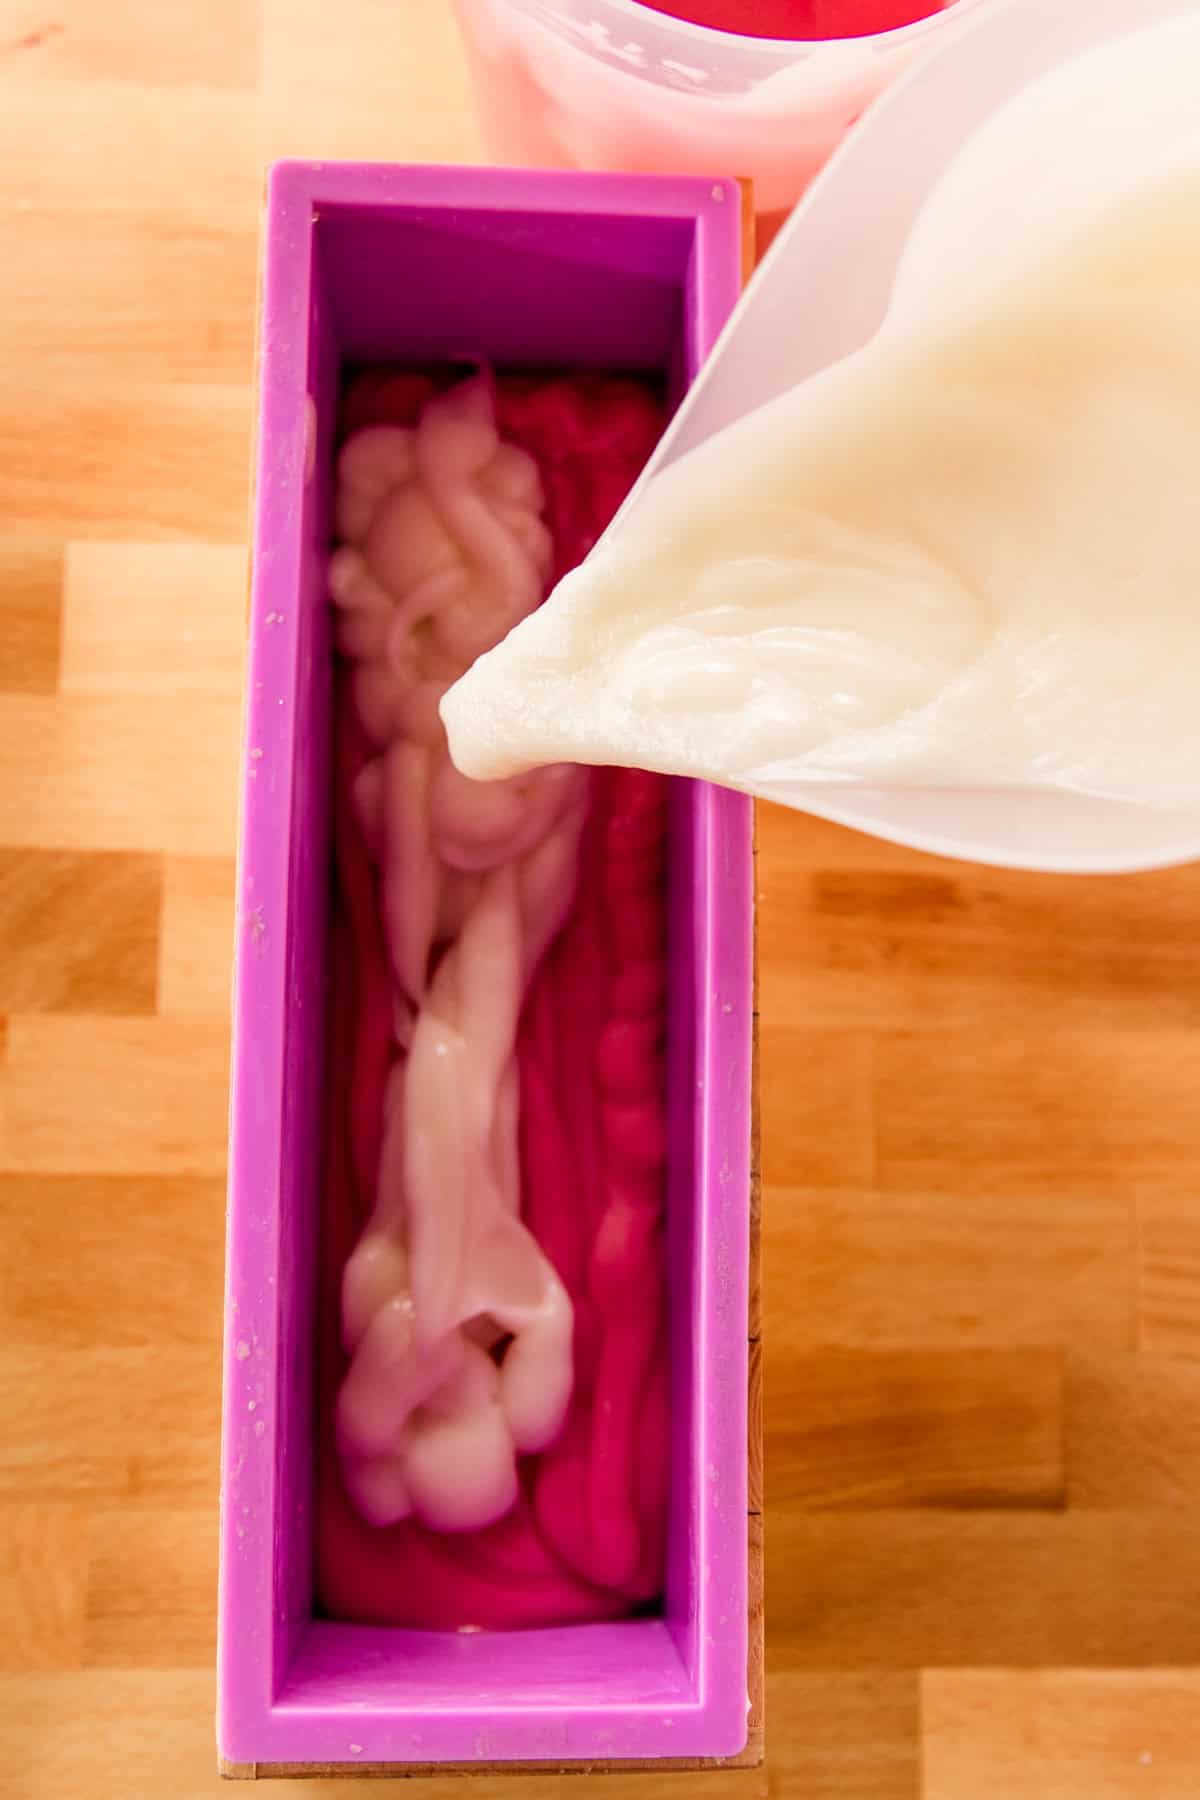
Step 7. Layer the soap into your soap mold, alternating between the two colors.
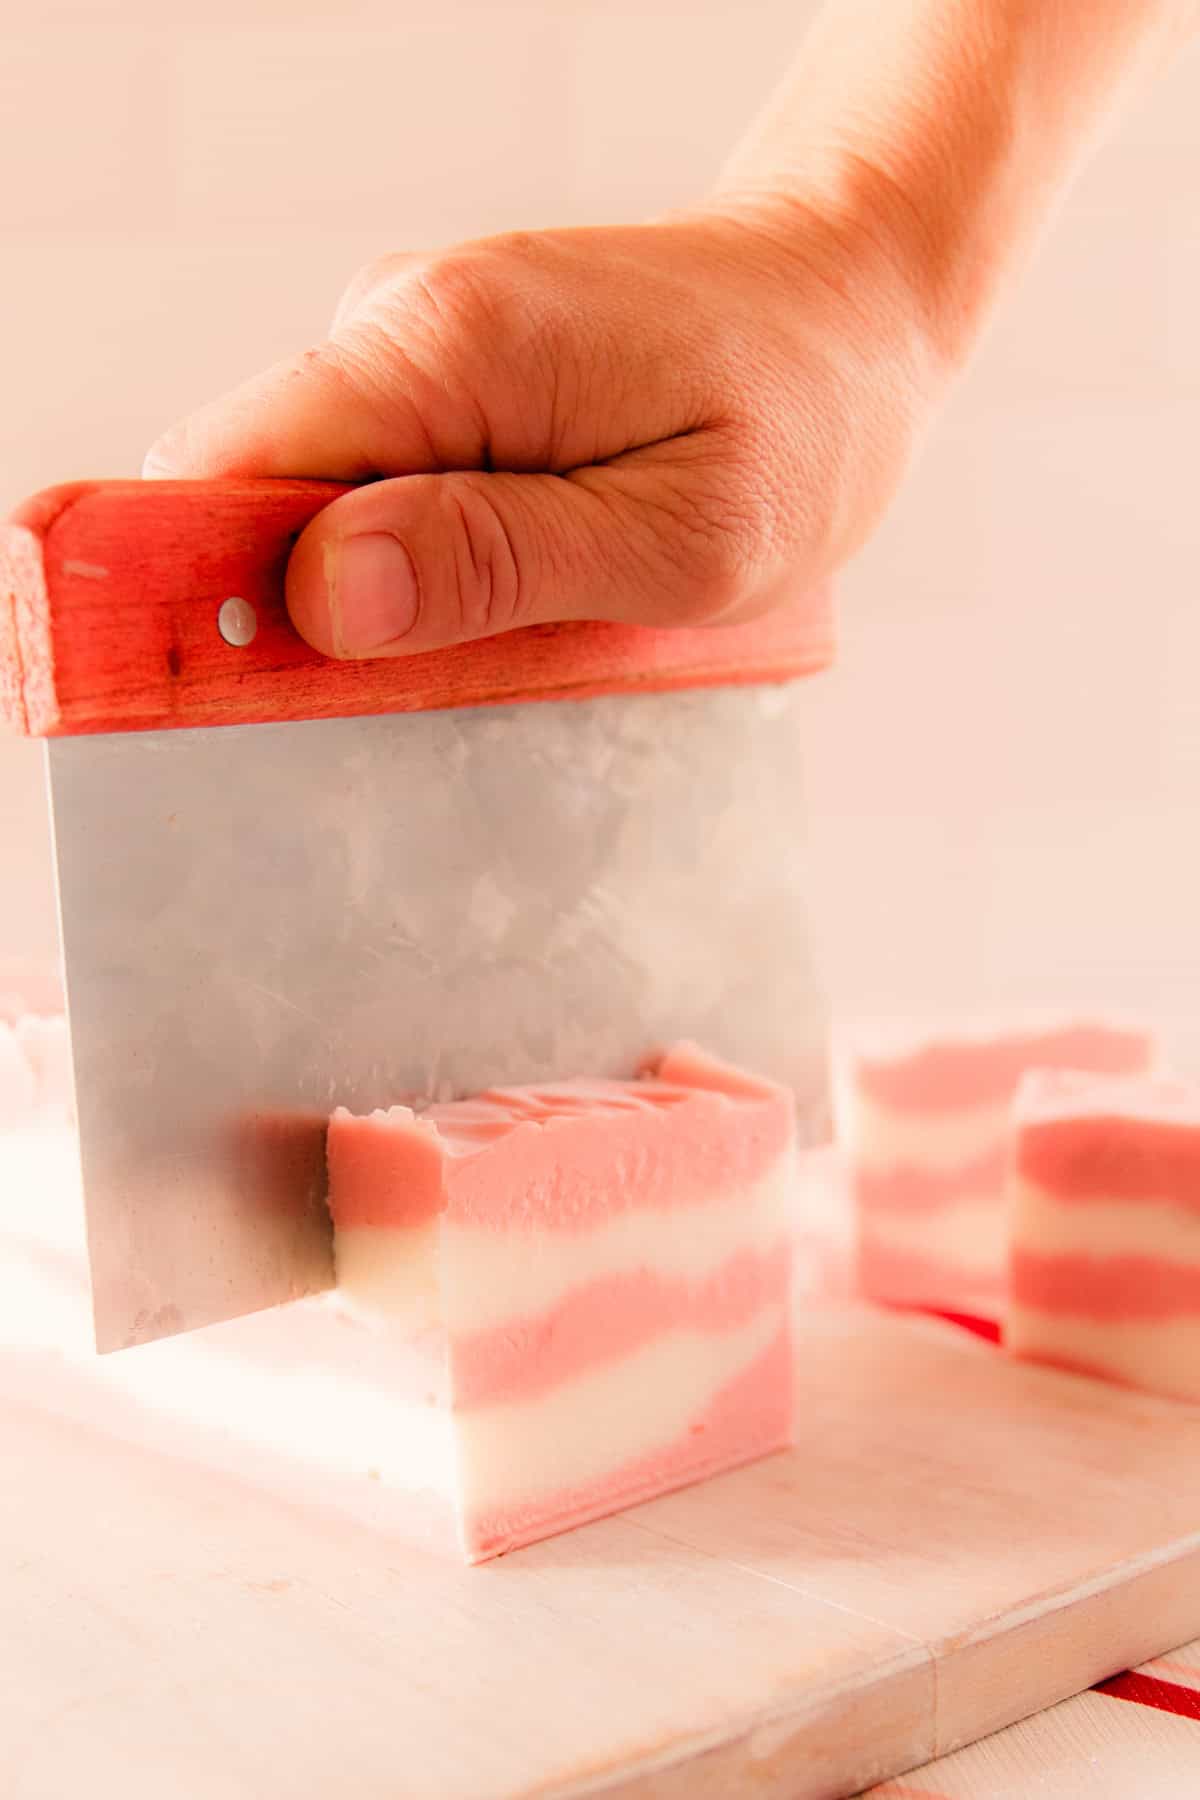
Step 8. Allow the soap to harden for three days before removing it from the mold and cutting it into individual bars. Lay the soap bars on their ends to cure for 6 weeks before using!
Expert Tips
- I suggest reading through the instructions and step-by-step photos before getting started so you have a good idea of the process when you begin.
- This recipe uses a 5% superfat. If you make any changes to the recipe, be sure to use a soap calculator.
- This soap makes a lovely Christmas gift! I like to tie my soap bars up with hemp twine and attach a gift tag to them. They are perfect hostess gifts, stocker stuffers, or additions to a Christmas gift basket.
- You can download free printable labels in my member resource library!
Recipe FAQ
You can’t make from-scratch soap without lye. Soap is created when lye reacts with the fats and oils in a process called saponification. If you would rather avoid handling lye, you can make a melt-and-pour soap! I have a holiday spice soap bar and a lot of fun Christmas soap recipes that would be perfect alternatives.
Yes, but it is crucial to follow the recipe closely and take basic safety precautions. Read about soapmaking safety in the above post or the recipe card notes.
This homemade candy cane soap needs to cure for 6 weeks before you use it.
More Festive Holiday Recipes
- DIY Christmas Scented Candles
- DIY Orange Creamsicle Soap
- Homemade Stovetop Potpourri
- DIY Essential Oil Diffuser Ornaments
If you tried this Candy Cane Soap Bar Recipe or any other tutorial on my website, please leave a 🌟 star rating and let me know how it went in the 📝 comments below. Thanks for visiting!
Homemade Candy Cane Soap
Equipment
- Safety goggles, mask, and gloves
- Silicone soap loaf mold
Ingredients
- 15 oz lard
- 8 oz coconut oil
- 4 oz avocado oil
- 2 oz castor oil
- 11 oz water
- 4.2 oz lye
- 0.075 oz peppermint essential oil, (50 drops)
- 1 tsp red mica powder
Instructions
- Melt lard, coconut oil, avocado oil and castor oil in a double boiler. Set aside to cool.
- Slowly add lye to water. Stir the ingredients together gently. Set aside in a safe area to cool.
- Once both the oil and lye solution have cooled to around 100°F, slowly pour the lye solution in with the oils.
- Mix with an immersion blender until it comes to a light trace and add your fragrance.
- Continue mixing with the immersion blender until it reaches a medium trace.
- Separate the soap into two batches. Add your red mica powder to one of the containers and stir it in well.
- Layer the soap into your soap mold, alternating between colors.
- Allow the soap to harden for three days before removing it from the mold and cutting it into individual bars. Lay the soap bars on their ends to cure for 6 weeks before using!
Notes
- Always wear proper protective gear when making soap, including goggles, a mask, and gloves.
- Work in a well-ventilated area, especially when handling the lye.
- Keep children and pets out of your workspace. Store ingredients in a safe place out of reach of children.
- Never add water to lye. Rather, put the water in a jar and slowly add the lye to that. Adding water to the lye can cause a dangerous reaction.
- Do not deviate from the recipe. If you wish to swap out any of the ingredients or change the recipe, you’ll need to recalculate with a soap calculator.
- You can download free printable labels in my member resource library!


I love the way these look. What a great Christmas gift idea!