Homemade Beeswax Wraps
Homemade beeswax wraps are a great way to save money and reduce waste in your kitchen. They are made with natural, sustainable materials and allow you to skip the cling wrap and opt for reusable instead!
Equipment
- Scissors or a rotary cutter
- Paintbrush or a piece of carboard
- Baking pan lined with parchment paper
Ingredients
- Fabric cut into squares or circles
- Beeswax pellets or shredded beeswax
Instructions
- Preheat your oven to 175°F. Cut your fabric into squares or circles. You can use plates, bowls, or pans as a guide for sizing.
- Line a baking pan with parchment paper and place the fabric on top.
- Sprinkle a thin layer of beeswax evenly over the fabric. You want the pellets spread out with space between them, not completely covering the fabric. If using a block of beeswax, shred it first. Place the pan in the oven for about 5 minutes, or until the beeswax is fully melted.
- Carefully remove the pan from the oven and quickly spread the melted beeswax evenly across the fabric using a paintbrush or piece of cardboard. The wax hardens fast, so work quickly.
- Hang the fabric or lay it flat until completely hardened.
How to Use Beeswax Wraps
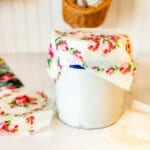
- Place the wrap over a bowl, plate, or food item.
- Press gently with your hands to help it seal.
- Allow the warmth of your hands to soften the wax slightly so it molds into place.
Notes
- Hand wash beeswax wraps in cold water and hang them to dry. It's very important to use only cold water, as warm or hot water can melt the wax.
- It’s hard to give an exact amount of beeswax since fabric sizes vary. You only need a light layer of pellets spread across the fabric (see images in the post above).
- Work quickly once the fabric comes out of the oven since the beeswax begins hardening almost immediately.
- Be careful when handling the hot pan and melted wax. Use hot pads or oven mitts while working.
- When cleaning up, be very careful to avoid any beeswax going down your sink drain!
- When the beeswax wraps stop clinging well, refresh them by reapplying beeswax following the same method.