This post may contain affiliate links. Please see our disclosure policy.
Welcome to the wonderful world of sea moss! Packed with vitamins and minerals, this beauty wonder tool packs a punch for anti-aging goodness! Learn how to make a sea moss face mask today!

Have you not heard of sea moss before? You’re in for a surprise.
Much like its name, Sea Moss comes straight from the sea, which in my mind invokes images of crustaceans and other crawlies creeping through the strands (just me?)
Sea Moss is a type of seaweed that, in truth, is rich in vitamins, minerals, and iodine – all of which mean fantastic things for your skin.
It’s eaten as a food in many places, but I love it most for its skincare benefits.
In fact, it’s currently one of the most ‘fashionable’ superfood ingredients out there right now, and for good reason!
What is Sea Moss?
Sea Moss is a type of seaweed found in the Atlantic Ocean. It’s sometimes called ‘Irish moss’ due to this fact.
You can buy Sea Moss as raw seaweed (often seen as dry seaweed) and in powdered form, gels, supplements, and liquid bottles.
All forms of Sea Moss hold tremendous.
Of course, you can buy it straight out of the ocean, just as it comes, but this is usually reserved for posh restaurants only (!)
It’s somewhat popular to use in culinary dishes for a distinct flavor, and I’ve also heard of Sea Moss being used as a digestive aid – and an anti-aging tool.
I know that Sea Moss has a never-ending list of health benefits (it seems!)
Read on to discover a wonderful recipe for a sea moss face mask that’ll take years off your complexion.
Benefits of a sea moss face mask
You may be wondering, “Why a Sea Moss face mask?”
Here’s why:
- Hydration: It’s a deeply moisturizing mask, great for nourishing and replenishing lost skin oils in dry skin conditions.
- Anti-aging: Sea Moss, like my matcha face mask, is rich in amino acids, boosting areas of skin collagen loss.
- Lots of vitamins: Vitamins, minerals, and iodine, to be exact. These contribute to reducing free radicals, which can cause premature skin aging.
- Healthier complexion: Thanks to the vitamins and minerals in sea moss, the skin looks healthier with a brighter, smoother appearance after just one application.
Why you’ll love this recipe
- It works! Your skin will feel healthier, look nourished, and glow with a youthful vibe after just one use of this glorious face mask.
- It’s fun to make and use: Making a DIY face mask is a great home activity to do, either on your own or with the kids!
- It’s affordable: I don’t know about you, but I see a lot of expensive face masks in the store, most of which are way out of my budget! This face mask is far more budget-friendly.

This post contains affiliate links, which means I make a small commission at no extra cost to you. Get my full disclosure HERE.
Sea Moss face mask recipe
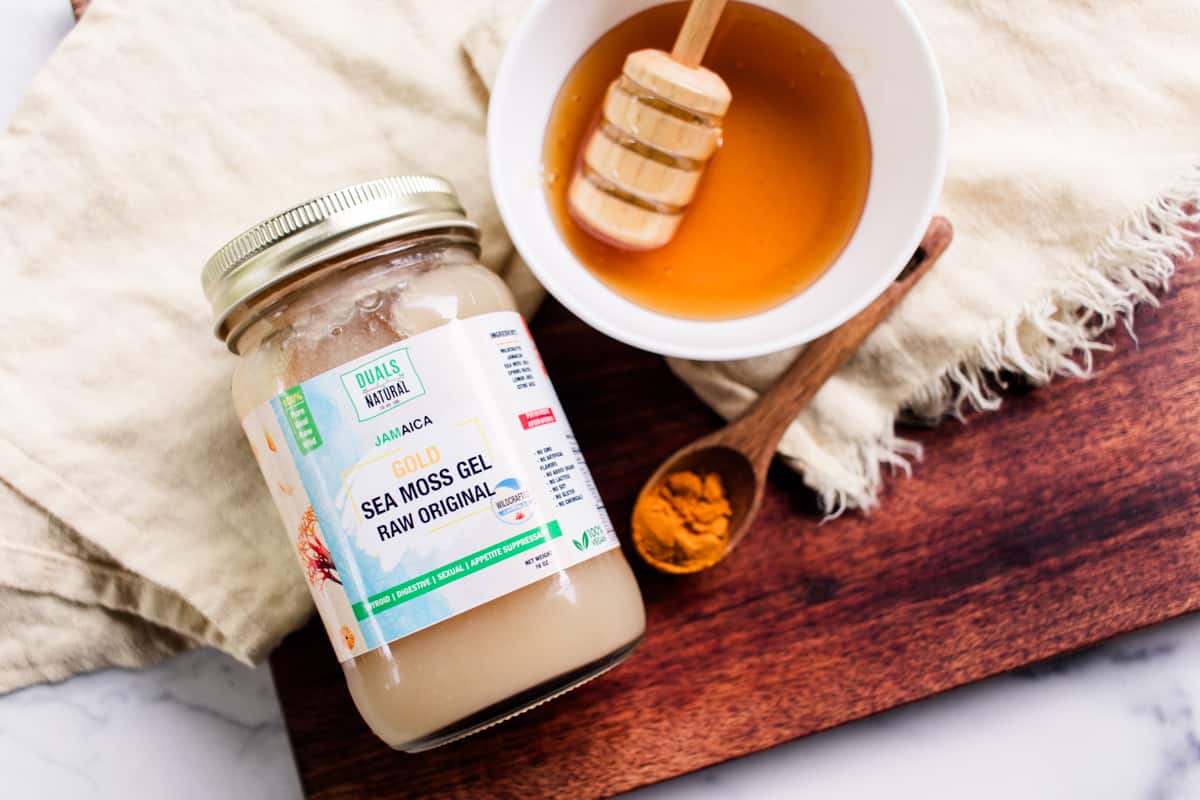
Here’s what you’ll need:
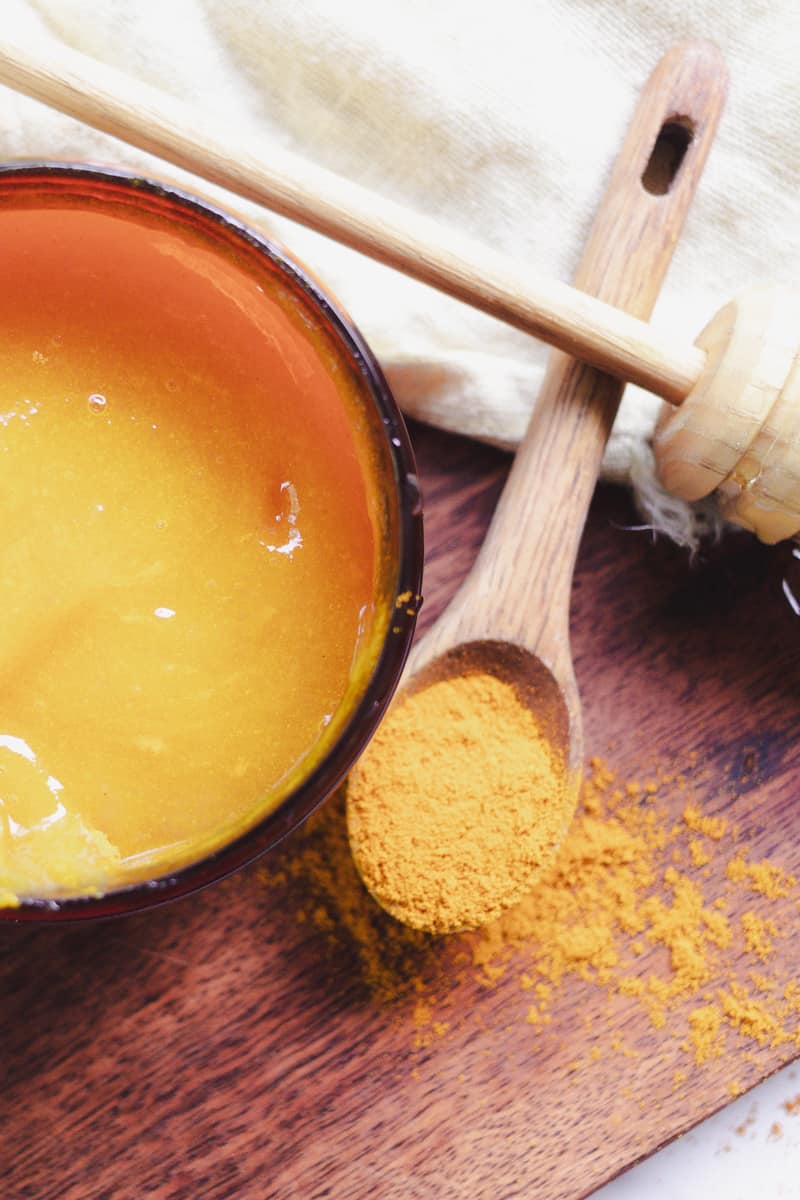
- Sea Moss 1/2 cup
- Honey 1/8 cup
- Turmeric powder 1/2 teaspoon
Instructions:
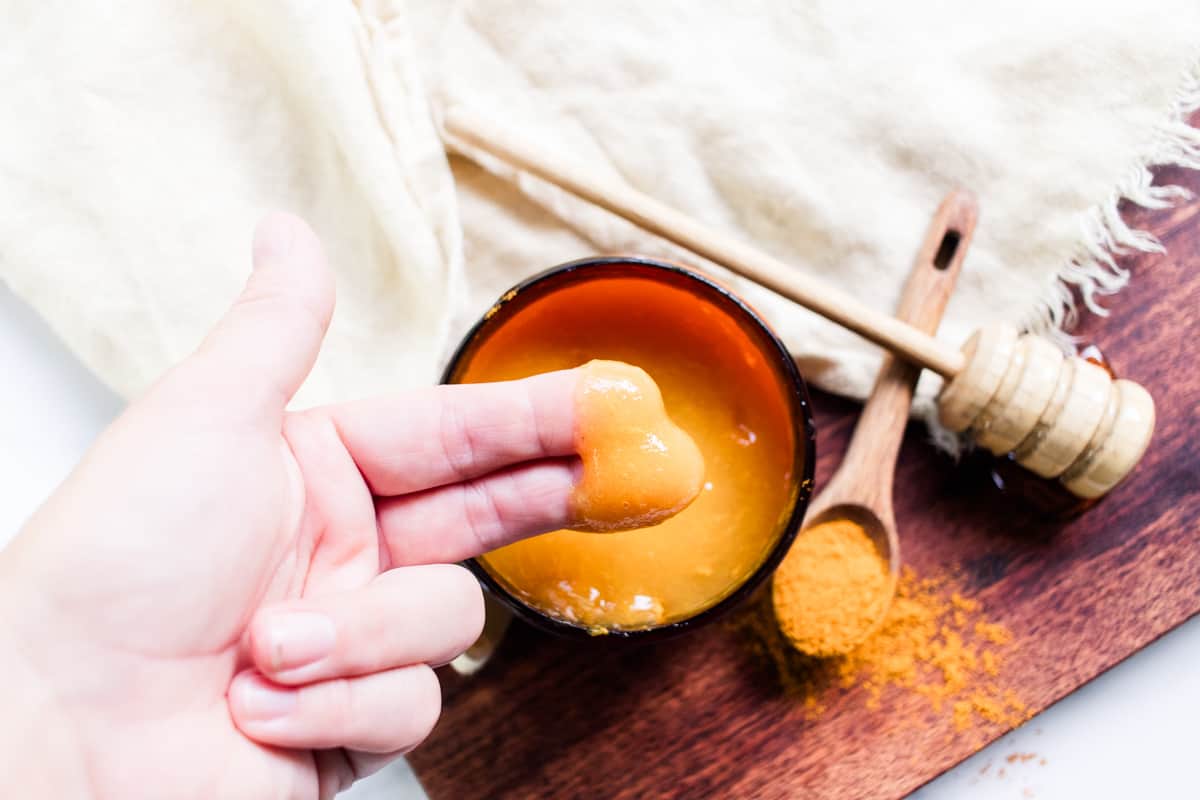
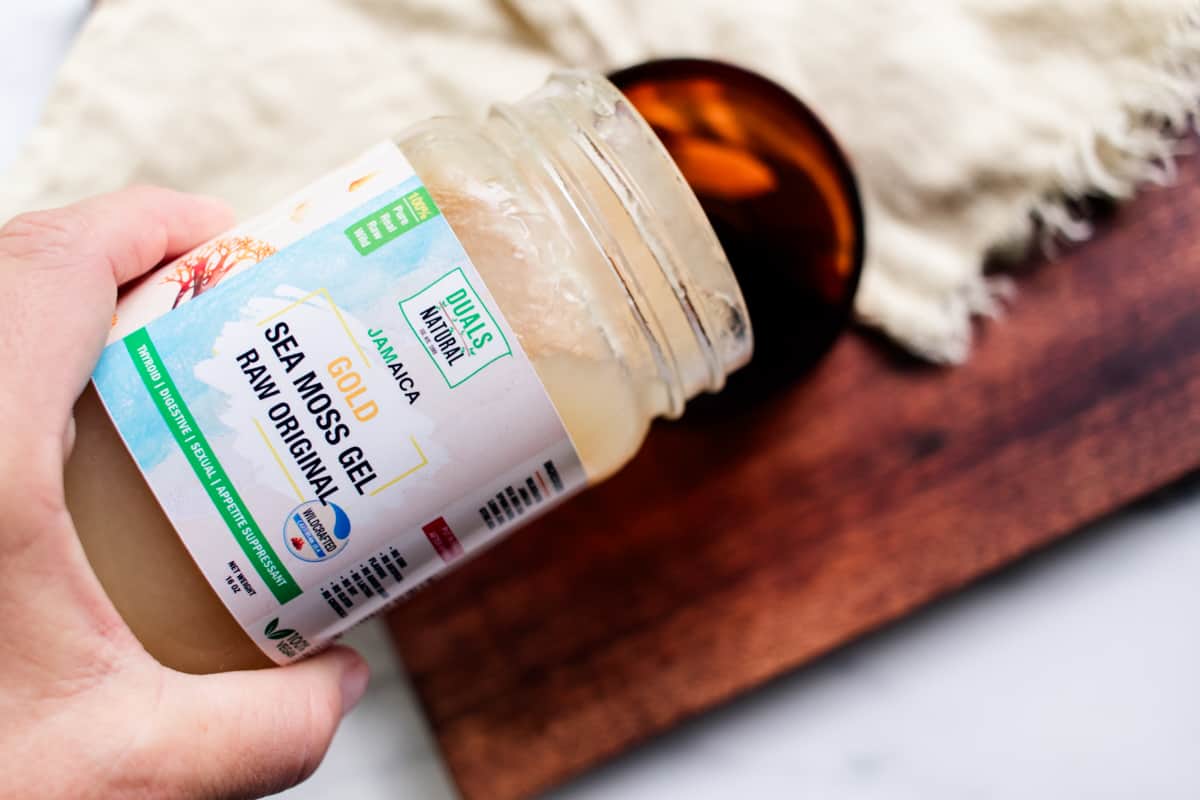
Step 1: Add the sea moss to a small container. I used an old 8-ounce lotion container, which it fits in perfectly. Note: This recipe uses raw seaweed.
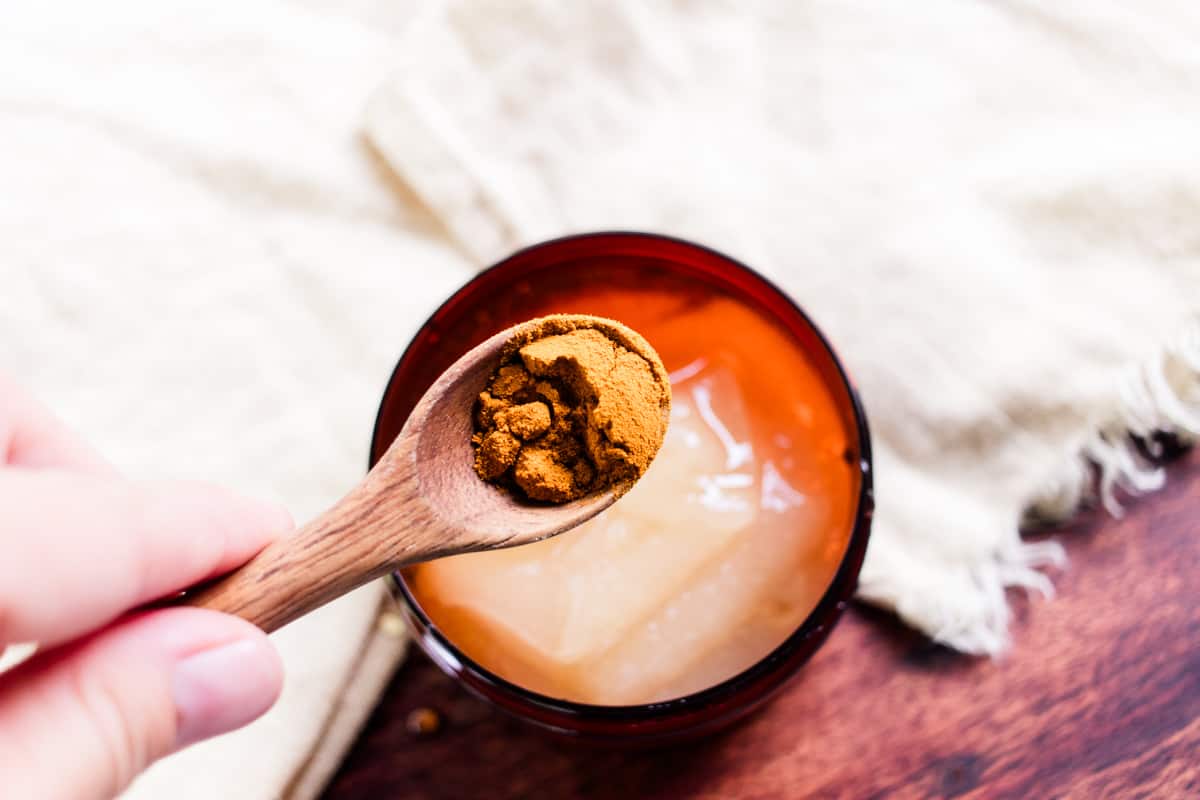
Step 2: Next, add the turmeric powder. You can adjust the turmeric amounts based on your preference. Always start with less and add more as needed.
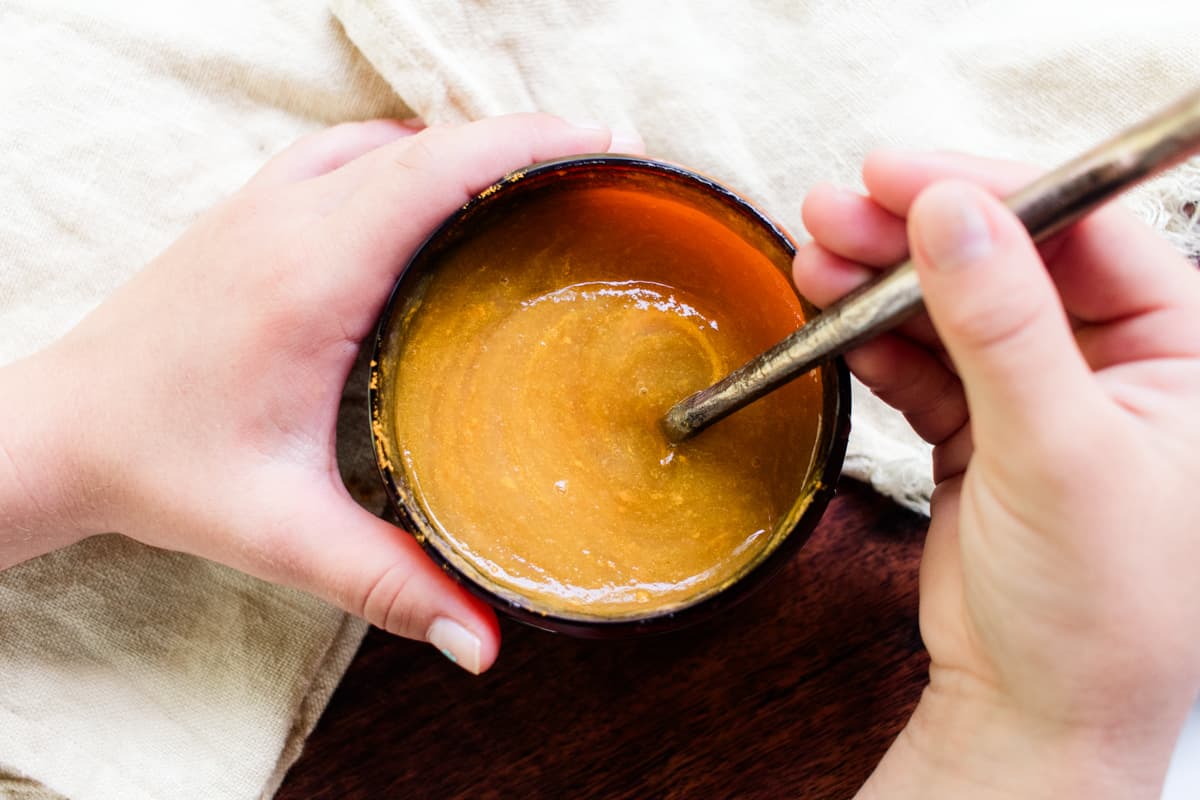
Step 3: Finally, stir in the honey until the ingredients are well combined.
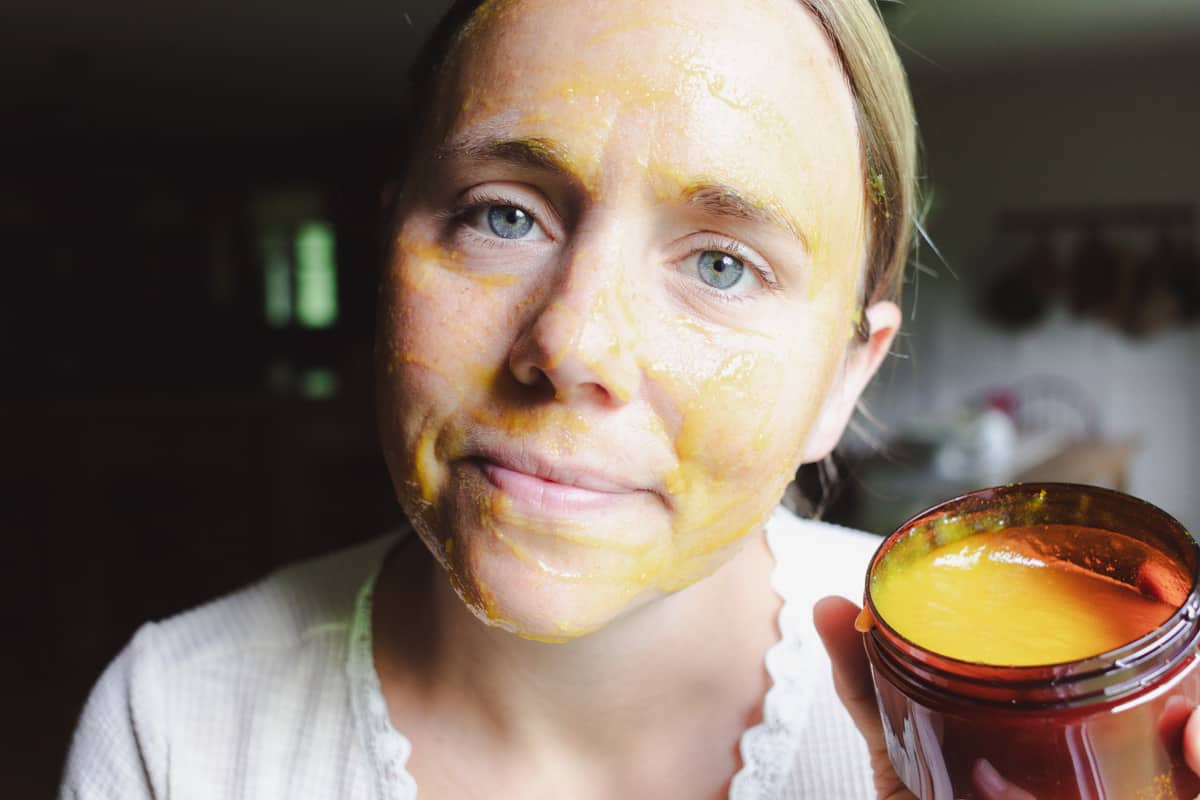
How to use a Sea Moss face mask
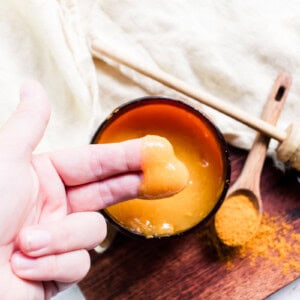
Scoop up a small amount of the pre-mixed face mask in your hands.
Apply it to dry, clean skin while avoiding the eyes. (Cleansing first is always a good idea.)
Leave it on for 10 minutes to allow the Sea Moss to work its magic.
Rinse off with cool water, and use a muslin cloth to help remove any remaining sea moss strands.
Storing your face mask
Secure the lid and store the face mask in the fridge for at least one week. The storage times largely depend on the sea moss you purchased. Always follow the instructions on the bottle.
A little on the ingredients
- Sea Moss: Rich in vitamins, minerals, iodine, amino acids, and antioxidants, all of which contribute to a healthier, brighter, deeply moisturized complexion.
- Honey: Renowned as a skin savior, honey is wonderfully soothing and kind to the skin. You find this ingredient in both my glowing skin face mask and my anti-aging face mask recipe!
- Turmeric: A power-packed antioxidant booster, turmeric is a fantastic anti-aging and anti-inflammatory tool.
FAQs
Is sea moss good for your face?
Yes! The Sea Moss face mask recipe I share here in this post is a great place to start using Sea Moss in your skincare routine.
It’ll help brighten your skin, deeply moisturize and nurture your complexion, and help reduce the signs of aging.
Can you use sea moss as a face mask?
Yes! You can use straight sea moss or follow the recipe in this post for a sea moss gel face mask (suitable for all skin types)
Can I put sea moss on my face every day?
According to this article, sea moss is gentle enough for daily use; however, for this face mask, once or twice a week is more than adequate.
How long to leave sea moss on the face?
This face mask is good to leave on for up to 10 minutes before rinsing off with cool water.
How long does it take to see results?
According to Lifestyle Asia, it can take up to 6 weeks to notice results.
Can sea moss fade dark spots?
If the dark spots are caused by skin dryness, sea moss will help. It’s very moisturizing, so it could help fade dark spots in this aspect.
How often should you use a sea moss face mask?
Once or twice a week maximum is more than enough.
Tips and Safety
- This face mask can be stored for at least a week in the fridge.
- This face mask contains natural ingredients, so I recommend doing a patch test before the first use.
- Just be aware of things like allergies and outbreaks regarding turmeric and Sea Moss. Certain skin types can react to these two ingredients, so doing a patch test is crucial.
I hope you enjoy this Sea Moss face mask recipe!
If you enjoy making your own face masks, you might like to try one of these recipes next!
- Bentonite clay face mask recipe
- DIY rose clay face mask
- DIY charcoal peel-off mask
- How to make a baking soda face mask
Sea Moss Face Mask
Equipment
- Storage container
Ingredients
- ½ cup Sea Moss
- ⅛ cup Honey
- ½ teaspoon Turmeric powder
Instructions
- Add the sea moss to a small container. I used an old 8-ounce lotion container, which it fits in perfectly. Note: This recipe uses raw seaweed.
- Next, add the turmeric powder. You can adjust the turmeric amounts based on your preference. Always start with less and add more as needed.
- Finally, stir in the honey until the ingredients are well combined.