This post may contain affiliate links. Please see our disclosure policy.
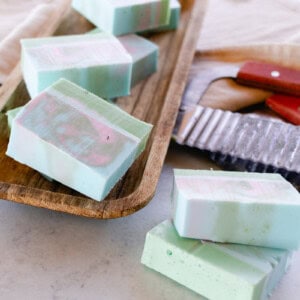
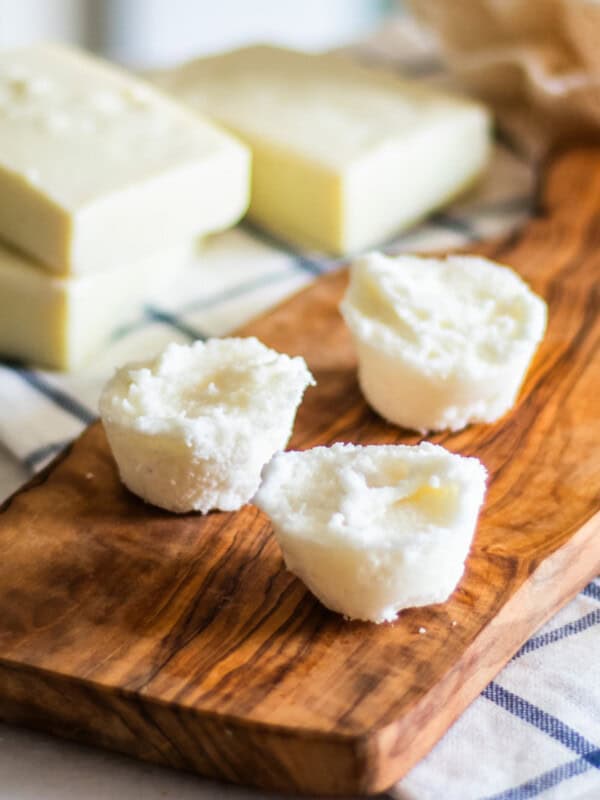
Enjoy the luxurious lather of a rich and moisturizing bar of coconut oil soap. This easy melt-and-pour soap recipe is simple to make and results in a gentle cleansing bar of soap that will leave your skin rejuvenated and glowing.

If you’ve ever felt intimidated by the process of making soap before, then you are going to love this recipe. Melt and pour soaps are fantastic for beginner soap makers and experienced crafters alike.
Many people shy away from making homemade soap because traditional cold-process soaps, like my other coconut oil soap bar recipe, call for handling lye.
This recipe eliminates the lye component and many extra steps. It simplifies the whole process so that anyone can quickly make their own customized bar of soap and have fun, too!
These soap bars make great gifts because they can be easily personalized with your favorite scents or colors. I love finding ways to craft a truly unique and beautiful DIY product without all the complicated steps.
Table of Contents
Coconut oil melt and pour soap ingredients
- 3 pounds of coconut oil soap base
- 40-50 drops Essential oils for fragrance (or natural fragrance oil)
- Liquid dye for coloring (We use 3 colors for this soap)
Equipment
- Double boiler (or saucepan)
- Silicone mold
- Thermometer (optional for temperature monitoring)
How to make a no-lye coconut oil bar soap
This recipe uses a melt-and-pour soap base, which is the easiest method without sacrificing the creative options for customization. There’s no lye involved here; simply melt the base and add in your favorite scents or colors.
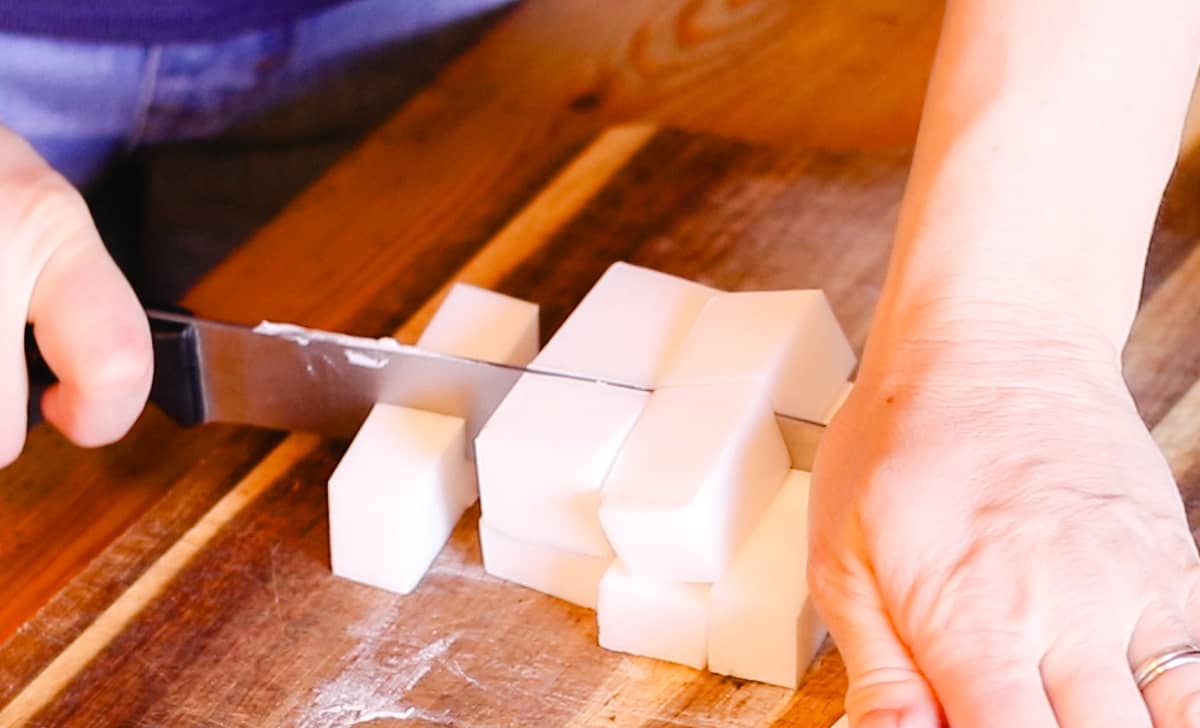
Step 1: Start by cutting up the coconut oil soap base into small, evenly-sized cubes.
Step 2: Slowly melt the soap base over low heat in a double boiler, stirring occasionally.
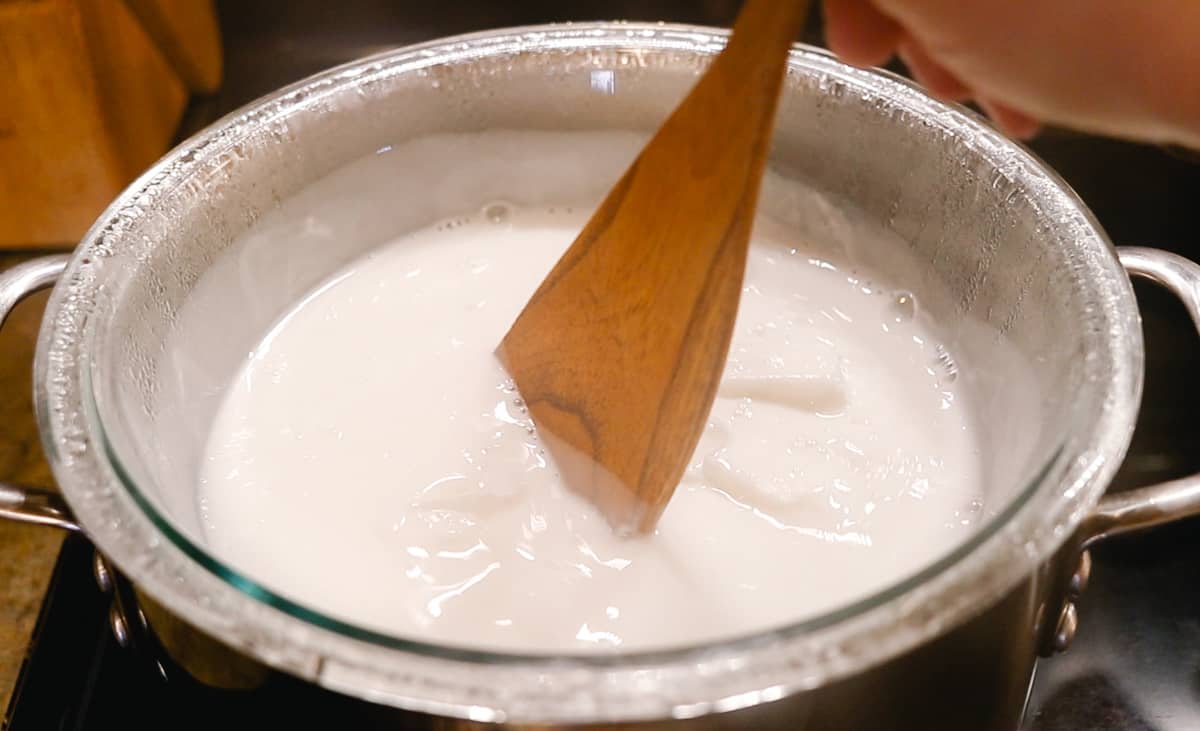
If using a thermometer, aim to keep the temperature at or below 150°F to preserve the soap’s quality.
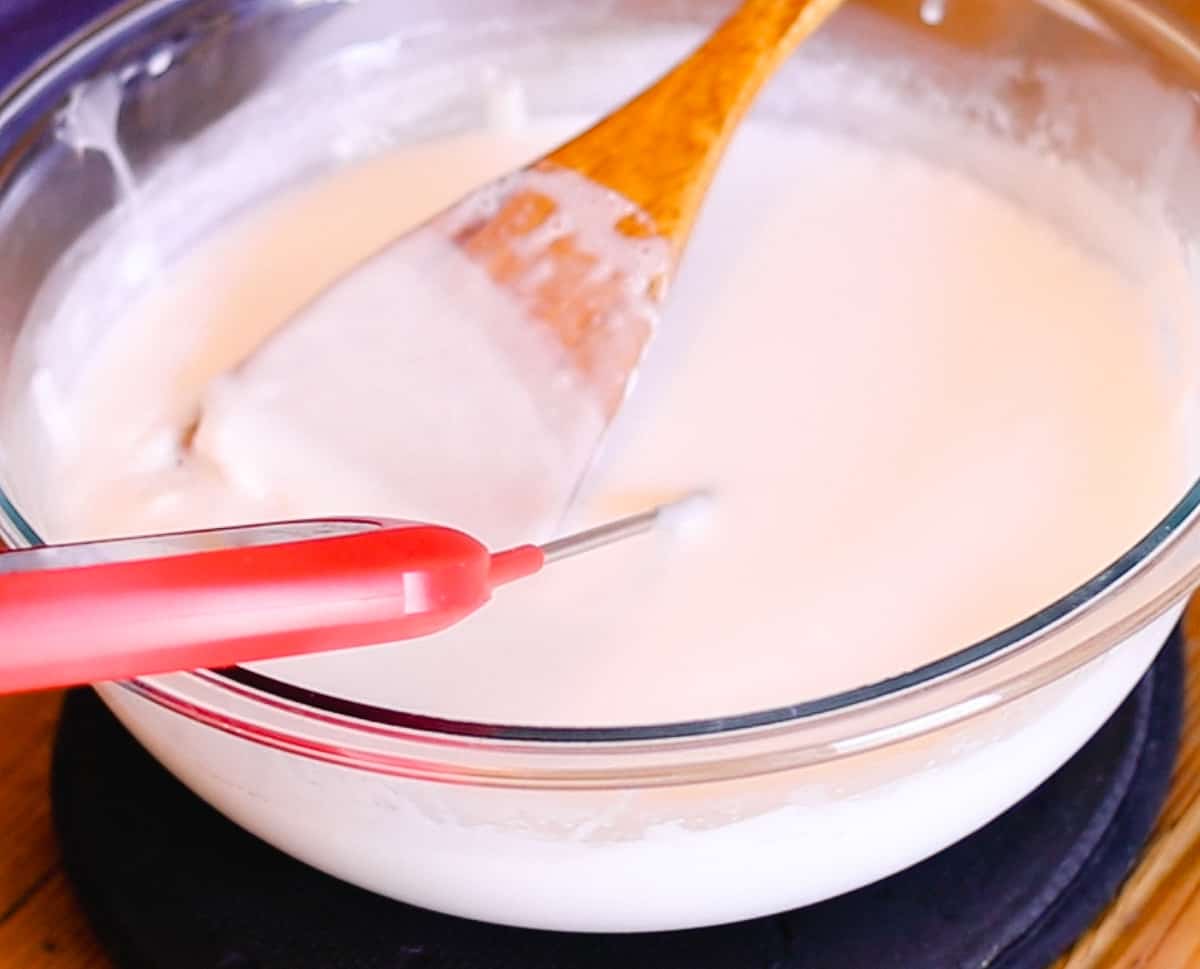
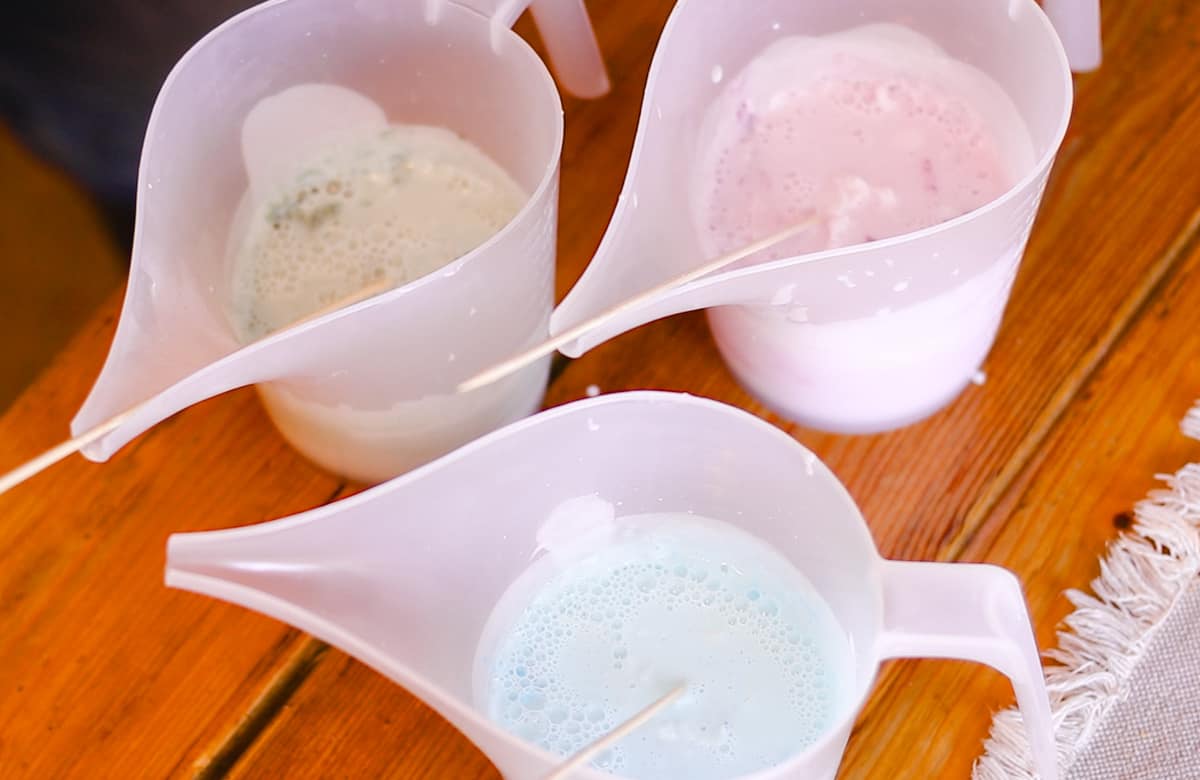
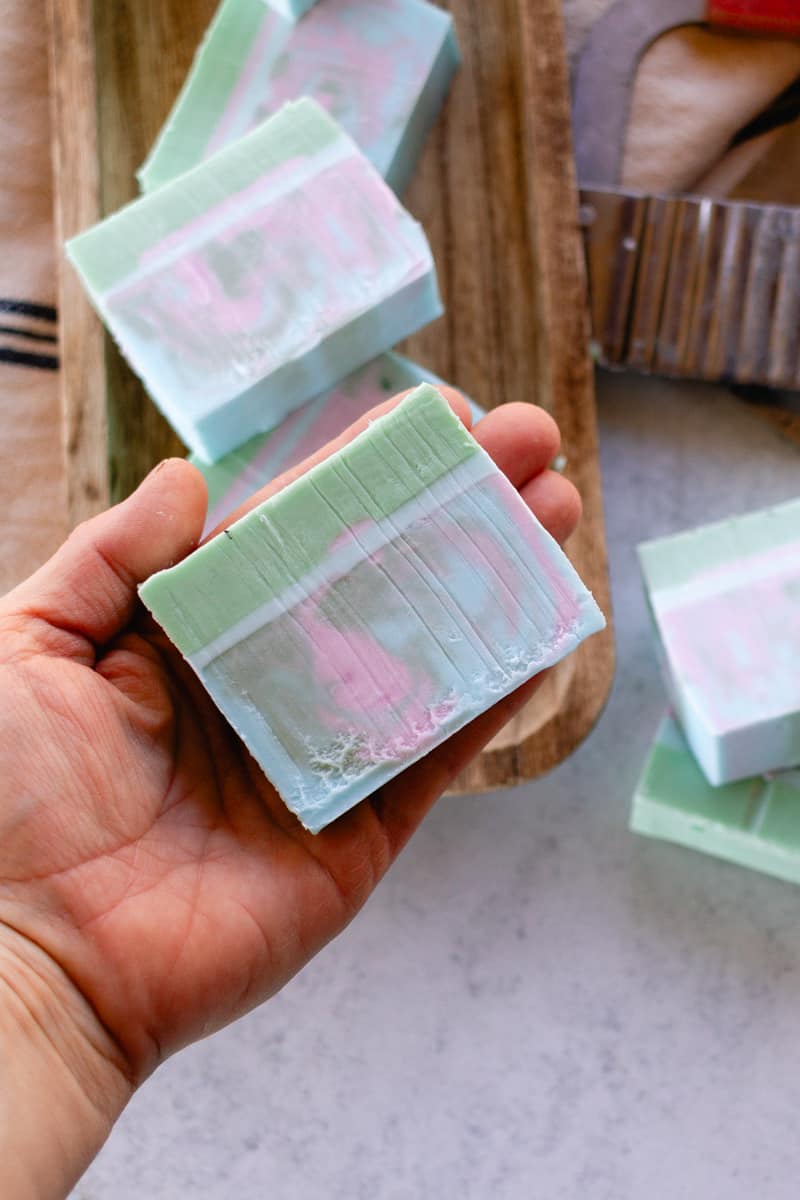
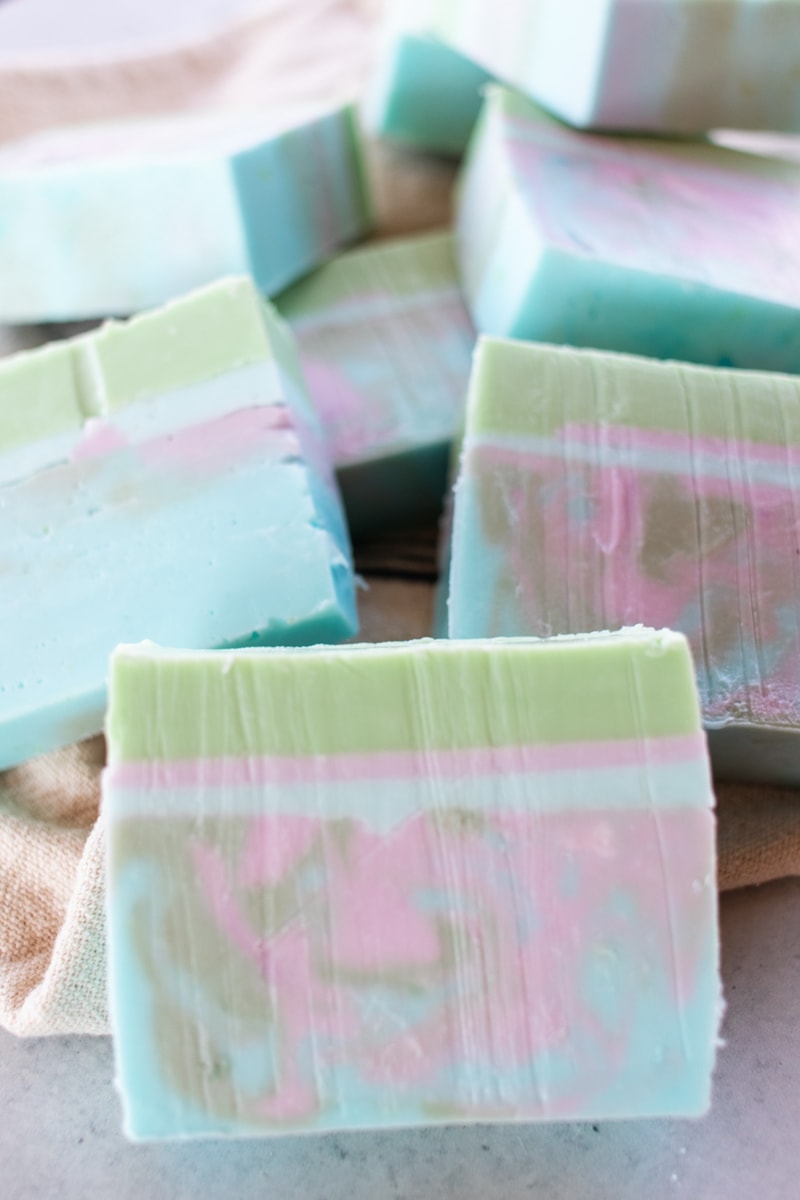
Step 3: Add your essential oils for fragrance once the soap base has melted completely. I use 20 drops of helichrysum, 20 drops of juniper berry, and 10 drops of jasmine.
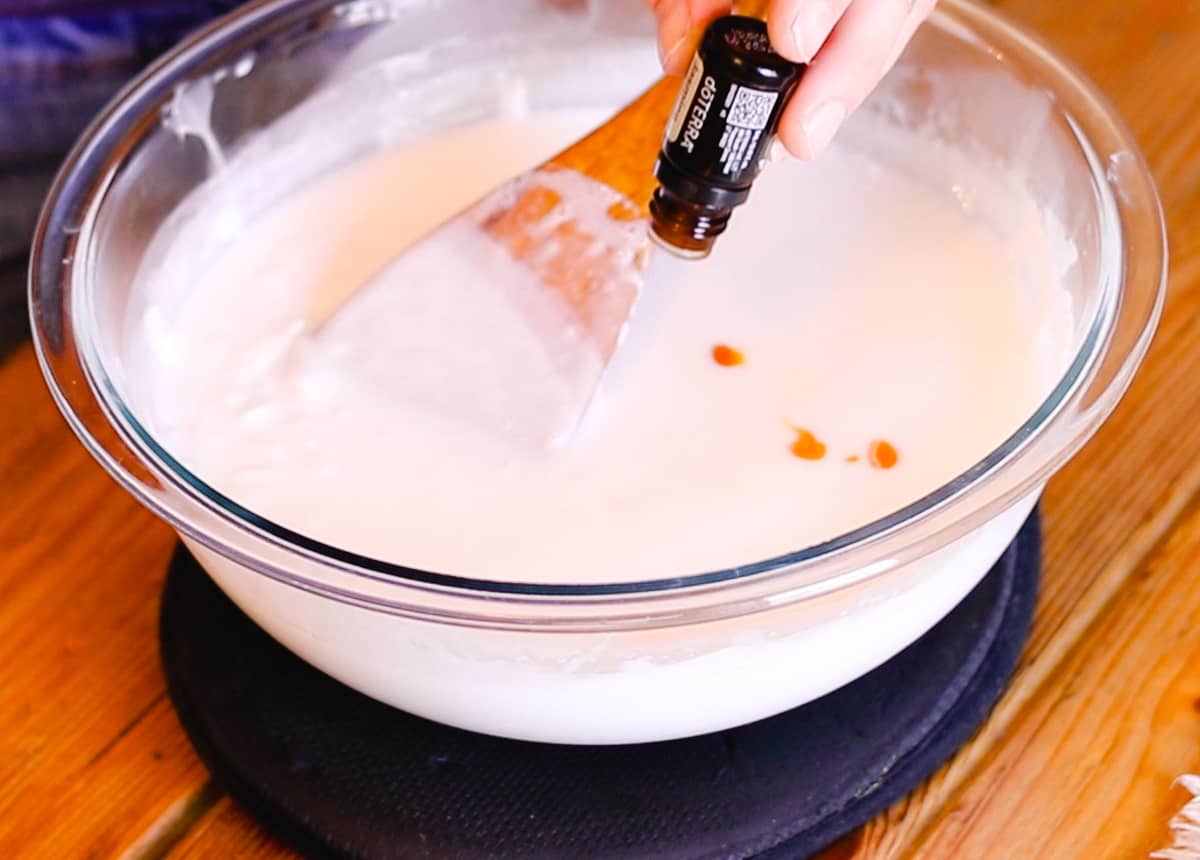
Step 4: Equally divide the melted soap base into three different containers. You’ll have a separate container for each of your chosen three colors. Drip the dye into each container, beginning with 10-15 drops, mixing thoroughly, and then adjusting until you achieve your desired hue.
Note: You can use as many different colors as you like, just as long as you have a container for each.
Step 5: Prepare your silicone mold and alternate pouring each color into the mold to create a marbled effect.
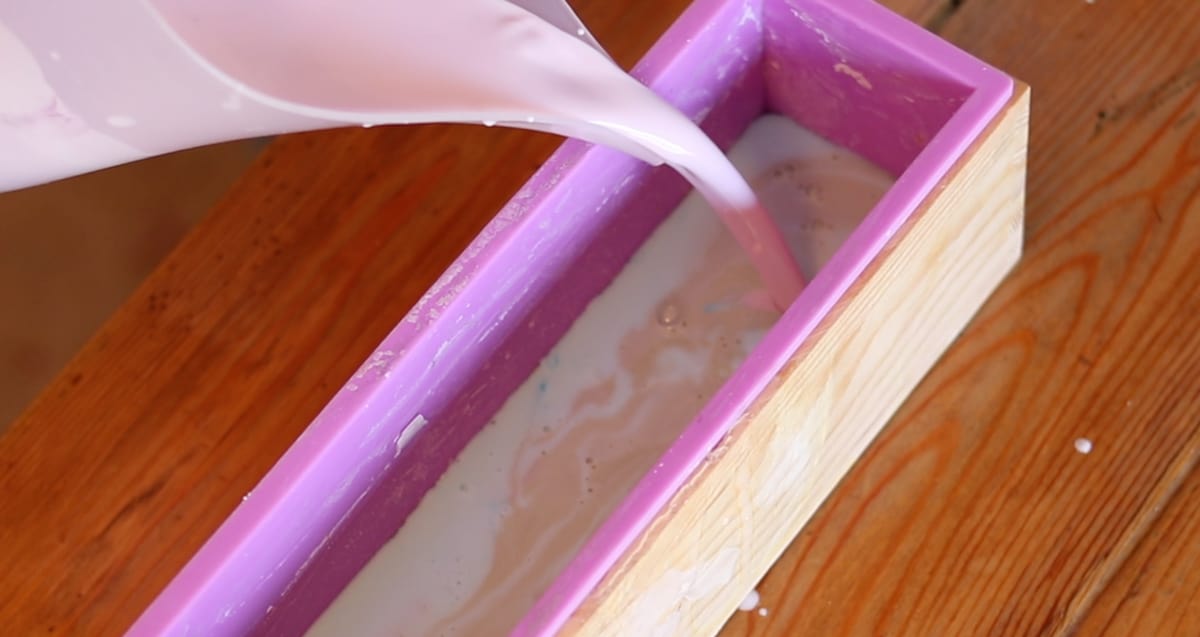
Step 6: Continue the layering process until all colors have been used. For a swirled marbled effect, use a skewer to swirl the top layer. See this swirl soap bar recipe as an example.
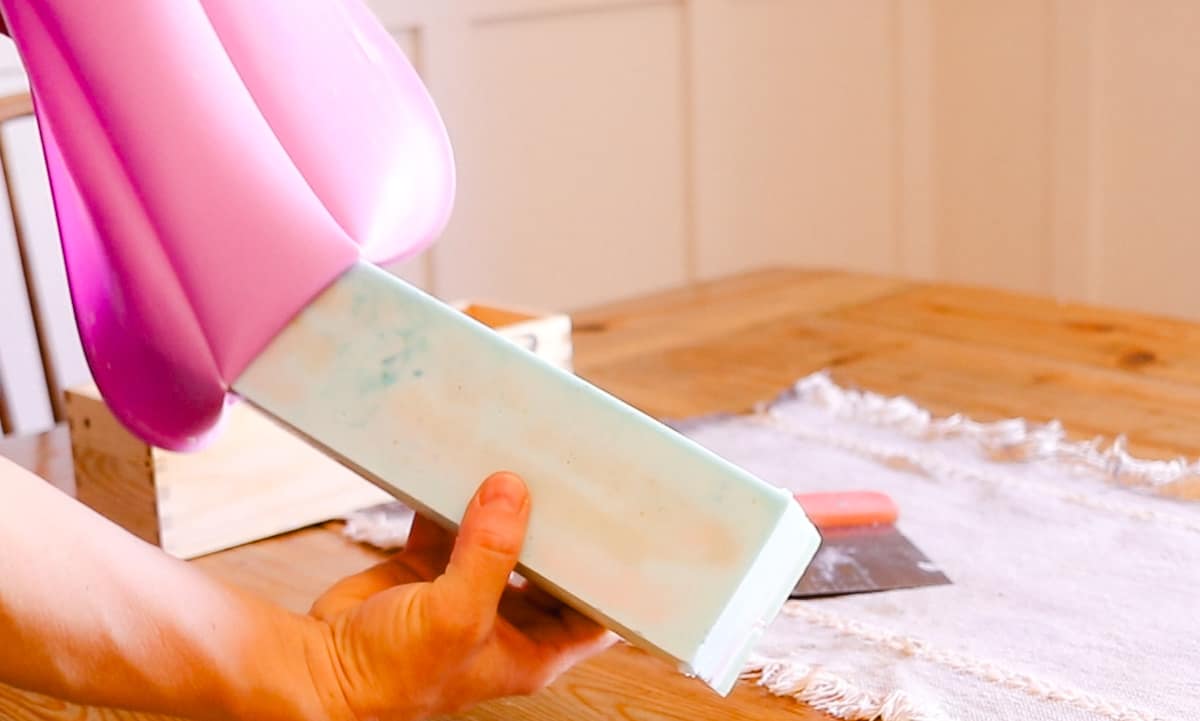
Step 7: Allow the soap to harden completely before removing it from the mold and slicing it into bars.
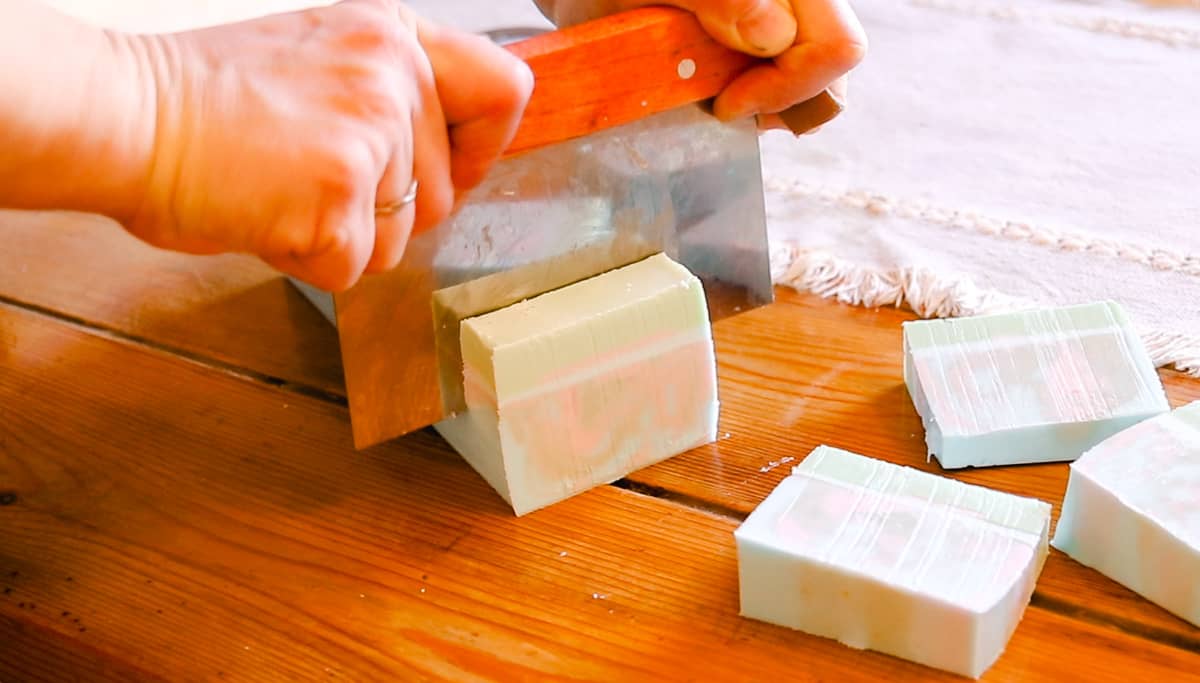
Tip: I do recommend allowing the individual bars to set overnight before using. This ensures they are completely dry and ready to use.
How to store
- Bars can be wrapped individually in wax paper or plastic wrap to preserve freshness.
- It’s best to store bars in a cool, dry place away from sunlight to extend shelf life.
- Consider eco-friendly boxes and labels for gifting.
- Airtight packing will ensure the preservation of the delightful aroma and quality of your soap.
Shelf life
These soap bars will keep for up to one year and beyond with good storage practices. Keep them sealed in a cool, dry, and dark location for best results.
Tips
- Though not required, a thermometer is handy for monitoring the temperature when melting the soap base. I suggest keeping it around 150°F. While going above this temperature won’t necessarily ruin your soap, it could decrease its shelf life.
- When experimenting with fragrance, remember that less is more. Start with a few drops and increase according to your preference.
- Don’t overthink the layering process. It’s not as technical as it may seem. Experiment with it and see how it turns out. That’s the beauty of hand-crafted soap; it’s supposed to look unique and organic. As you can see in the pictures, it’s really a “swirl of colors.” To get layers, you would pour in one color at a time, let it set up, then add the next layer of color.
- You can get creative with using different EOs to scent your bars. I made these with a heavy fragrance to give as gifts; if you prefer a lighter scent, reduce the oils by half.
- Be sure to use skin-safe dyes.
- While most melt-and-pour bases come in 2 lb blocks, I used 3 lb to fill my mold all the way. You can always adjust the recipe to make only 2 lbs.
Fragrance notes
You can use fragrance oil or essential oils to scent your soap. Aim for about 0.3 ounces of oil per pound of soap. For example, if you used a 2 Ib block of soap base, you would add 0.6 ounces of scented oil.
Where to get your soap base
Here is a great economical option that produces a professional-quality bar, though it’s not the most natural option.
Whenever possible, I like to use bases with more natural ingredients. That’s why I love this soap base from Brambleberry. It’s perfect for people like me who are looking to reduce the use of synthetic ingredients in their skin-care products.
Benefits of making your soap
I love melt-and-pour soap because it’s a no-fuss process that anyone can have fun with. There’s no lye or long wait time for curing. Plus, you still get to have all the freedom of customizing your soap with your favorite scents, colors, or add-ins.
Another benefit of making your soap at home is getting complete control over what goes into your product. This is especially important when the ingredients will be applied to your skin – a big pro for those looking to curate a natural body care routine.
Because we are making this soap ourselves, there are significant cost savings when compared to buying hand-crafted soap from a boutique soap seller.
Family members and friends absolutely love thoughtful and hand-made gifts. This soap is always well-received and raved about when given as a special gift to loved ones.
Choosing the best soap mold
There are many options to choose from when picking out a mold for your DIY soap bars. Here are some favorite ideas:
- Silicone molds: My personal favorite, and what I choose to use in this recipe, is a silicone mold. They are non-stick and super easy to remove the loaf of soap from. They also come in a variety of sizes, shapes, and colors.
- Wooden molds: These can be useful for larger batches. Make sure to line them with parchment paper to prevent sticking.
FAQs
A melt-and-pour soap base is a ready-made soap base that comes in a variety of ingredient options, from coconut oil to shea butter or even goat milk. It’s ideal for beginner soap makers as there is no handling of lye required; simply melt the base and add in your favorite scents or colors.
No, that’s the great thing about this recipe. All you need to do is pour the mixture into your mold and let it harden. It’s ready to use as soon as it has dried completely!
More fun soap recipes to try
- Honey Oatmeal Soap Recipe
- Lemon Scented Coconut Milk Soap Recipe
- Sea Salt Soap Bar Recipe
- Shea Butter Soap Recipe
- Homemade Goat Milk Soap
Coconut Oil Melt and Pour Soap Recipe No Lye
Equipment
- Double boiler (or saucepan)
- Thermometer optional
Ingredients
- 3 pounds Coconut oil soap base
- 40-50 drops Essential oils for fragrance, You can also use skin-safe fragrance oil.
- Liquid dye for coloring, Use skin-safe dye.
Instructions
- Start by cutting up the coconut oil soap base into small, evenly-sized cubes.
- Slowly melt the soap base over low heat in a double boiler, stirring occasionally. If using a thermometer, aim to keep the temperature at or below 150°F to preserve the soap's quality.
- Add your essential oils for fragrance once the soap base has melted completely. I use 20 drops of helichrysum, 20 drops of juniper berry, and 10 drops of jasmine.
- Divide the melted soap base equally into three different pouring containers. You'll have a separate container for each of your chosen three colors. Drip the dye into each container, beginning with 10-15 drops, mixing thoroughly, and then adjusting until you achieve your desired hue.
- Prepare your silicone mold and alternate pouring each color into the mold to create a marbled effect.
- Continue the layering process until all colors have been used. To create a swirled marble effect, use a skewer to swirl the top layer.
- Allow the soap to harden completely before removing it from the mold and slicing it into bars.


Dear Laura,
This is indeed a simpe and efective way of making your 0wn soap.
Thank you very much for the. isnstructions etc. One’s natural fears of losing the purity of the process by picking up the ingredientsfrom the market itsellf doesnt
interrupt reading one f the finest recipes i ‘ve come. across.
Best wishes,
Ranjana
Do you have any recommendations for the liquid dyes?
You should be able to purchase from Amazon. Just be sure to look for “skin safe dyes”.
Could this recipe be made with a shea butter soap base? or any other soap base? i just dont have access to coconut oil soap base. Should i add some coconut oil for moisture or will that affect the end result?
Hey Natalie, I have several other melt and pour soap recipes using different bases. Take a look around our blog, I’m certain you will find one you like.
I love this! You got me into making soap for me and my family and starting my own business (coming soon called “The Soap Store”) for it at the age of 20 ! I really am thankful for your inspiration !