This post may contain affiliate links. Please see our disclosure policy.
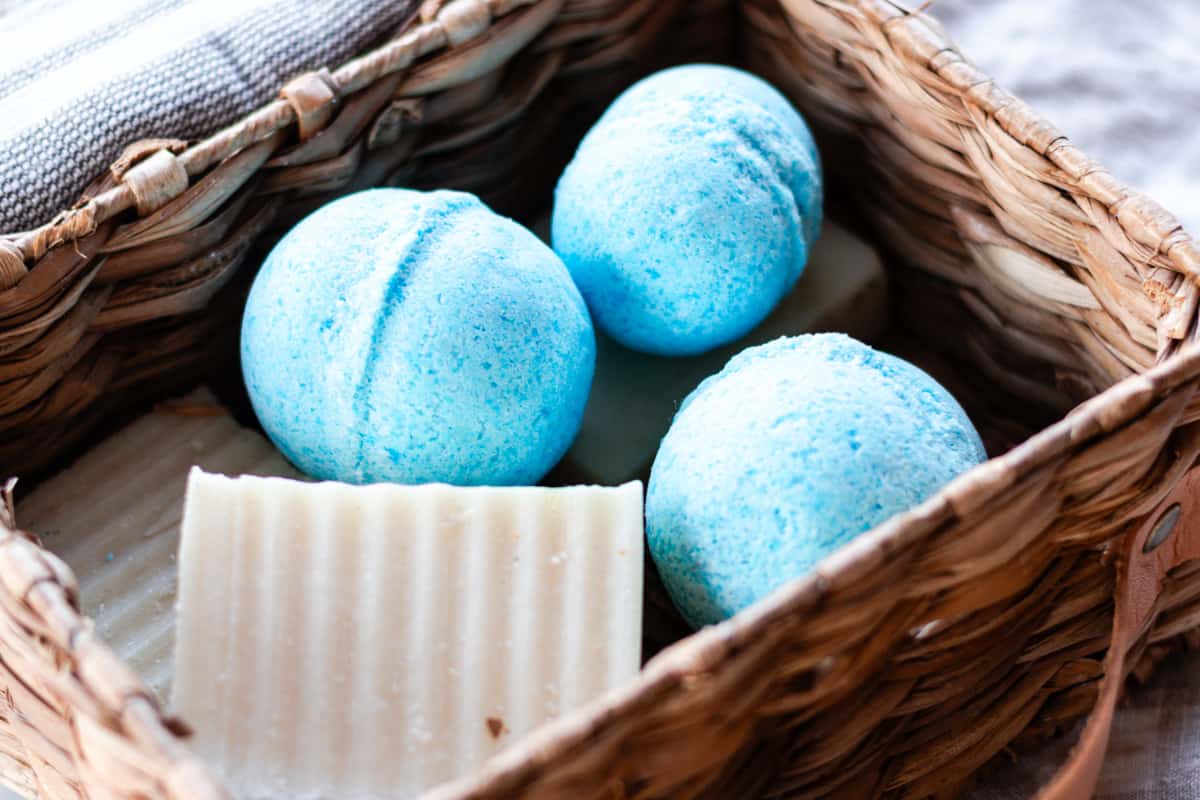
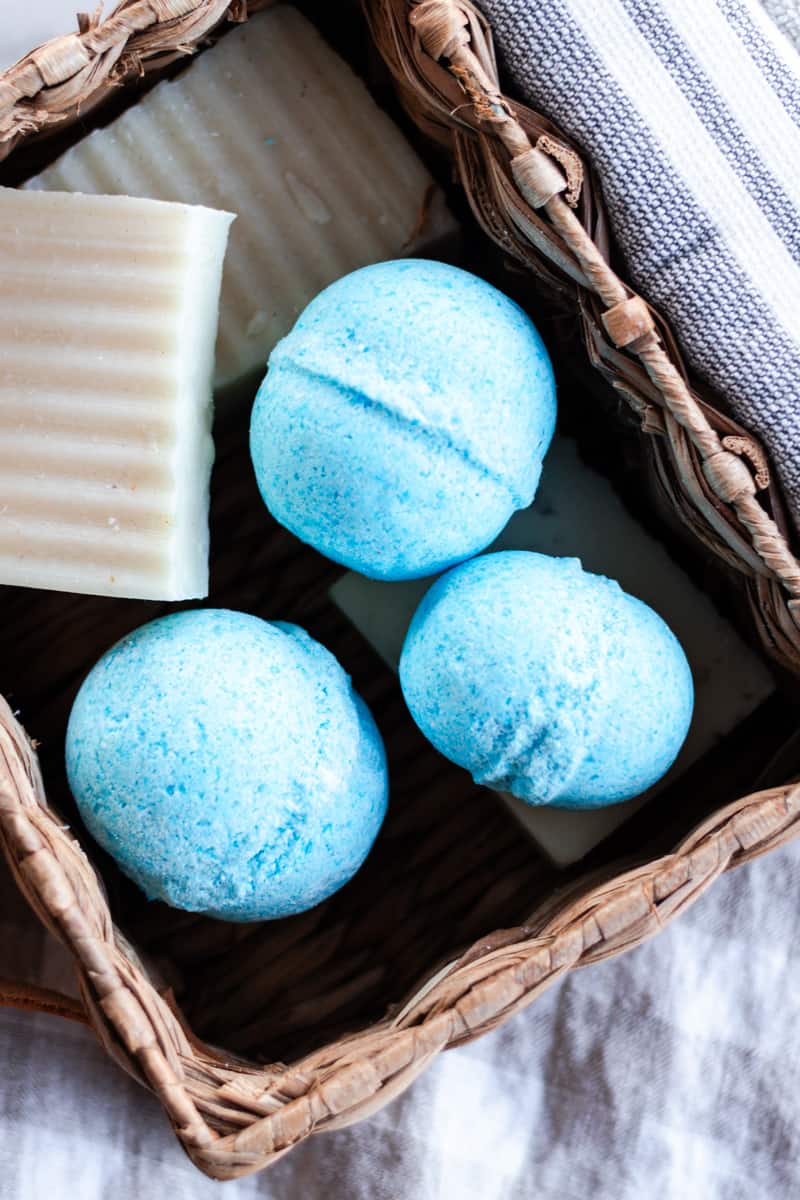
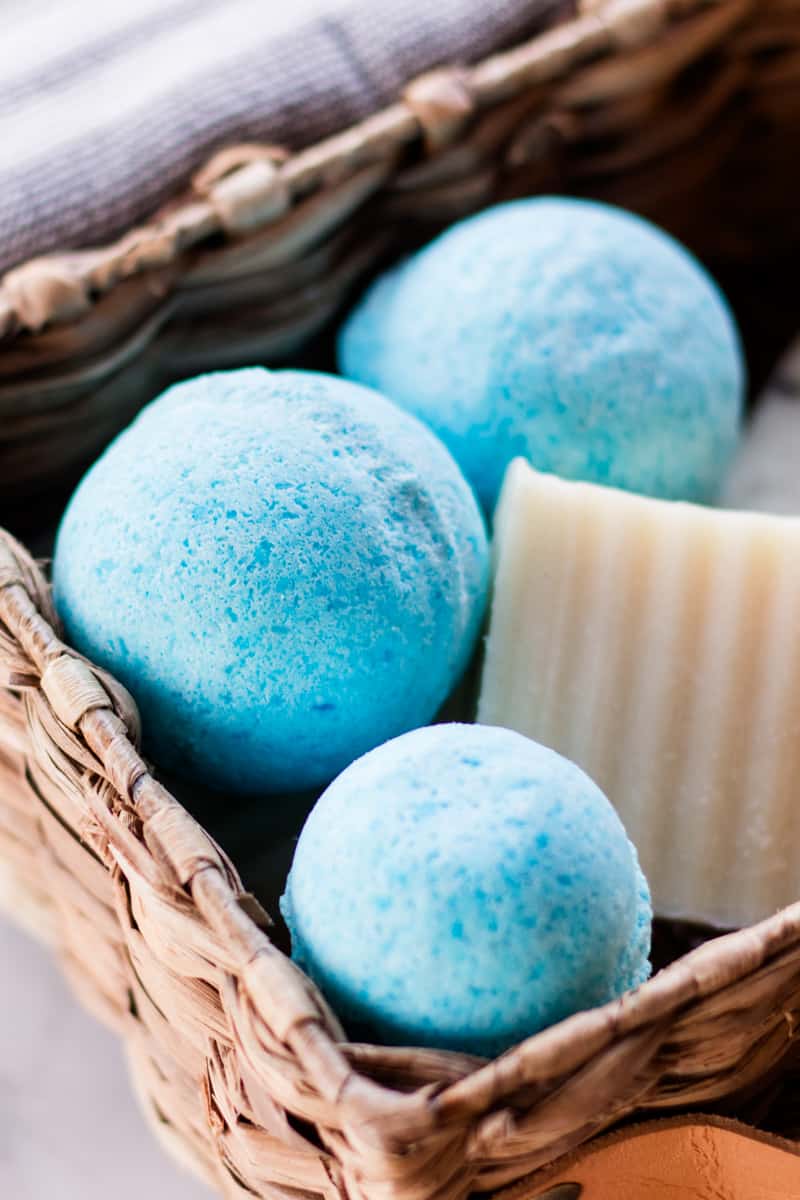
Convert your shower into a spa with a homemade shower bomb! You’re sure to love the aroma and the experience. Learn how to make cute shower bombs with my simple recipe below!
Have you heard of shower bombs before?
You use them just like your typical bath bomb recipe, but instead of being placed in your bath water, they sit on the shower floor and release a gorgeous aroma while you shower.
Not convinced? Well, why not try them out yourself?
My homemade recipe for shower bombs is in this post. I can’t wait for you to see how amazing they are!
Homemade shower bombs
Ingredients:
- 1/2 cup (5 oz) of baking soda
- 1/4 cup (2.2 oz) of citric acid
- 1/4 cup (2.2 oz) of Epsom salts
- 20 drops of lime essential oil
- 20 drops of helichrysum essential oil
- 10 drops of liquid food coloring
- Witch hazel (just a few spritzes as needed)
Note: Please see the “Shower Bomb Tips” section for helpful tips and tricks when making shower bombs.
Instructions:
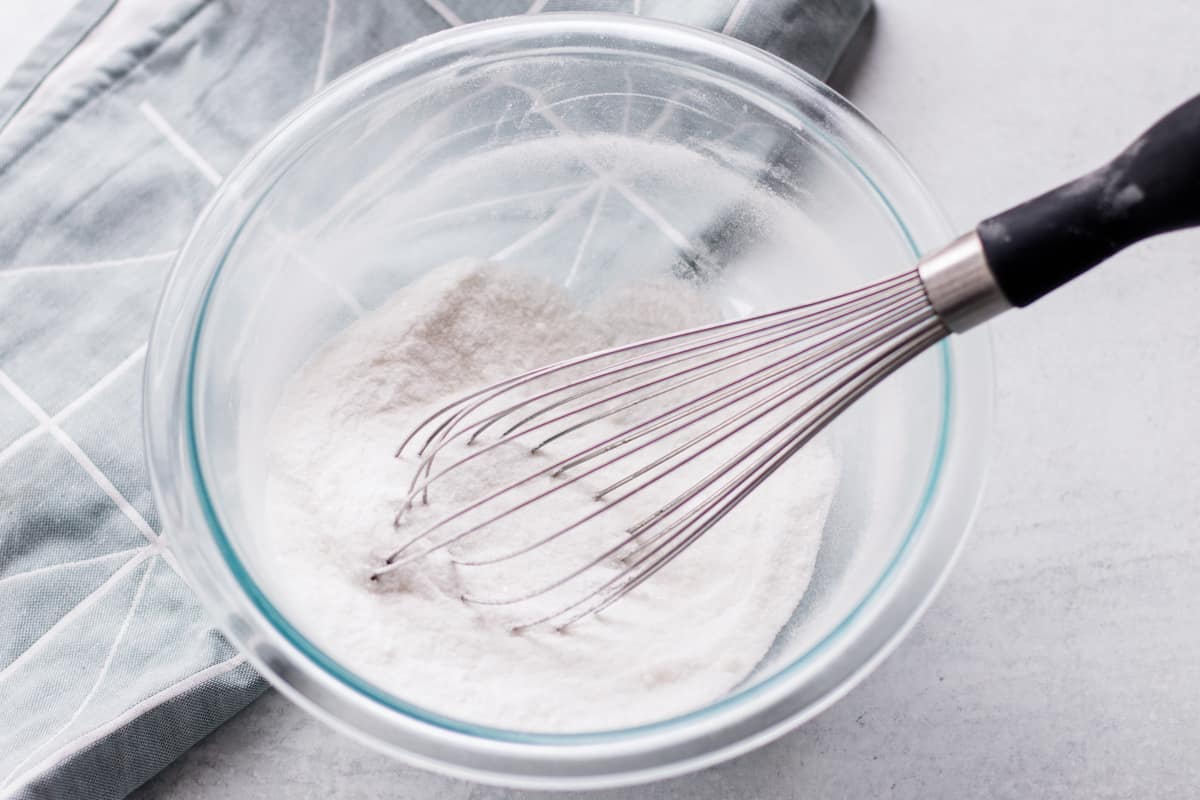
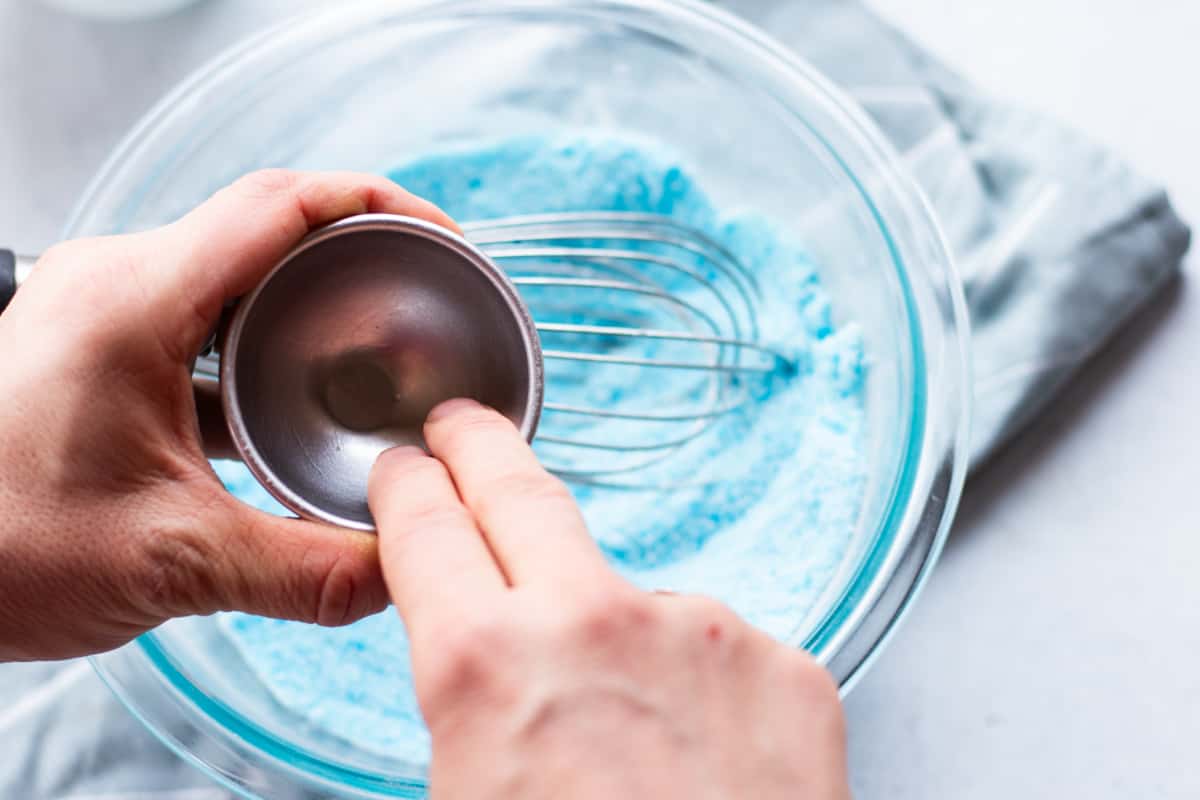
Step 1: Mix all the dry ingredients together in a medium-size bowl.
Step 2: For these next steps, work quickly, as the liquid will start to fizz when added.
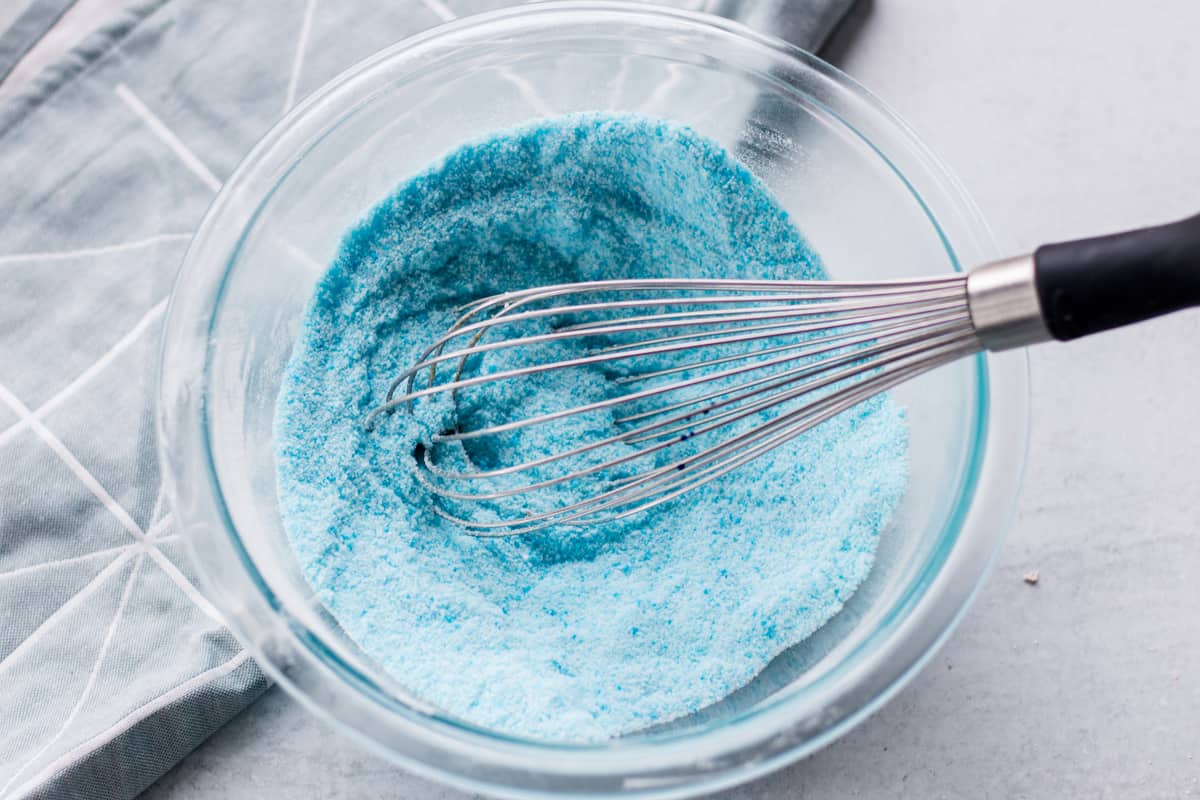
Step 3: Quickly add your essential oils and liquid colorant. Mix with your hands or a whisk until well incorporated.
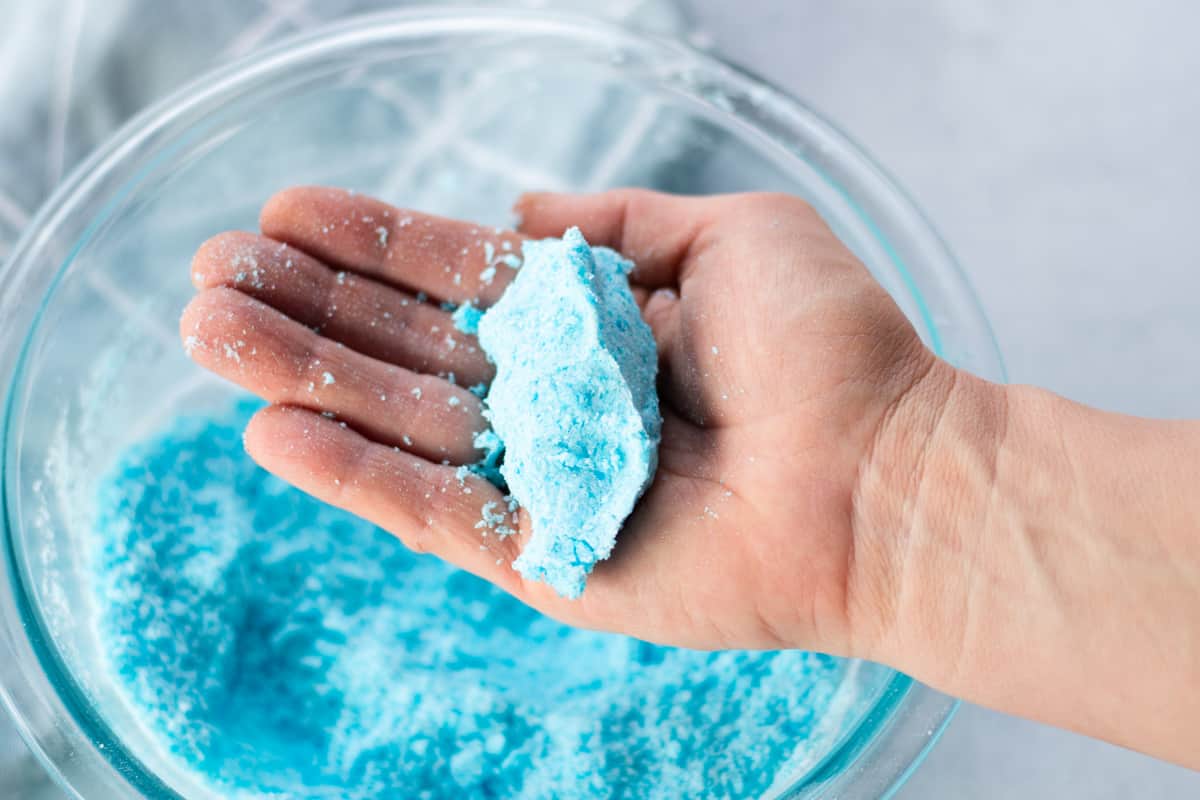
Step 4: You’ll want the shower bomb to resemble kinetic sand at this point. If it still feels crumbly, add a few extra spritzes of witch hazel. Then, mix again with your hands until you get the right consistency.

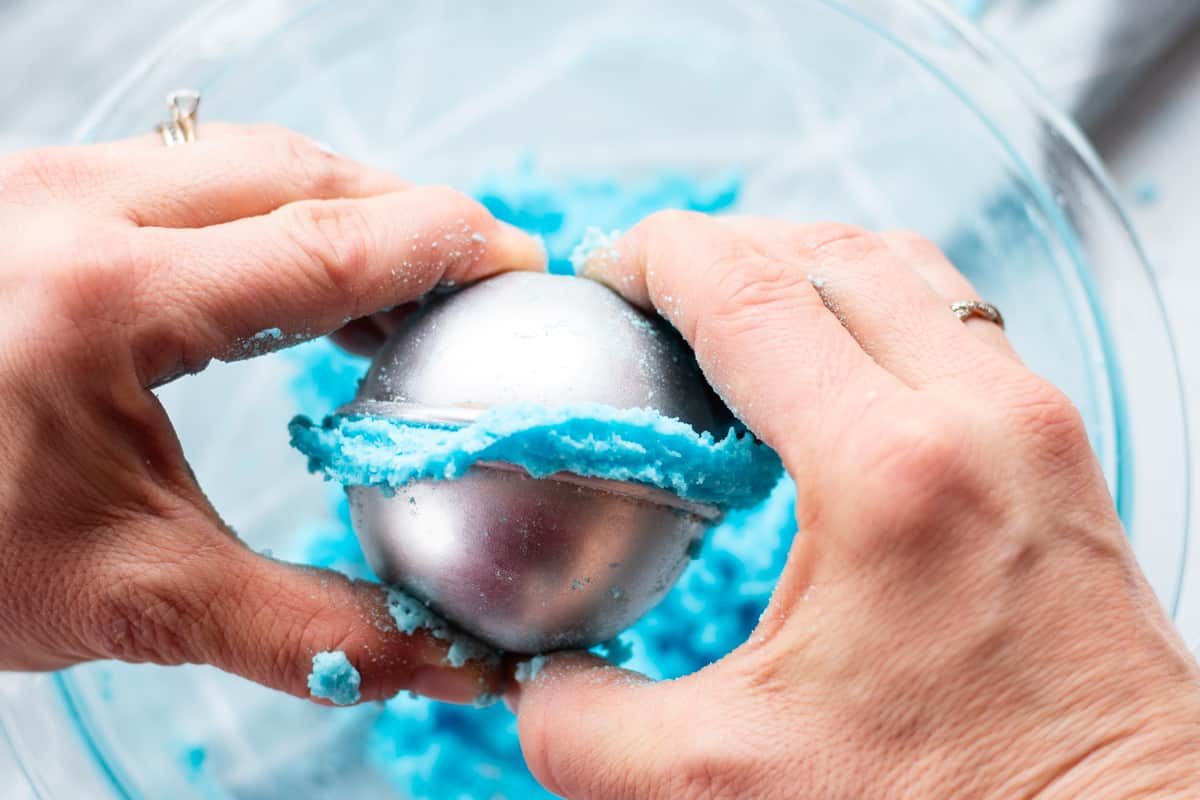
Step 5: Next, prepare your bath bomb molds by greasing them with a trace of oil. (I used castor oil, but any oil will do.)
Step 6: Add the mixture to both sides of the bath bomb molds and firmly press the two halves together. Wipe any excess mixture off the sides and set it aside to firm up.
Pro tip: You’ll want to overflow each half of the mold with the shower bomb mixture so that it really compresses when you squeeze the two halves together.
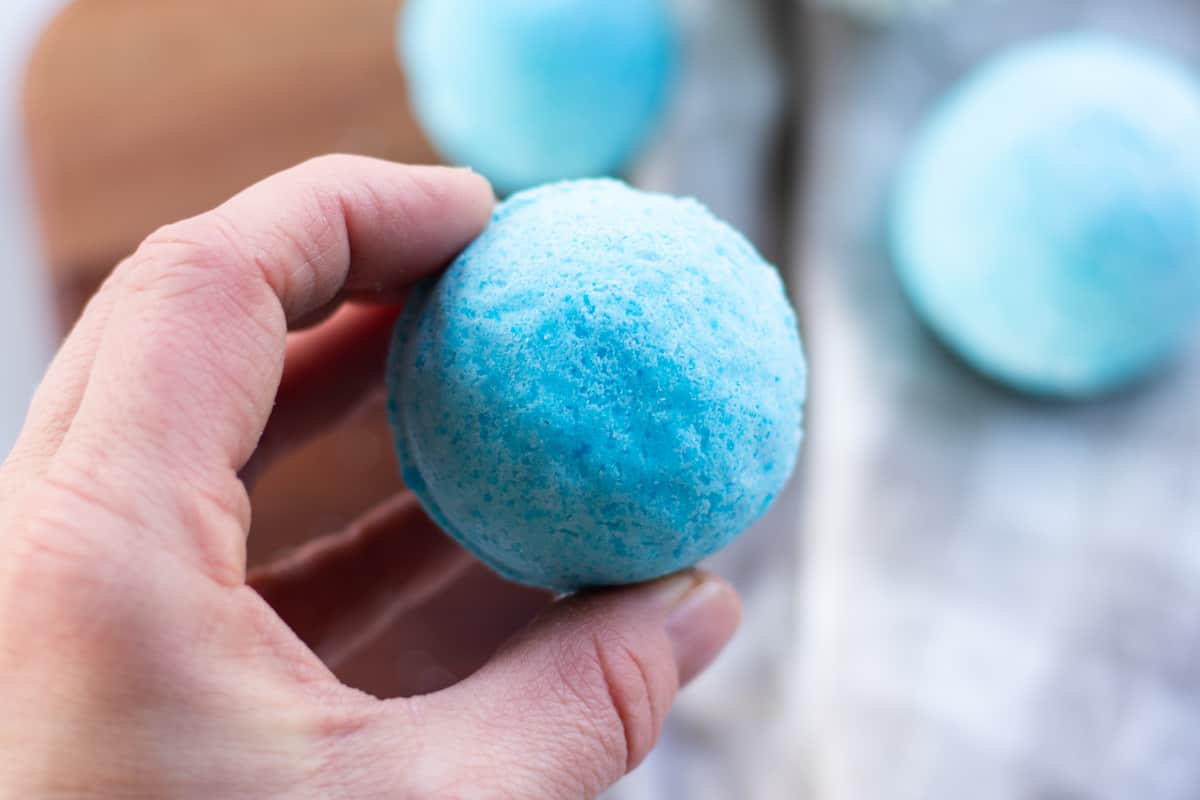
Step 7: Allow the molds to sit for 24-48 hours or until completely dry, and then pop the shower bombs out of the molds ready to use.
Pro tip: For metal molds, you will likely need to tap the sides of the mold with a spoon or butter knife to help get the shower bombs to release.
How to use shower bombs
Nothing is as easy as a shower bomb! Simply plop one on your shower floor, turn the shower on, let it dissolve, and wash yourself as usual.
The shower bomb will slowly release a wonderful, calming aroma while showering, which works wonders for a frazzled mind.
I like to use them in the mornings, as they help wake me up better than hot coffee, haha!
You could also use them in the evening to help wind down after a long day.
The choice is yours!!
Benefits of Homemade Shower Bombs
Here are several reasons to make shower bombs at home!
Natural Ingredients
Unlike commercial shower bombs, which usually contain harmful chemicals and are created in a melt-your-fingers-type factory, homemade shower bombs are made with loving care, using safe and non-toxic ingredients.
Baking soda, Epsom salts, citric acid, essential oils, and dried herbs or flowers are some of the usual natural ingredients you’ll find in homemade shower bombs.
Cost-Savings
Another benefit of making your shower bombs at home is you save a fair amount of money rather than buying in-store.
Store-bought shower bombs can be expensive, especially if you use them frequently, whereby you can make several shower bombs out of one recipe when they’re homemade.
Customization
You can choose how your shower bombs look and smell, as well as the shapes and sizes of the molds.
There’s seriously no limit to how you can customize these beauties! I personally use metal molds, but that’s only because that’s what I already have on hand.
I’ve heard silicone molds work very well, making it easier to remove the shower bombs once they’ve set up, but they won’t pack as tightly.
Shower bomb tips
- Try not to overdo the liquid! If your mold starts expanding right away when you add the mixture, it means it’s probably too wet to begin with.
- If the mixture is too dry, it will not hold its shape, so add an extra spritz of witch hazel as needed.
- The shower bomb mixture should hold its shape when you squeeze the ingredients together, but not too much so that it becomes stiff.
- My shower bomb recipe doesn’t contain oil, so the shower floor shouldn’t be slippery after use, although it’s always best to be extra cautious and rinse the shower floor after use.
- You can switch up the essential oil fragrances if you like – other citrus oils work nicely, as does lavender or peppermint for a wake-up call!
Yes, absolutely! Shower bombs dissolve in water just like bath bombs, so you can use them in the same way. If you’d prefer a bath bomb specifically designed for your soak, check out my colorful homemade tropical bath bombs or my homemade bath bombs without coconut oil for a great alternative!
Shower bombs are more about the scents and aromas than anything else. The essential oils in shower bombs help relax the mind, making the shower feel more like a spa!
Perfect for relaxing moments if you ask me.
Shower bombs, like homemade shower melts, release their aroma into the shower’s steam, whereas bath bombs release it into the bath water. Otherwise, they’re pretty similar.
If stored correctly, homemade shower bombs can last up to six months. However, for best aroma results, I recommend using them within three months.
Storage of shower bombs
It’s best to wrap the finished shower bombs individually in parchment paper and store them in a dry space away from heat and light sources.
Keep them well away from wetness, too; otherwise, they’ll dissolve before you get to use them.
A closet or dresser drawer would be an ideal location for storage – just not your bathroom cabinet, as the humidity might get to them.
Creative Variations
The possibilities are endless with shower bombs! Here are a few creative ideas you could try out:
Colorful Shower Bombs
Adding a pop of color to your shower bombs makes the experience even more fun!
In the recipe I share in this post, I use a touch of liquid food coloring, but you could try alternatives like beetroot powder, spirulina powder, or even turmeric powder to get those vibrant colors going!
Simply mix a small pinch into the dry ingredients before adding the wet ingredients, and be sure to wear gloves to avoid staining your hands. You can also learn more about coloring these in my bath bomb recipe for kids post.
Calming Blends
You could try making shower bombs with lavender essential oil, which can help promote relaxation and calmness.
I would say research the benefits of different essential oils before you use them to find what works best for your needs.
Or check out my relaxing bath bomb recipe here!
Seasonal Scents
Why not celebrate the changing seasons? Add cinnamon and nutmeg to create a cozy, warm scent in the fall.
Or try peppermint, pine, or eucalyptus in winter for a refreshing, stimulating scent?
And citrus oils, of course, are hard to beat in Spring and Summer!
Can I give shower bombs as gifts?
Yes absolutely! Shower bombs make perfect homemade gifts. Here are some ideas:
- Cellophane bags are a simple, affordable option for packaging shower bombs. Tie them up with a cute bow and a handwritten gift tag.
- Gift boxes: If you want to give a more formal gift, consider using a gift box. Craft stores sell these in various colors and styles to match the occasion.
Safety Precautions
- Some essential oils or fragrances used in homemade shower bombs can upset the skin. Therefore, it’s a good idea to do a patch test before using shower bombs, mainly if you’re using them as bath bombs.
- Just be aware that some shower bombs make the shower floor slippery, so keep this in mind when you put the shower bomb in between your feet under flowing water. My recipe in this post doesn’t contain oils that make the shower slippery, but it’s best to be safe and aware.
How long do homemade shower bombs last?
If stored correctly, homemade shower bombs can last up to six months. However, for best aroma results, I recommend using them within three months.
Summary
I do hope you enjoy my shower bomb recipe!
Reach out if you have any questions about making homemade shower bombs, and remember to check out my other posts for DIY bath and body products.
Please remember to leave a review or comment below if you try out this recipe, and let me know how it worked for you!
And if you liked this recipe, you may enjoy making these DIY shower vapor disks next!
Homemade Shower Bombs
Equipment
Ingredients
- ½ cup 5 oz of baking soda
- ¼ cup 2.2 oz of citric acid
- ¼ cup 2.2 oz of Epsom salts
- 20 drops of lime essential oil
- 20 drops of helichrysum essential oil
- 10 drops of liquid food coloring, adjust amount as needed
- Witch hazel, just a few spritzes as needed
Instructions
- Mix all the dry ingredients together in a medium-sized bowl.
- For these next steps, work quickly, as the liquid will start to fizz when added.
- Quickly add your essential oils and liquid colorant. Mix with your hands or a whisk until well incorporated.
- At this point, you want the shower bomb to resemble kinetic sand. If it still feels crumbly, add a few extra spritzes of witch hazel. Then, mix again with your hands until you get the right consistency.
- Next, prepare your bath bomb molds by greasing them with a trace of oil. (I used castor oil, but any oil will do.)
- Add the mixture to both sides of the bath bomb molds and firmly press the two halves together. Wipe any excess mixture off the sides and set it aside to firm up.
- Allow the molds to sit for 24-48 hours or until completely dry, and then pop the shower bombs out of the molds. They are ready to use once hard.


Hello
First off I wanted to say I love your recipes. Have made so many of them and love them all. Simp;e ingredients & so easy to make & each one has been fantastic whether it be for bath or skin.
In the shower bombs, do you have to put in the epsom salts? I don’t see the benefit of it & thought I might be able to leave out, your thoughts?
Keep the new recipes coming!
The epsom salts really just help with the ingredient ratio in order to control the fizz action. If you leave them out, you would need to substitute them with another ingredient.