This post may contain affiliate links. Please see our disclosure policy.
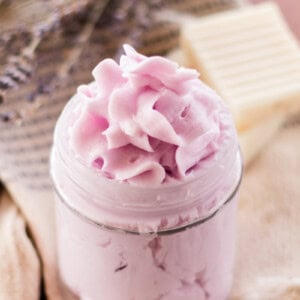
Pamper yourself or a friend with this delightfully rich and moisturizing DIY whipped soap recipe. This soap is easy and fun to make and uses simple, soothing ingredients.
I have always wanted to make a fancy top soap, and for whatever reason, I just kept putting it off. I’ve done fun things with soap bars, like putting a loofah in soap and different things like that, but nothing really fancy.
The opportunity finally came when a friend introduced me to whipped soap! Now, I have heard of it but never actually used it before! So when I tried it for the first time and felt how soft it was, I realized that it was the perfect base to make my ‘fancy top soap,’ as I like to call it!
It was a little intimidating at first, not because of the soap-making part, but getting the beautiful-looking top. But I do think it turned out pretty well, at least in the pictures!
All in all, it’s actually pretty hard to mess up because you can simply scoop it back out and try again! Pro tip: get a piping bag! It will make making your design so much easier.
Update: I had so much fun with this soap, I have since made a DIY whipped foaming sugar soap!
How to make whipped soap
Ingredients
- 1 lb of Bath Butter Base. You can pick any whipped soap or bath butter base. Stephenson has a lot of options on Amazon, but they are not completely natural. I found the best place to find a natural base is Etsy.
- 2 oz of sweet almond oil. Or any carrier oil you have on hand would be fine!
- 15 drops of lavender essential oil. The lavender fragrance is optional but totally worth it!
- 10 drops of lemongrass essential oil. Again, optional, but it does impart a beautiful fragrance.
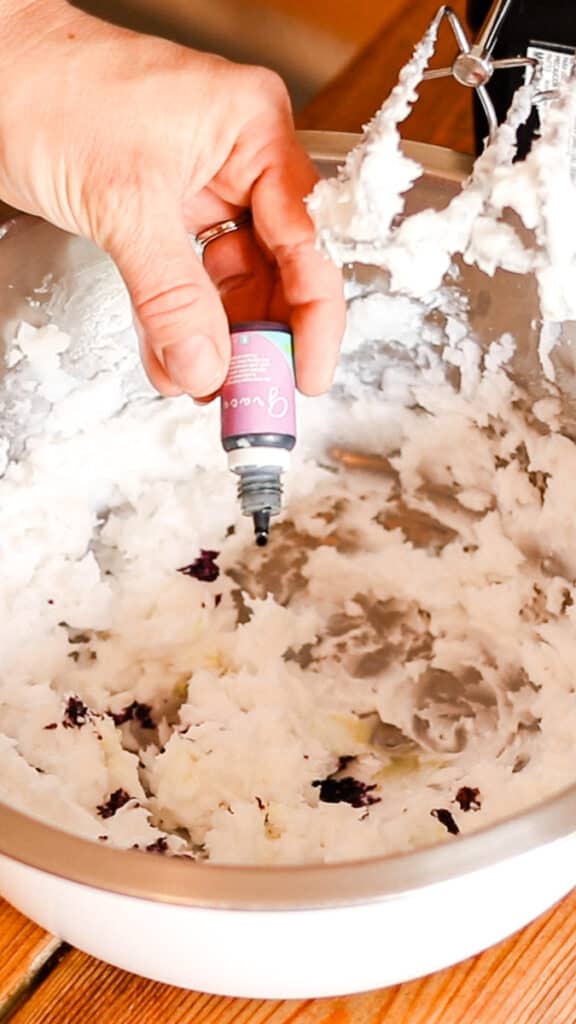
- 5-10 drops of liquid dye. I used about 7 drops of purple dye, though you can always add more for a darker color.
Instructions
Check out the image gallery at the end of the instructions for step by step. I also have a video for reference.
- Begin by gathering your ingredients ahead of time. Everything goes pretty quickly once you get started, so its a good idea to have everything laid out ahead of time.
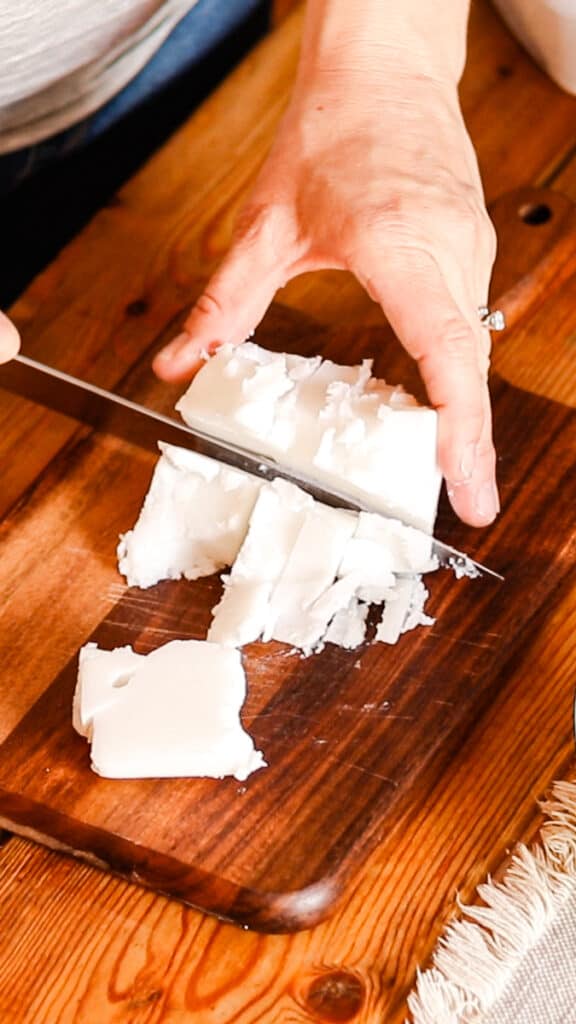
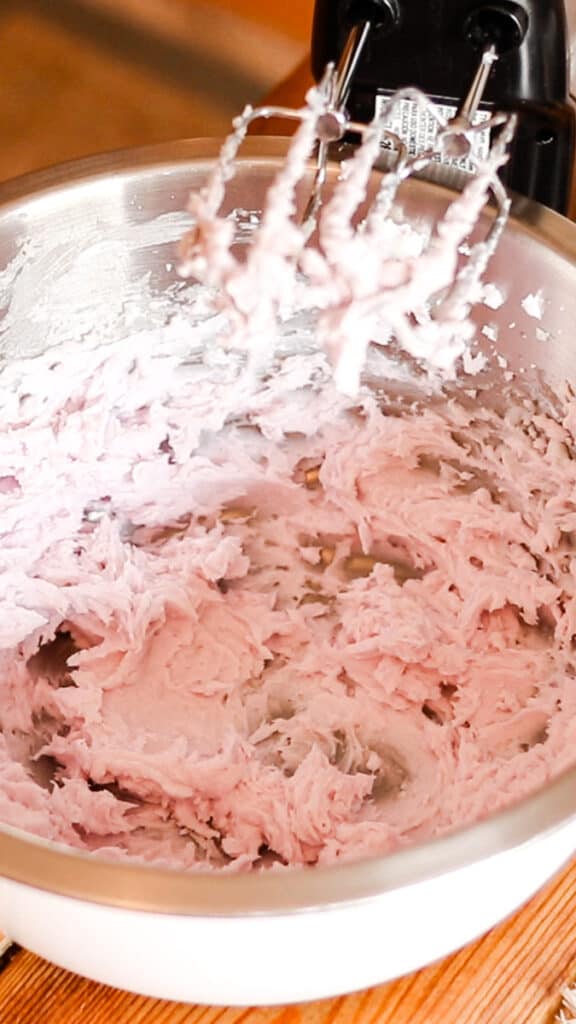
- Cut your foaming bath butter base into chunks and add to the bowl of a stand mixer. I actually use a large bowl and a handheld mixer, though either will work.
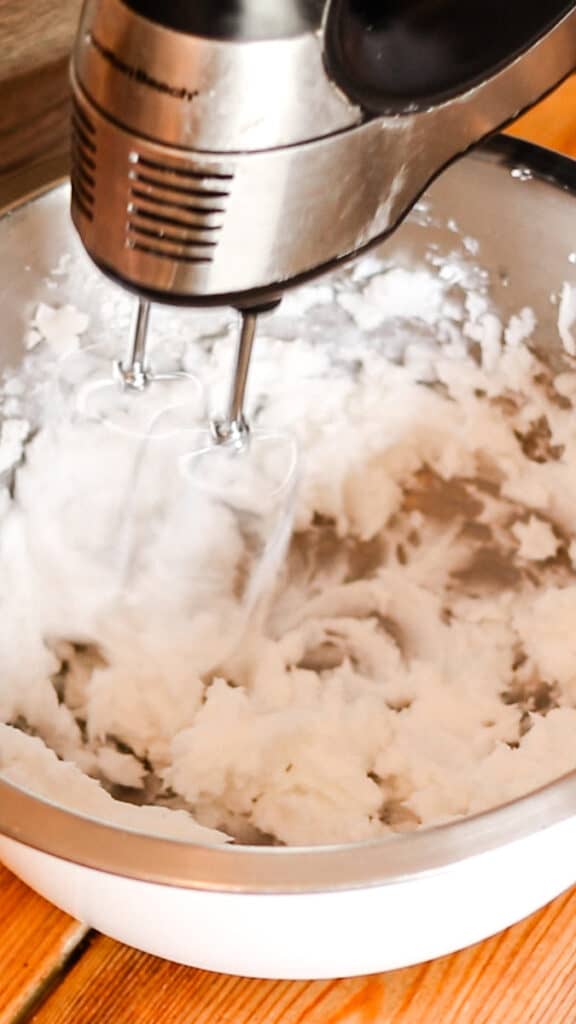
- Then, add in the almond oil and begin whipping the bath butter and oil together at medium to medium-high speed until the mixture softens. Basically, you want to whip it until no chunks remain.
- Add your essential oils and dye.
- Then, whip the ingredients one more time on high speed until the soap becomes fluffy, light, and almost doubles in volume. The amount of time you need to whip can vary depending on the temperature and humidity in your house, but this can take up to 5 minutes.
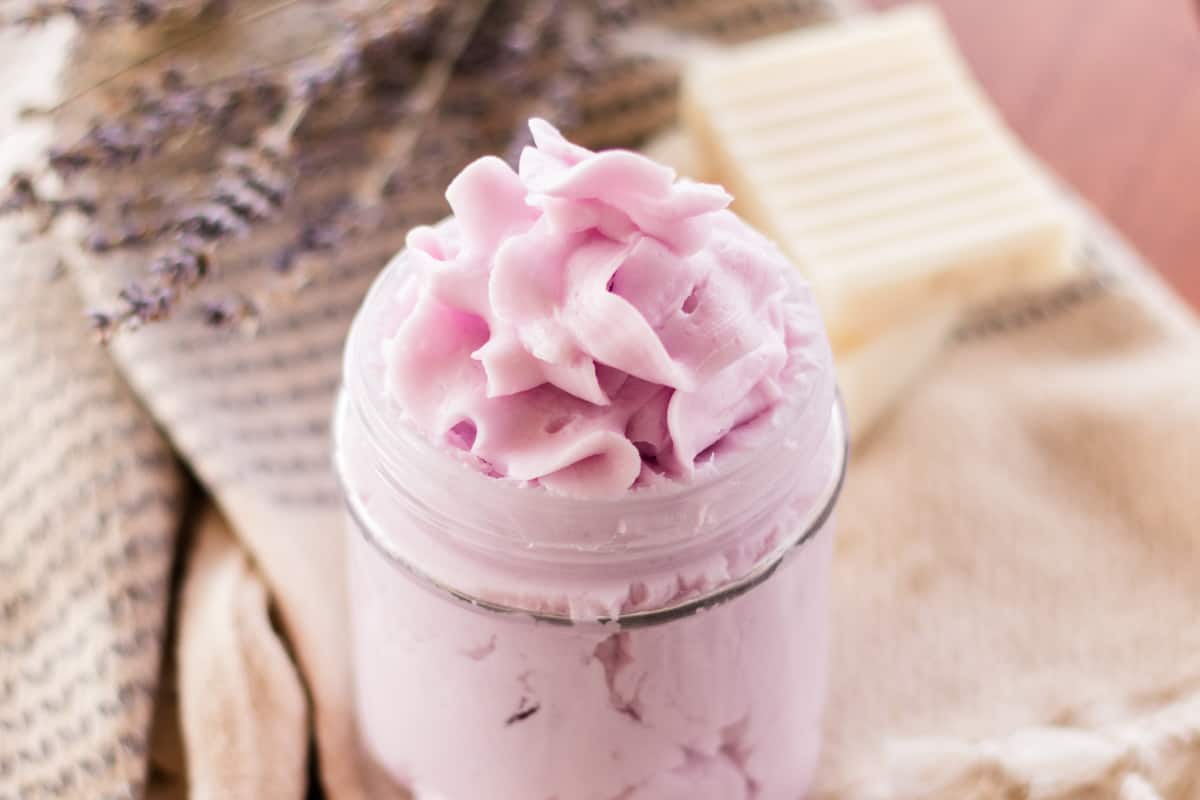
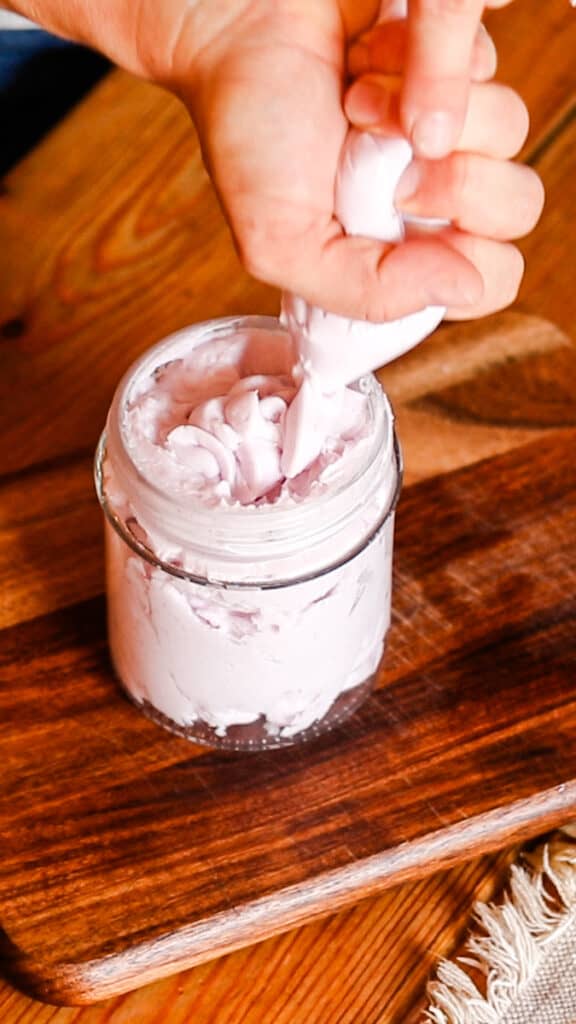
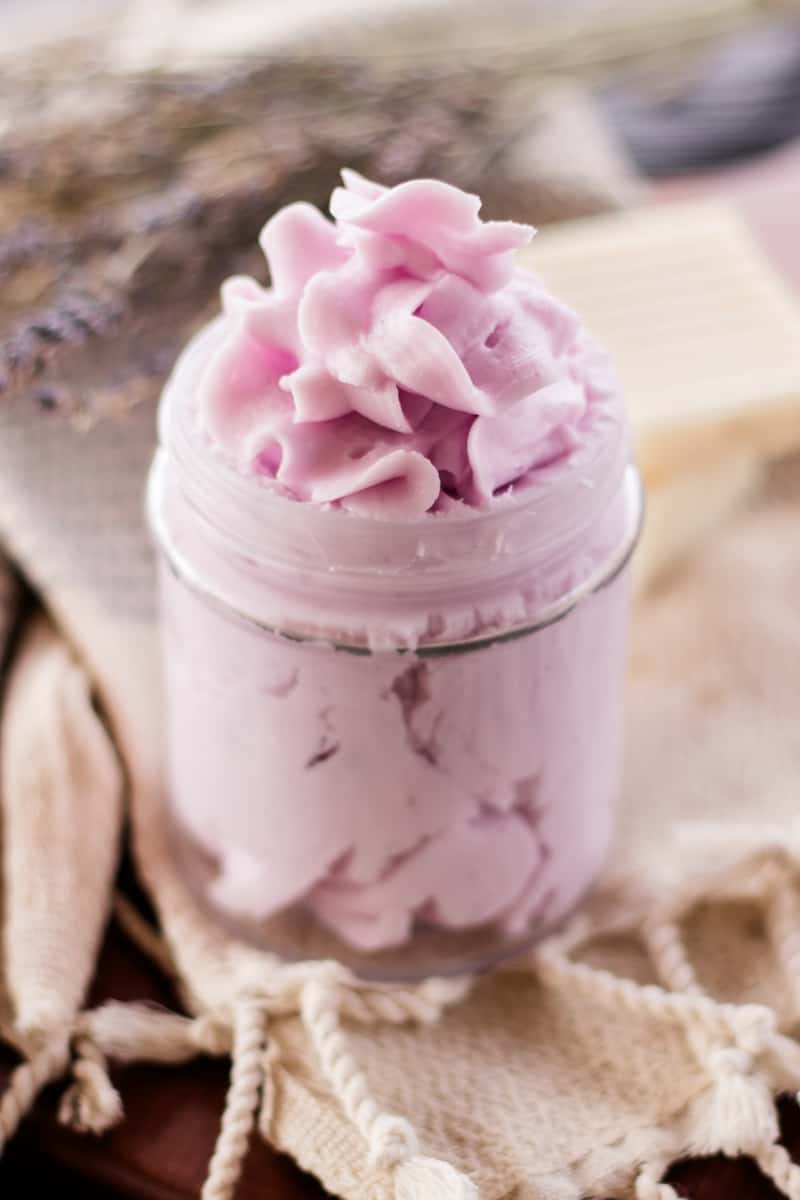
- Finally, transfer the whipped soap to your container of choice and enjoy. For a beautiful aesthetic, I like to use a piping bag to pipe the soap into a clear jar. This creates a charming ribbon effect that everyone will love.
Step-by-step pictures

Recipe tips
- Make sure the soap base is at room temperature for optimal whipping. A cold base will be harder to whip.
- We’re aiming for a light and fluffy consistency, like whipped cream. If you whip for too long, the soap might lose its volume and become greasy. If you don’t whip enough, it will just reharden.
- With that said, It will take several minutes, depending on your mixer, to reach the correct consistency.
- When using a hand mixer, the soap might splatter a bit. Consider wearing gloves and even eye protection if you’re worried about splashes.
- Make sure your workspace and utensils are squeaky clean. This helps prevent any unwanted bacteria from growing in your finished product.
- Liquid dyes can go a long way in the finished product. I definitely recommend starting with less and adding more if needed until you reach your desired shade.
- If you don’t have a piping bag, don’t worry, neither do I. Just grab a zippered bag and snip a few small holes in it. This will still allow you to create a fun, textured, and pretty-looking whipped soap.
Where to get your bath butter base
There are a lot of options for a bath butter base. Here are a few of my favorites.
Stephensons Bath Butter Base: not the most natural, but perfect for first-timers
Vegan Foaming Bath Butter: This one is not as thick of a base as the others but it is vegan!
Bath Butter Base on Etsy: This is the best place to find bath butter bases, in my opinion!
How to use
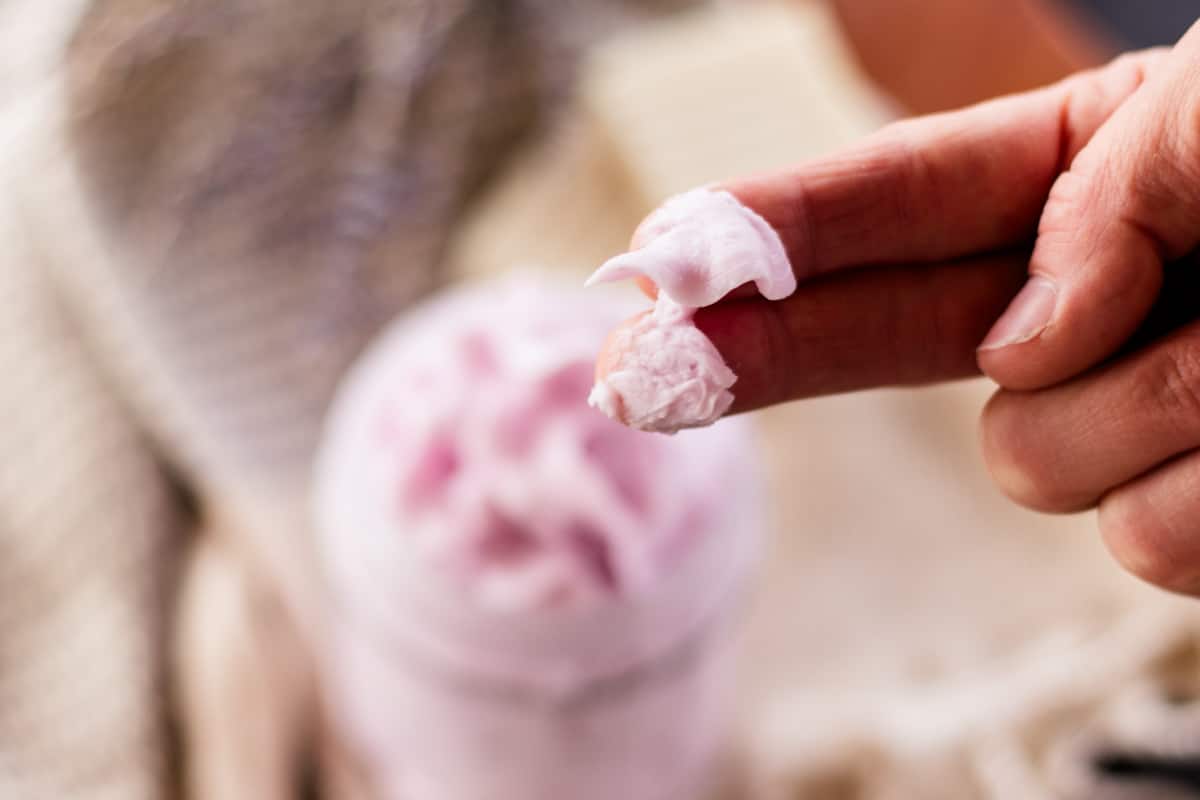
Whipped soap is used in the same way as bar soap; it just has a delightfully different consistency. Simply apply a small amount to the skin, work into a rich, bubbly lather, and then rinse off with water.
You can use whipped soap in the kitchen or bathroom as a hand soap, or in the shower as a homemade body wash, it’s even great as a DIY shaving soap. This cute and refreshing DIY soap also makes a wonderful gift for friends and family.
What is whipped soap?
Whipped soap is a decadently fluffy and creamy soap. It has a light, silky texture that is very smooth when applied to the skin.
You can make the bath butter base from scratch, but this recipe uses a high-quality base that simply has to be whipped in a mixer. It’s the absolute best recipe for getting started with DIY soap.
Depending on the soap base you choose, the ingredients can be all-natural and eco-friendly, which is great for families looking to curate a natural living lifestyle.
Even the essential oil fragrance is optional, so you can keep your skin-care routine as clean and simple as possible. You’re going to love this foaming bath butter recipe.
How to store
We love to use glass jars to store the whipped soap in because they are reusable and eco-friendly and allow you to see the beautiful product that you hand-crafted.
Shelf life
A tip for storing any DIY body product in jars is to thoroughly clean the jars, then wipe them out with rubbing alcohol and allow them to dry completely before adding in your product. This will ensure your whipped soap will keep fresh for many months.
FAQs
Whipped soap and foaming bath butter are the same thing. It is a fluffy, whipped cleansing soap that you use to wash and rinse off.
Adding in the essential oils or fragrance is completely optional, and you can skip this step if you are sensitive to scents.
Yes, you can replace the essential oils with your favorite fragrances. Just remember to keep the fragrance load under 5% of the total recipe volume if you opt to use a fragrance oil rather than essential oils. I always prefer EOs as they are natural, and it is harder to find a fragrance oil that isn’t made with synthetic ingredients.
It is generally not recommended to use a melt-and-pour soap base to make whipped soap. These bases are designed to harden into solid bars of soap, not for whipping.
This is a no-fuss, easy recipe using a bath butter base. It is a perfect way to ease into making whipped soap while still adding a few of our own personal touches.
If you made and loved this recipe, I would love for you to leave a review and let me know how it turned out in the comments below!
If you are looking for more great recipes, check out one of these next!
Easy Whipped Soap Recipe
Equipment
Ingredients
- 1 lb of Bath Butter Base
- 2 oz of sweet almond oil
- 15 drops lavender essential oil
- 10 drops lemongrass essential oil
- 5-10 drops liquid dye, see notes below
Instructions
- Add the bath butter base and almond oil to a standup mixer (or use a hand mixer). Note: you may need to melt it slightly to soften it.
- Whip until no chunks of soap remain.
- Add in your fragrance oils and dye.
- Whip again just until the fragrance and dye are well incorporated. (it should be light and fluffy)
- Scoop the soap into a piping bag if you have one. Otherwise, a zippered bag or a square of plastic wrap will work. Then, just squeeze it into your clean, airtight container.


Where do I buy a butter base?
Amazon. I have one linked in the recipe at the bottom of the post.
At the whipping stage, would it be better to use the wire whisk attachment rather than the beaters for a fluffier soap finished product? Thanx.
Does the whipped soap get hard? I want to be able to decorate the top of my soaps like frosting when it’s still in the mold, then cut it the next day before the curing process. Will it harden like the bar of soap?
I believe this idea would be better for one of the other soap bar recipes.