This post may contain affiliate links. Please see our disclosure policy.
Learn how to make nail polish in just a few simple steps. Making homemade polish is a great way to save money and create your own custom colors. Your nails will look better than ever!
With a little girl in the house, we go through a lot of nail polish. My daughter and I always have fun painting each other’s nails and trying our hand at nail art.
I’ve wanted to make my own polishes for a long time. I already make my own makeup and skincare products, so why not try nail polishes?
I finally figured out the perfect homemade nail polish recipe and I am hooked!
Why You’ll Love Homemade Nail Polish
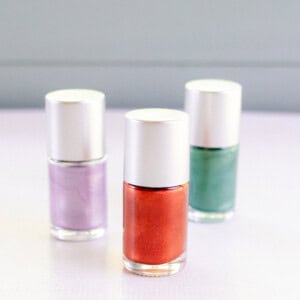
Custom Colors: The best thing about DIY nail polish is creating your own custom nail polish colors! If you have a specific shade in mind or just like to get creative, you will have so much fun perfecting the color of your polish.
Easy to Make: If you want a great project that will be done in just a few minutes, this is it! Making nail polish is surprisingly easy and the finished product is wonderful.
Save Money: Doing your own nails already saves a lot of money, but making your own polish takes it one step further! I buy nail polish suspension base in bulk to keep the cost low and it lasts me a very long time.

What You’ll Need
- Untinted Suspension Base
- Mica Powders
- Miniature Funnels
- Empty Nail Polish Bottles
- Polish Mixing Balls
How to Make Nail Polish
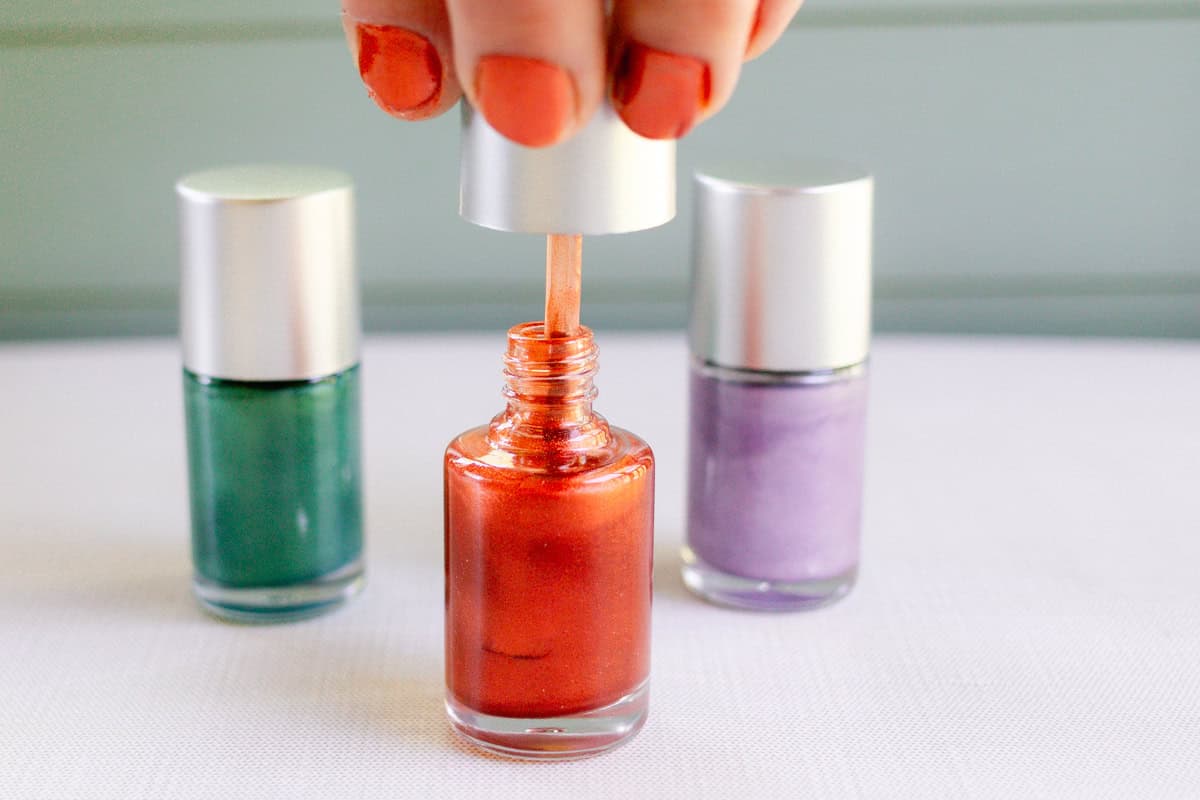
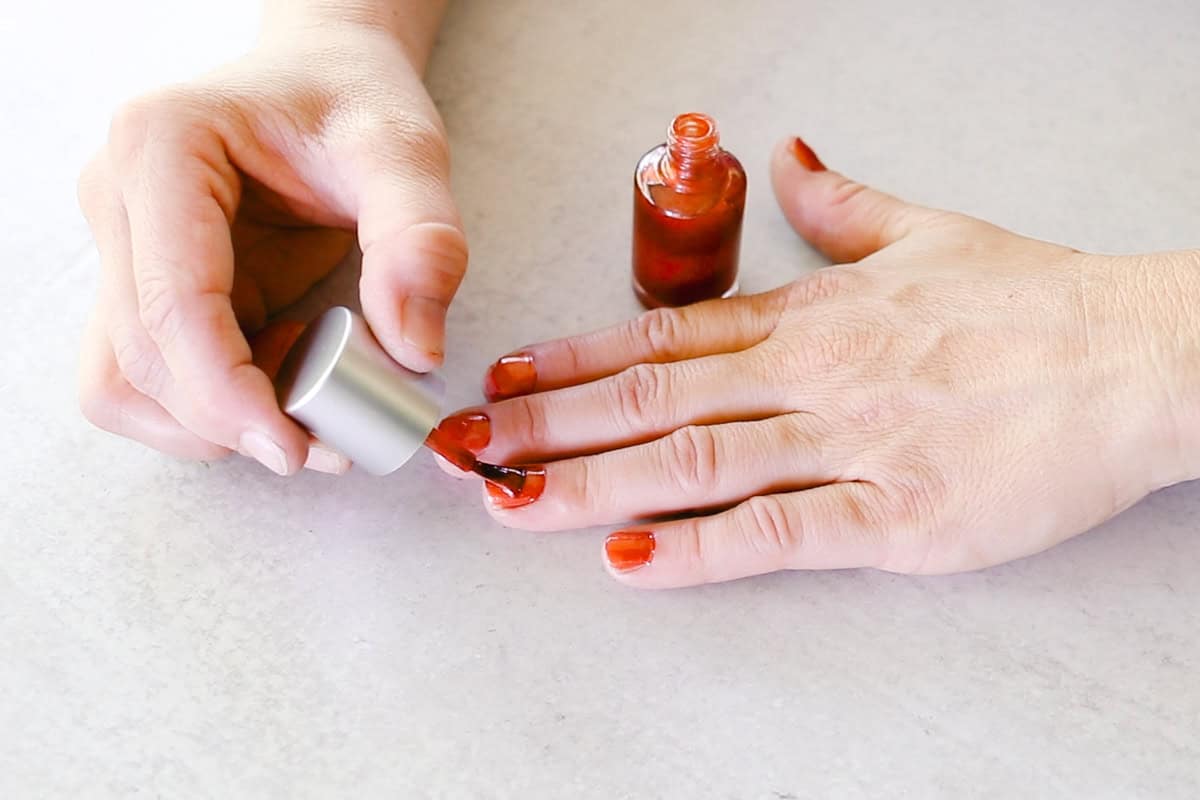
Step 1. Start by placing the nail polish mixing balls into the empty polish bottles, then carefully insert a small funnel into the neck of each bottle.
Step 2. Add your chosen pigments or glitters to the bottles, starting with ¼ teaspoon or less. You can adjust the amount of colorant to change the final look of the nail polish. A small amount will create a subtle, translucent hint of color and a larger amount (¼ to ½ teaspoon) will produce a bold, opaque finish. Feel free to experiment by blending multiple colors and creating your own custom shade.
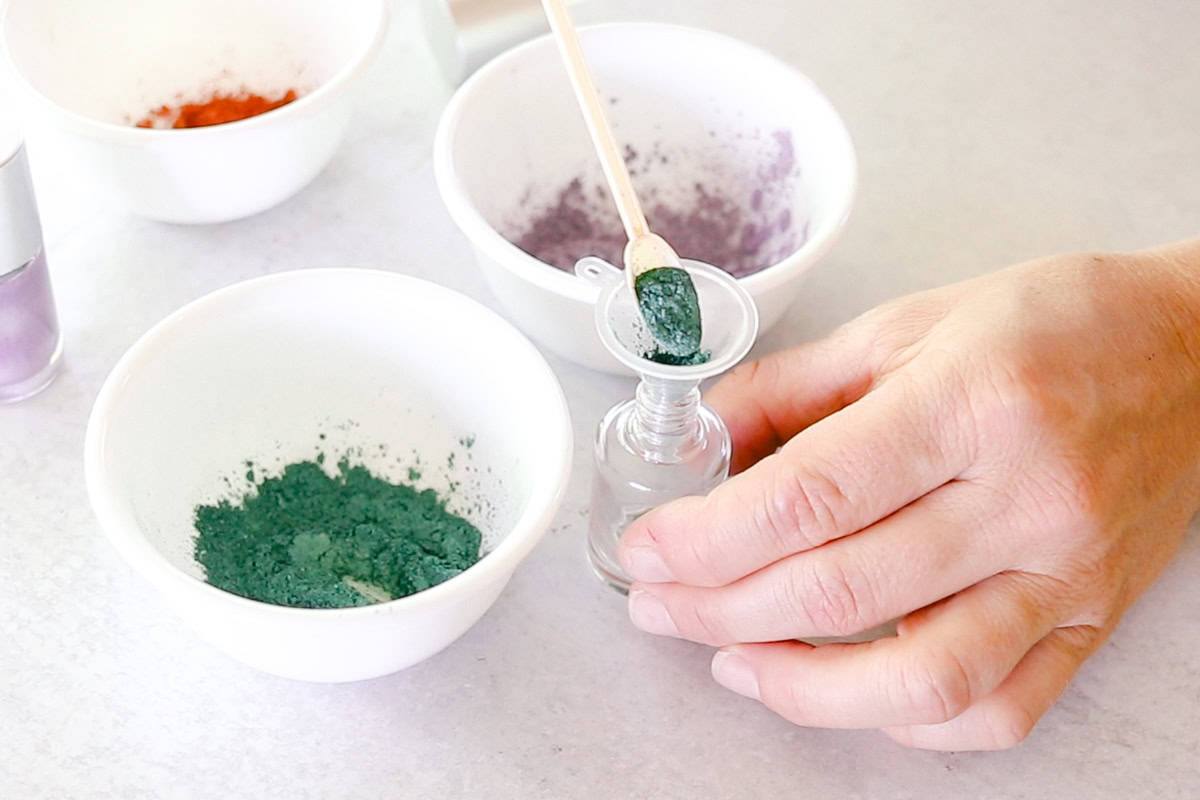
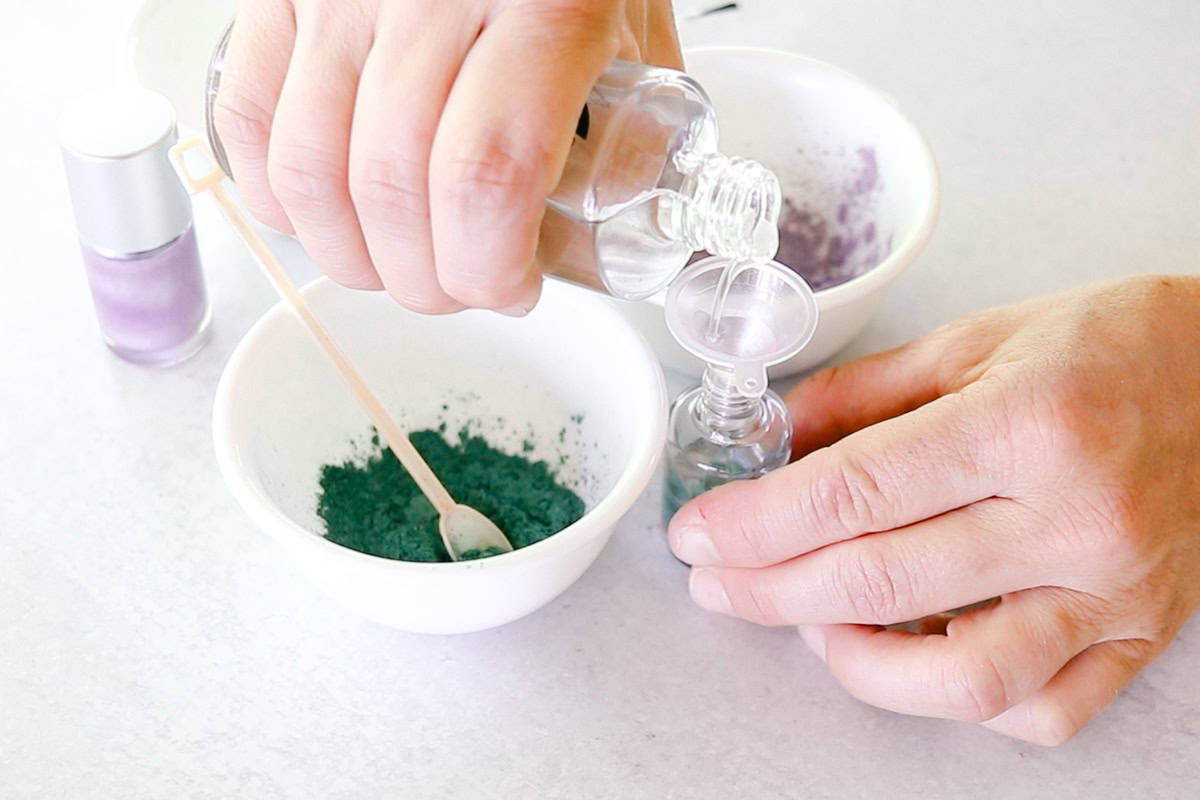
Step 3. Once you’re happy with the amount of colorant added, gently tap the bottles and funnels to ensure all of the pigment is in the bottom of each bottle.
Step 4. Carefully fill the nail polish bottles to the neck with nail polish base, then remove the funnels.
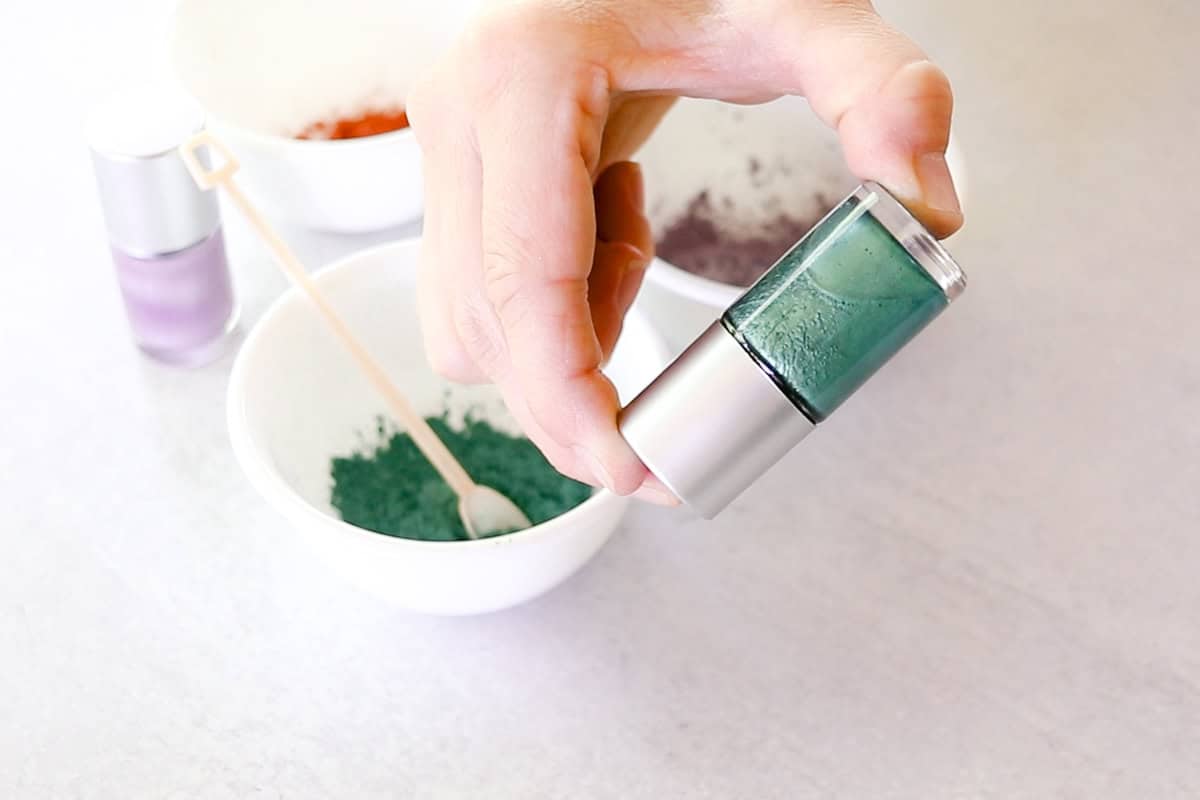
Step 5. Secure the lids on the nail polish bottles and shake them persistently for at least 60 seconds, or until the color is completely dispersed throughout the base.
Helpful Tips and Variations
- If you are mixing multiple colors of mica powder to create a custom nail polish color, I recommend doing that before adding them to the bottle. Stir the powders together on a piece of printer paper until you get the right shade, then pour them into the funnel.
- Instead of a suspension base, you can use a regular clear base coat polish. That said, the suspension base helps keep the mica powder suspended throughout the nail polish rather than sinking to the bottom. If you use a regular base polish, you may need to shake it very well before each use.
- You can add a little glitter to your polish for an extra fun sparkle! Opt for cosmetic-grade glitter, not regular craft glitter.
How to Apply Nail Polish
If you’re like me and you want your nail polish to last as long as possible, a good polish application is important. Simply brushing on a quick coat of nail polish is easy, but you will find that it chips much faster than it will if you take a few extra steps.
For painted nails that last, follow this application method:
- Clear Base Coat: This will protect your nails from the nail polish and provide a primed surface for the colored polish to adhere to.
- Color Polish: Once your base coat is dry, it’s time to apply your homemade nail polish! You may need to use more than one coat to get the look you’re going for. I usually do two coats, but you can add even more as needed.
- Clear Top Coat: Finish off your nails with a top coat once the color polish is completely dry. A top coat adds a glossy finish to your nails and protects the paint from chipping as quickly.
Ingredient Notes
Untinted Suspension Base: Nail polish suspension base is a clear nail polish coat designed to help mica powders, glitter, or other color pigments suspend in the liquid rather than sinking to the bottom. You can use any type of suspension base, but I prefer to use a 10-free base. This means that the polish is formulated without 10 of the toxic chemicals that are typically found in regular nail polish, making it a more natural option.
Mica Powders: Keep in mind that many mica powders are often unethically sourced, so it’s important to spend extra time finding a company that uses ethical practices. After a lot of research, I purchase all of my mica powder from Mad Micas. Their ethics statement checks all the boxes for me, so I feel great about their products.
FAQ
When you’re ready to remove your nail polish, I recommend using one of my 5 all-natural nail polish removers or an acetone-free nail polish remover with a cotton ball.
Yes, you can make your own nail polish with eye shadow. When thoroughly crushed and mixed into the suspension base, the eye shadow can work as a color pigment similar to mica powder. My homemade eye shadow is already colored with mica powder and I find it easier and more consistent to use the mica, but feel free to experiment with eye shadow if you’d like.
More Recipes for All-Natural Manicures and Pedicures
- DIY Nail Growth Serum
- All-natural Mascara Recipe
- DIY Cuticle Oil for Dry Nails
- 8 Amazing Pedicure Foot Soak Recipes
- Homemade Lipstick
How to Make Nail Polish
Equipment
- Tiny Funnel
- Polish Mixing Balls
Ingredients
- Untinted Suspension Base
- Mica Powders, any color
Instructions
- Start by placing the nail polish mixing balls into the empty polish bottles, then carefully insert a small funnel into the neck of each bottle.
- Add your chosen pigments or glitters to the bottles, starting with ¼ teaspoon or less. You can adjust the amount of colorant to change the final look of the nail polish, though I recommend no more than ½ teaspoon of mica per 15ml container.
- Once you’re happy with the amount of colorant added, gently tap the bottles and funnels to ensure all of the pigment is in the bottom of each bottle.
- Carefully fill the nail polish bottles to the neck with nail polish base, then remove the funnels.
- Secure the lids on the nail polish bottles and shake them persistently for at least 60 seconds, or until the color is completely dispersed throughout the base.
Video
Notes
- Be sure to check out the step-by-step images above for visual reference.
- The nail polish bottles I have linked above come with mixing balls and funnels!
- If you are mixing multiple colors of mica powder to create a custom nail polish color, I recommend doing that on a sheet of printer paper before pouring the mica into your polish bottles.
- Be sure to use mica powder that is ethically sourced.
- Instead of a suspension base, you can use a regular clear base coat polish. Note that you may have to shake the bottle very well before each use as the colorant might settle to the bottom.
- Feel free to add cosmetic-grade glitter for an extra sparkle.


Hi Laura,
Thank you for this beautiful recipe. Finally my kid can get the nail painted without me having to worry about it. We loved Mad Mica. The Etsy suspension base seller doesn’t appear to sell anymore. Do you buy elsewhere & could you share the details please?
Looking for the 10 free base from a reliable seller. Would 16oz suspension base be good enough quantity for beginners?
Sorry about the numerous questions.
This is such a great DIY! We had such a fun time making this project!
Yay, I love hearing that! Thanks for sharing!
These look so great! But I just wondered how “natural” and non toxic the suspension base is? Nail polishes are always pretty toxic. Any way to find out what ingredients are in it?
You could reach out to the supplier on Etsy. Suspension base is linked in recipe.