How to Make Nail Polish
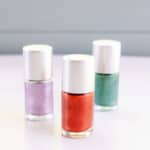
Create custom colors of homemade nail polish for nails that look better than ever!
Servings: 3 bottles
Equipment
- Tiny Funnel
- Polish Mixing Balls
Ingredients
- Untinted Suspension Base
- Mica Powders any color
Instructions
- Start by placing the nail polish mixing balls into the empty polish bottles, then carefully insert a small funnel into the neck of each bottle.
- Add your chosen pigments or glitters to the bottles, starting with ¼ teaspoon or less. You can adjust the amount of colorant to change the final look of the nail polish, though I recommend no more than ½ teaspoon of mica per 15ml container.
- Once you’re happy with the amount of colorant added, gently tap the bottles and funnels to ensure all of the pigment is in the bottom of each bottle.
- Carefully fill the nail polish bottles to the neck with nail polish base, then remove the funnels.
- Secure the lids on the nail polish bottles and shake them persistently for at least 60 seconds, or until the color is completely dispersed throughout the base.
Notes
- Be sure to check out the step-by-step images above for visual reference.
- The nail polish bottles I have linked above come with mixing balls and funnels!
- If you are mixing multiple colors of mica powder to create a custom nail polish color, I recommend doing that on a sheet of printer paper before pouring the mica into your polish bottles.
- Be sure to use mica powder that is ethically sourced.
- Instead of a suspension base, you can use a regular clear base coat polish. Note that you may have to shake the bottle very well before each use as the colorant might settle to the bottom.
- Feel free to add cosmetic-grade glitter for an extra sparkle.