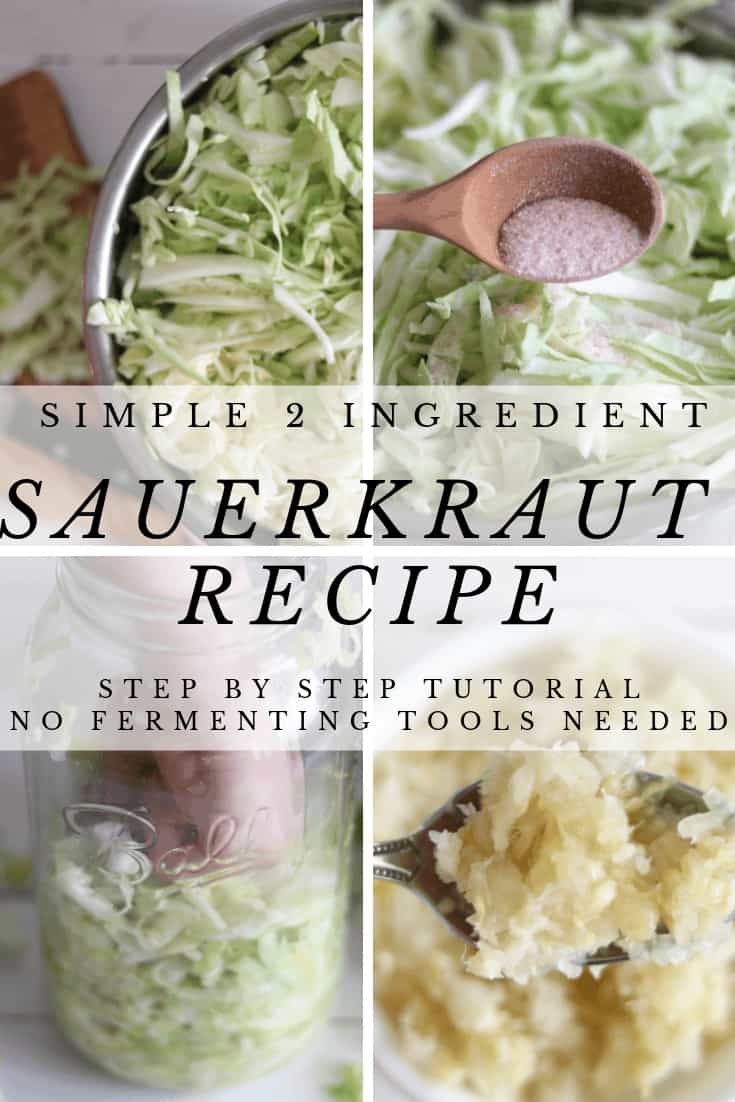
Learn how to make delicious fermented vegetables with this simple 2 ingredient sauerkraut recipe. Incorporating sauerkraut into your daily routine can promote healthy gut flora and overall wellness.
We love sauerkraut over here, but that wasn’t always the case. I feel like sauerkraut is one of those foods that is a required taste; at least it was for my family.
A few years ago, my oldest son was admitted to the hospital for RSV and double pneumonia. He was really sick and had dangerously low oxygen numbers. I usually like to go the natural route, but when your kid isn’t breathing right, you just do whatever works the fastest!
He was in the hospital for 5 days and was hooked up to IVs, had multiple breathing treatments, and lots of antibiotics. I knew we would have a lot of work to do when he got better to get his gut back in line, but while we were going through it, I didn’t even think about it.
Sure enough, the poor kid developed food intolerances, eczema, and lots of digestive issues. The bacteria in his gut was shot because of all the steroids in the breathing treatments and the antibiotics. I put him on the GAPS diet and started incorporating a lot of fermented foods into his diet. It took a couple of years and a lot of work, but he is finally better.
Sauerkraut became a staple in our home. In the beginning, my kids didn’t love it, but the more we ate it, the more it grew on them. Now they beg for it at every meal! So if you or your kids don’t like it, keep trying it!
MAKING SAUERKRAUT IS SO SIMPLE AND CHEAP!
This post contains affiliate links, which means I make a small commission at no extra cost to you. Get my full disclosure HERE.
You really only need two ingredients to make sauerkraut, and you don’t need any special fermenting equipment. You can get fancy and spice it up in different ways, but that is completely optional.
Remove the outer leaves of the cabbage and set aside.
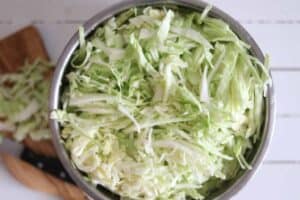
Shred cabbage in a food processor or by hand with a knife. I have done both ways, and either works just fine. If I am making a larger amount, then I prefer the food processor.
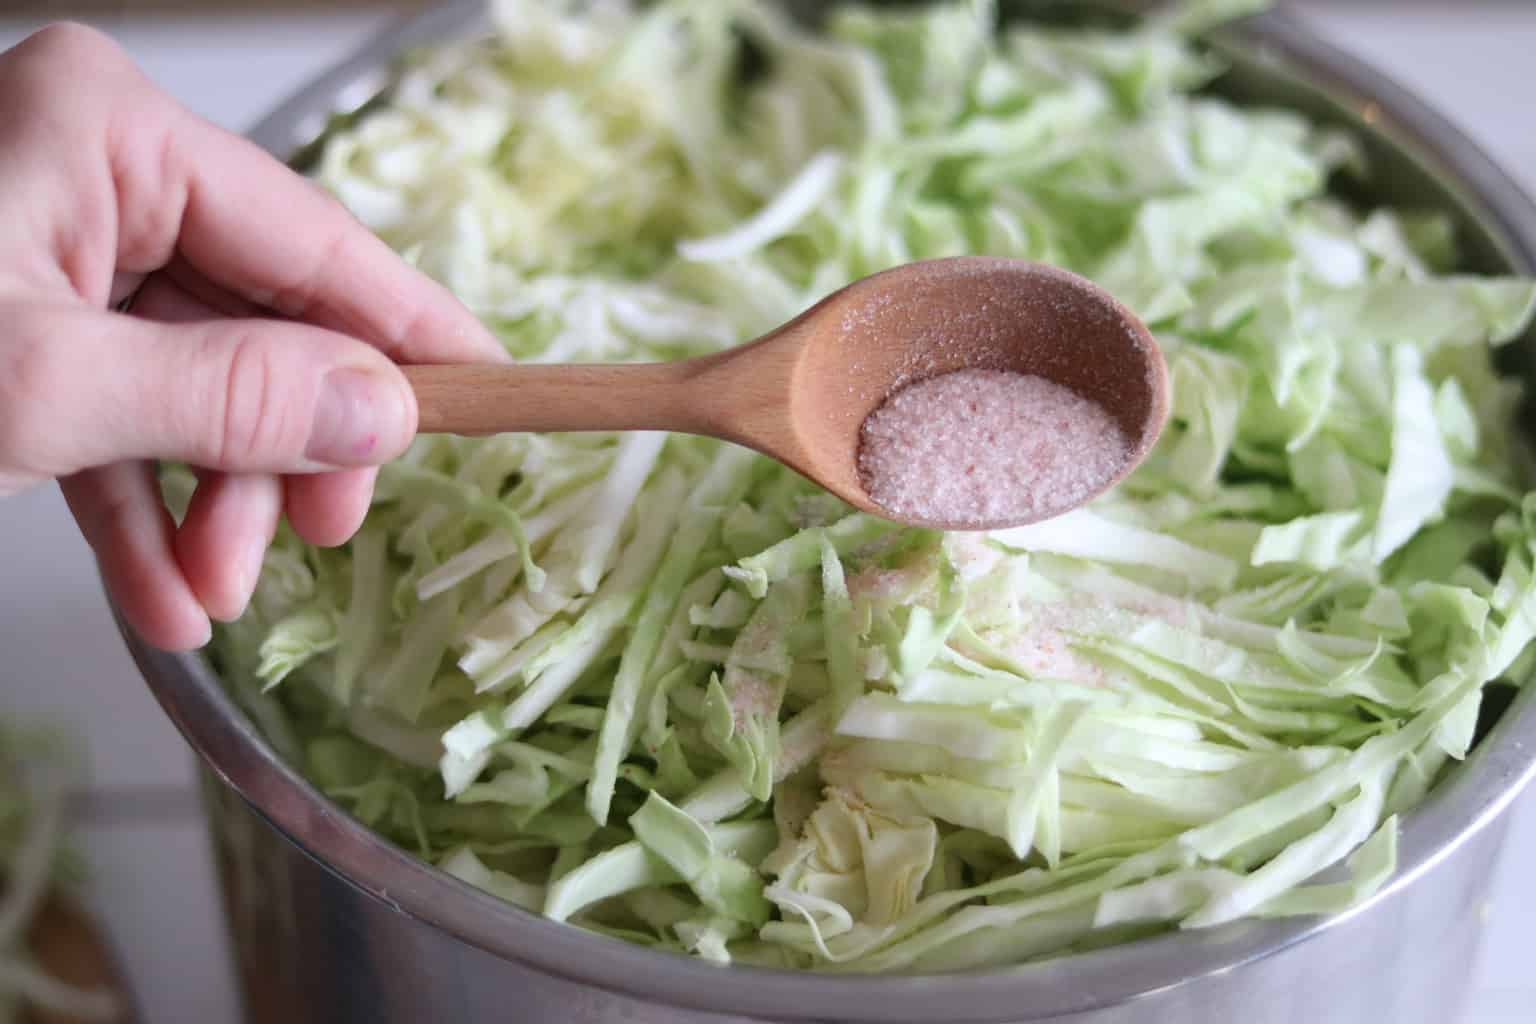
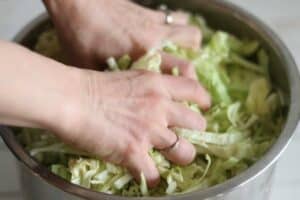
Place the shredded cabbage in a large bowl and sprinkle with salt. Let it sit for about 5-10 minutes to allow the cabbage to sweat; this will make the next step easier.
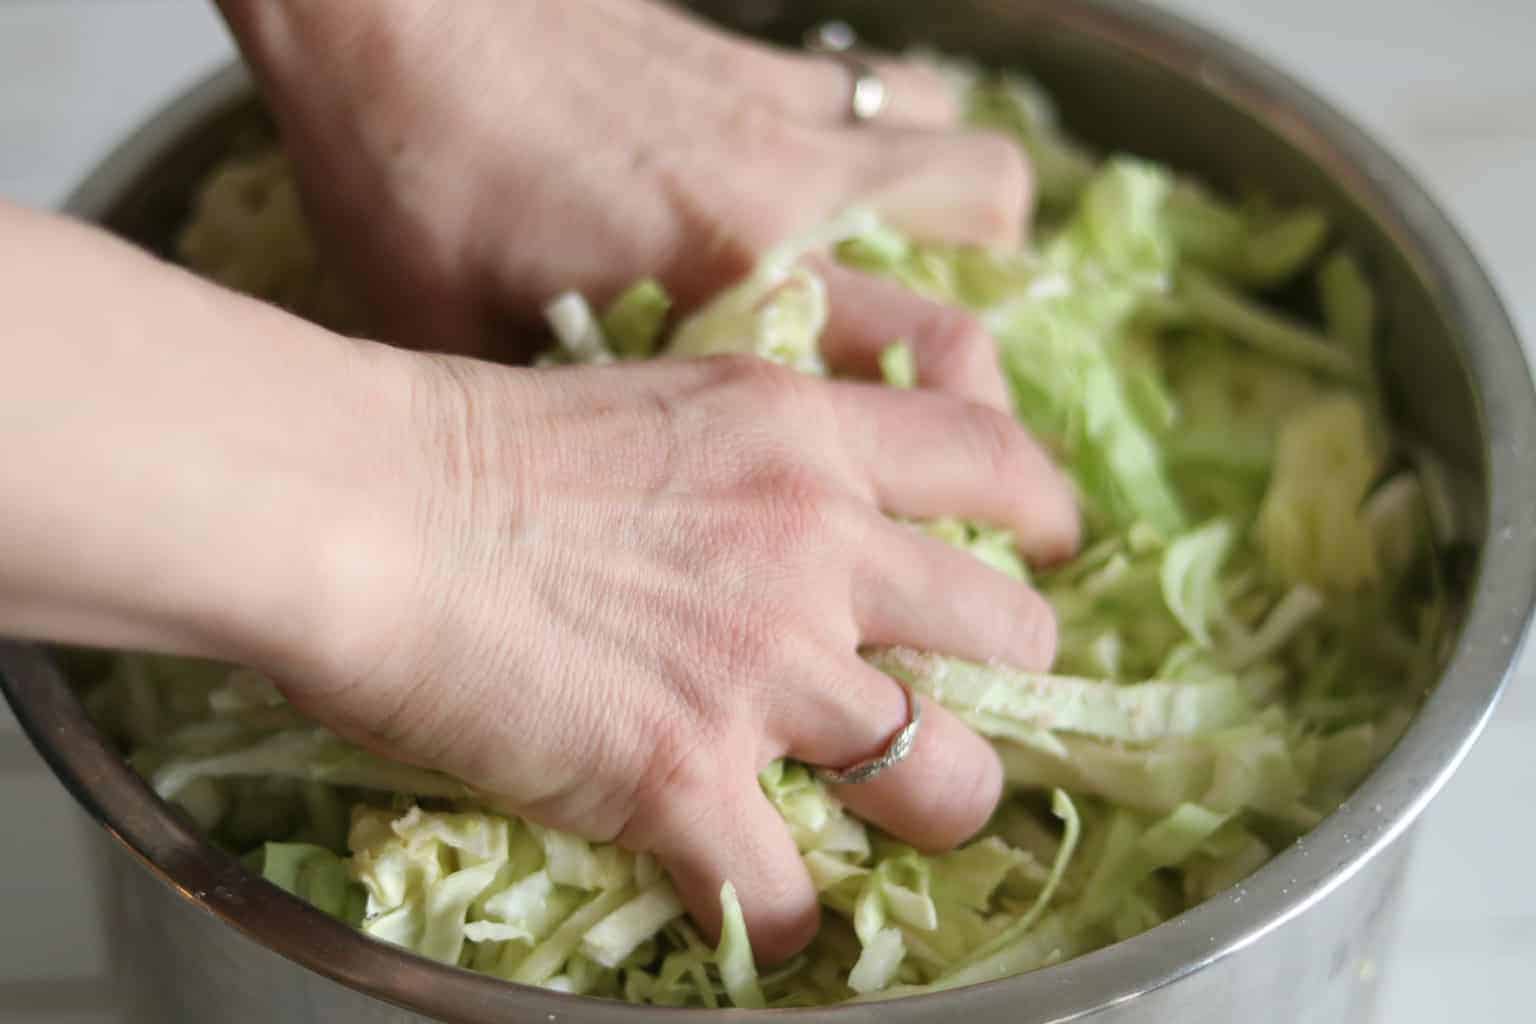
Now it is time to make the brine! Massage, punch and pound the cabbage with your fist until a decent amount of liquid forms in the bowls. The liquid is the brine, and you will need enough to cover the cabbage when you transfer it to the mason jar.
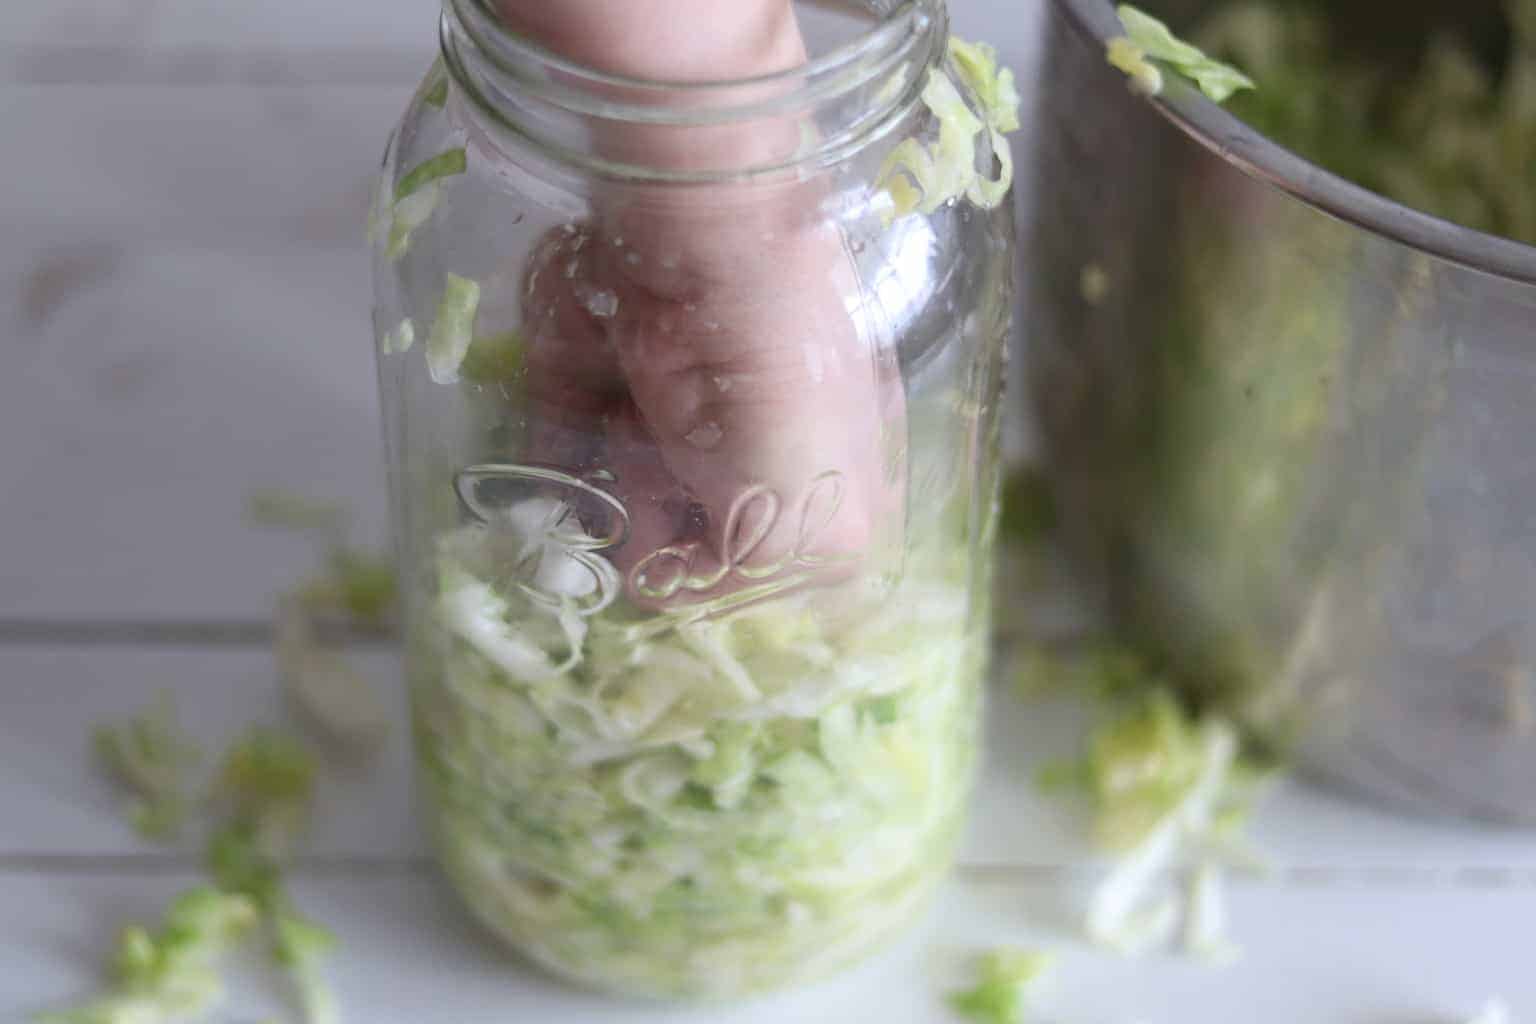
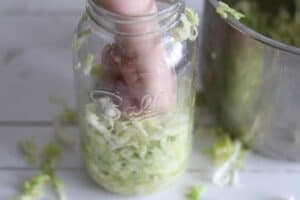
Taking small amounts of cabbage at a time, start pressing it tightly into a glass mason jar. In between each added handful, be sure to push down hard to see that the brine comes over the top of the cabbage and to make sure there are no air pockets.
Continue to fill the mason jar with cabbage. Leave about two inches of space at the top of the mason jar because the vegetables will expand. One large head of cabbage will make about a quart of sauerkraut.
Once all your cabbage is into the jar, you will need to use something to weigh the cabbage down so it stays below the brine, you can buy glass fermenting weights, or you can make your own. You can use the outer leaves of the cabbage that you pulled off the cabbage in the beginning. Roll the cabbage leaves into log shapes and place them on top of the cabbage. Or you can use a ziplock bag with a couple of rocks in it. Be sure the bag is zipped, so the rocks don’t touch the cabbage.
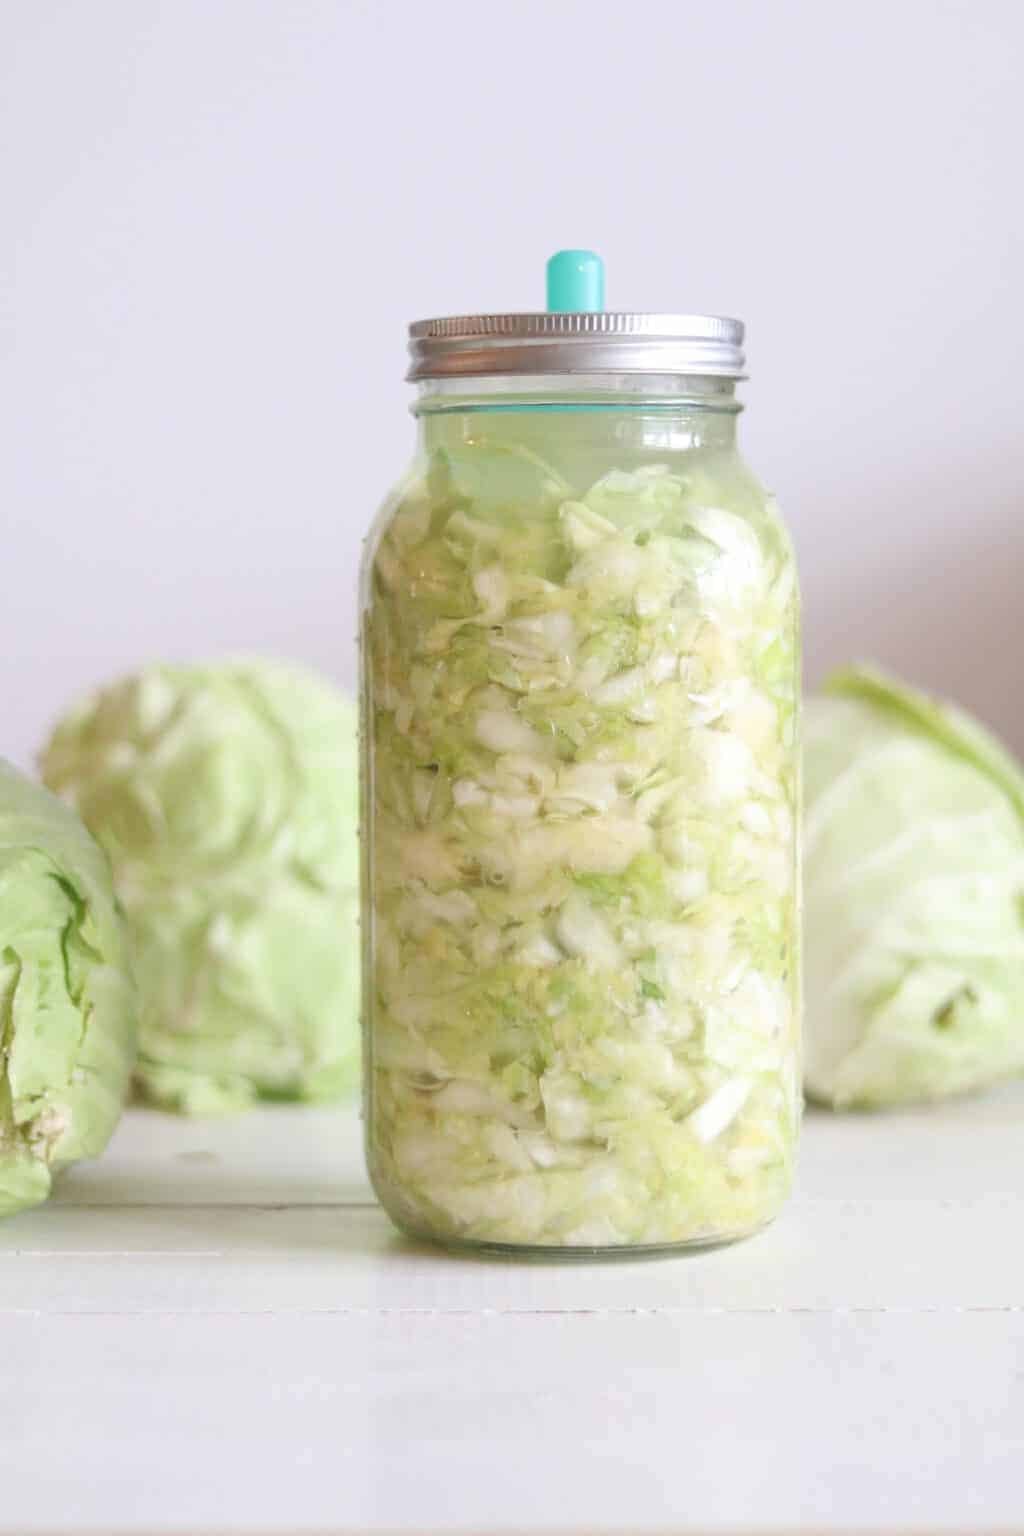
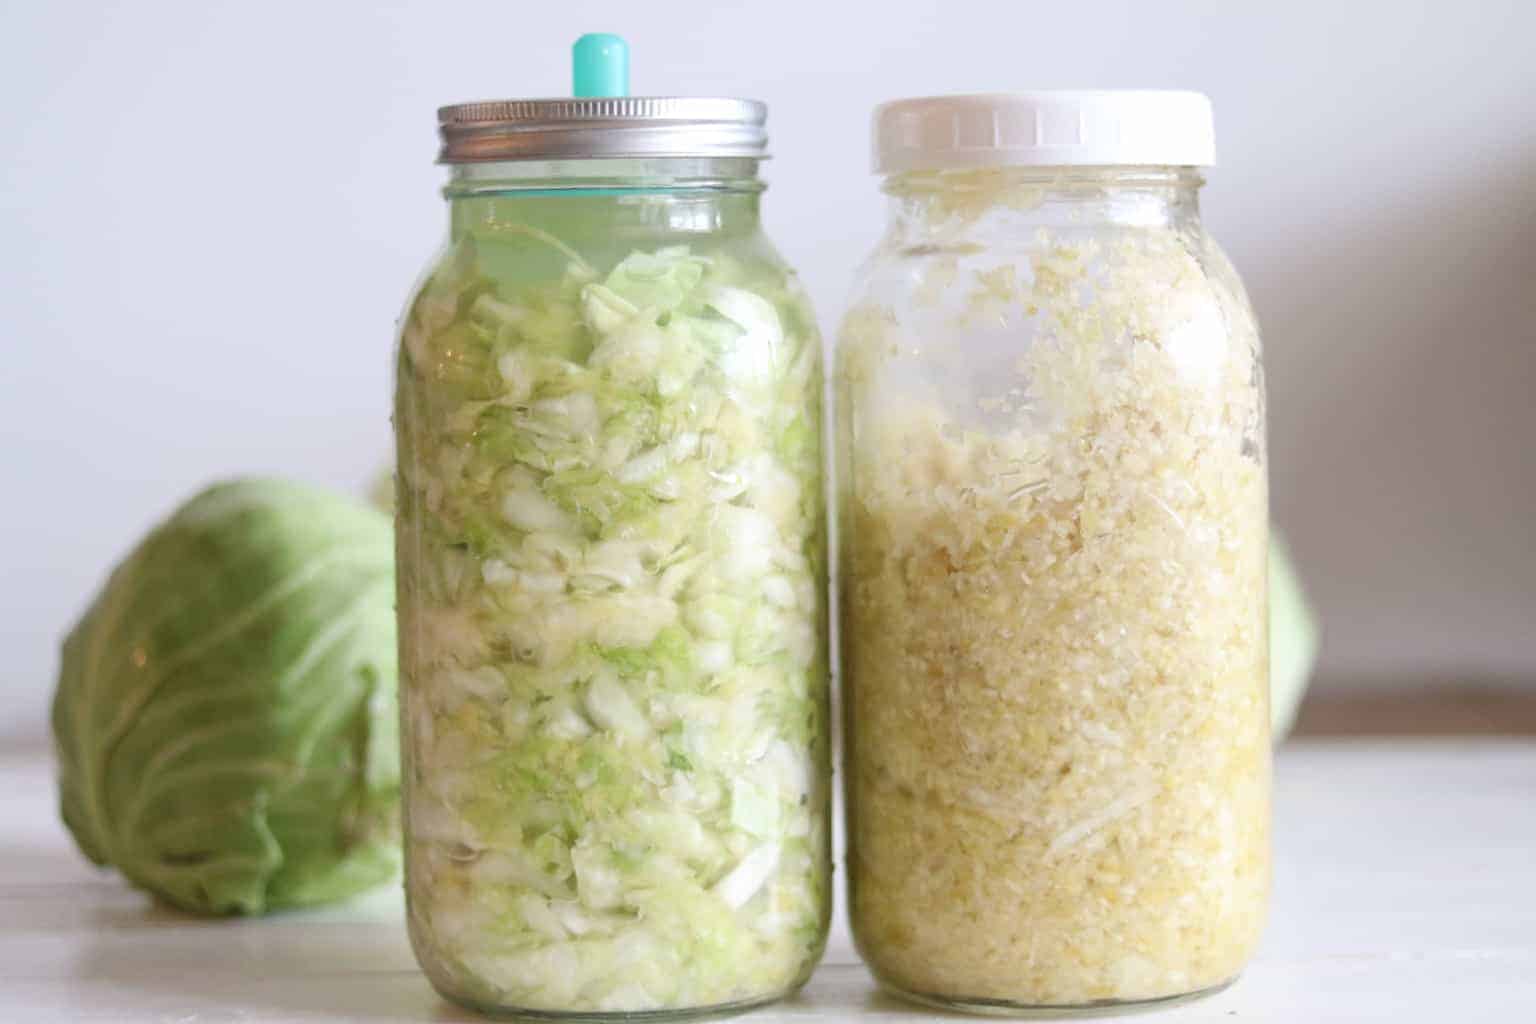
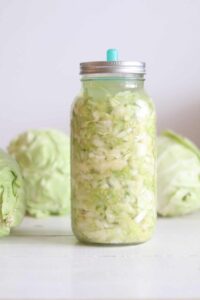
Place a loose lid over the sauerkraut and leave it on the counter at room temperature to ferment. You can leave it as long as 2 weeks or as little as 5 days. The longer it sits, the sourer it will taste. You can try it after 5 days and decide if you want to leave it out longer. You can use a special lid for fermenting that has a nipple on top, but it isn’t necessary.
Remove the weight, replace the lid, and store it in the refrigerator. It can last up to 9 months.
As your sauerkraut is fermenting, it will change color. See the picture above. This is completely normal.
It is best to ferment your cabbage in at least 68 degrees or warmer. The warmer the house, the faster it will ferment. During the winter months, I will leave mine out for 2 weeks, and during the summer, I might only do one week.
As the sauerkraut sits out on the counter, it will leak brine. Place your mason jar in a baking dish to catch the brine. I learned this trick the hard way and had sauerkraut juice all over my countertops!
If you are fermenting more than one thing at a time, be sure to place each item at least 6 feet apart. The live cultures can jump from one ferment to another ferment and cause cross-contamination. It’s common to see sourdough, water kefir, yogurt, and sauerkraut in my home at all times. My kitchen isn’t very big, and I have had things fermenting in my bedroom to make sure everything was far enough away from each other.
If you aren’t using a special fermenting lid with a nipple on top, you may need to burp your sauerkraut. When you ferment cabbage, in a closed container, carbon dioxide builds up. This is why I suggest putting the lid on loosely. You can also crack the lid once a day to let the carbon dioxide escape. AGAIN I learned this the hard way, not with cabbage but with coconut water kefir. One night while we were sleeping, I heard a loud noise, woke up my husband, and walked cautiously into the kitchen where I heard the loud noise. I thought for sure someone was breaking in! Nope! It was just my fermentation exploding all over my kitchen. It was a giant mess, and I learned my lesson, always burp your ferments!
If you keep your cabbage below the brine, you should be good. I have been making sauerkraut for several years, and I have never had a batch mold. If you see mold or your sauerkraut smells off, just dump it out and start over. Always better to be safe than sorry!
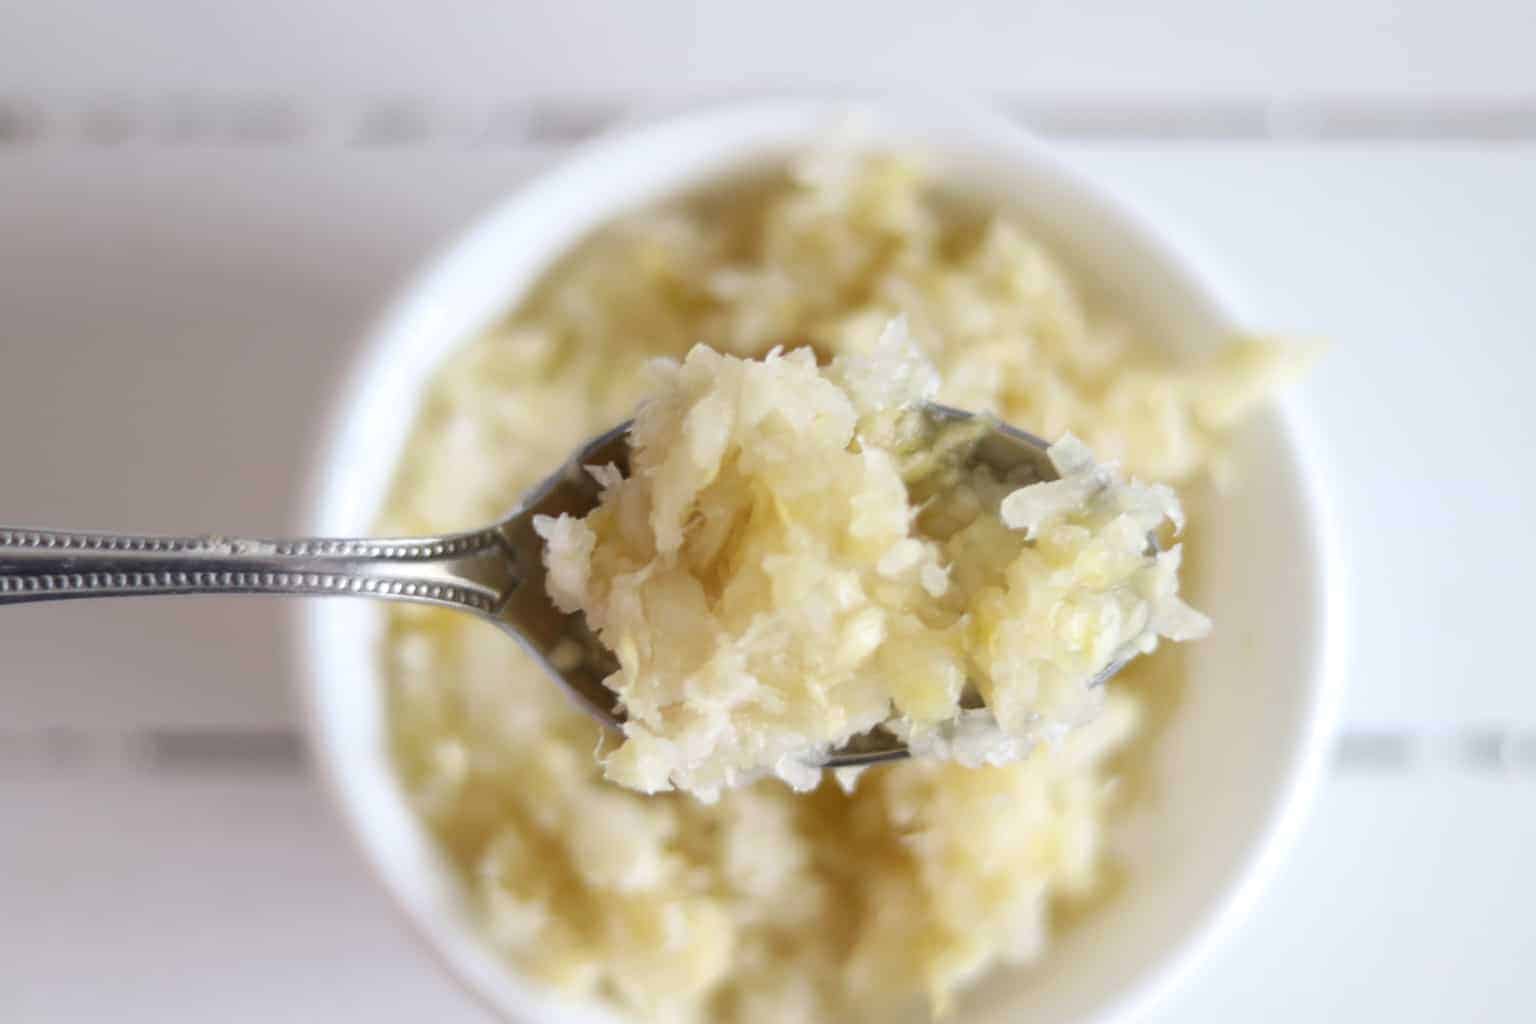
Start small! You will want to train your body to get used to sauerkraut. Start with a couple of tablespoons and work your way up to 1/2 cup per meal. Some people that have really sensitive stomachs start off with the sauerkraut juice before eating the actual cabbage.
BENEFITS OF EATING SAUERKRAUT
Sauerkraut, or fermented vegetables, are loaded with probiotics and good bacteria that your body needs to function. So many things in today’s day and age affect our gut flora. Over-the-counter medications, antibiotics, antibacterial soaps, steroids, processed foods, sugar, to name a few.
Sauerkraut will help to replenish good bacteria that may have been killed because it is loaded with probiotics. It is also high in vitamin K12, vitamin C, vitamin B6, folate, calcium, magnesium, and iron. Eating sauerkraut can help with digestive issues, support a healthy immune response, and promote healthy brain function.
Do you eat sauerkraut in your home? Have you ever made it?
Learn how to make delicious fermented vegetables with this simple 2 ingredient sauerkraut recipe. Incorporating sauerkraut into your daily routine can promote healthy gut flora and overall wellness.
Remove the outer leaves of the cabbage and set aside.
Shred cabbage in a food processor or by hand with a knife. I have done both ways and both are just fine.
Place the shredded cabbage in a large bowl and sprinkle with salt. Let it sit for about 5-10 minutes to allow the cabbage to sweat, this will make the next step easier.
Now it is time to make the brine! Massage, punch and pound the cabbage with your fist until a decent amount of liquid forms in the bowls. The liquid is the brine and you will need enough to cover the cabbage when you transfer it to the mason jar.
Add small amounts of the cabbage at a time, start pressing it tightly into a glass mason jar. In between each added handful be sure to push down hard to see that the brine comes over top of the cabbage and to make sure there are no air pockets.
Continue to fill the mason jar with cabbage. Leave about two inches of space at the top of the mason jar because the vegetables will expand. One large head of cabbage will make about a quart of sauerkraut.
Once all your cabbage is in the jar you will need to use something to weigh the cabbage down so it stays below the brine. You can buy glass fermenting weights or you can make your own. You can use the outer leaves of the cabbage that you pulled off the cabbage in the beginning. Roll the cabbage leaves into log shapes and place them onto the cabbage. Or you can use a ziplock bag with a couple rocks in it. Be sure the bag is zipped so the rocks don't touch the cabbage.
Place a loose lid over the sauerkraut and leave on the counter at room temperature to ferment.
You can leave it as long as 2 weeks or as little as 5 days. The longer it sits, the sourer it will taste. You can try it after 5 days and decide if you want to leave it out longer. Remove the weight, replace the lid, and store in the refrigerator. It can last up to 9 months.
Video
Notes
I’ve included step-by-step images in the post above for visual guidance. If you would rather watch, I’ve included the complete step-by-step video tutorial here in the recipe card!
Welcome to Our Oily House, I’m so glad you’re here! Explore DIY cleaners, homemade soaps, skincare and hair care recipes, fragrance-free solutions, and sustainable laundry tips for a naturally inspired home.
We made crocks of sauerkraut with my parents as kids, it was our job to pound and add the salt. We had a homemade pounder shaped like a baseball bat but larger.
I just made a batch in a gallon jar, but I think I put to much salt. I used very large cabbages and used kosher salt (2 tbsp) per 1/4 head of cabbage as I was pounding it. There wasn’t enough brine when I was finished packing it so made a brine to make sure it was covered.
My question is because of the amount of salt I used will it ferment?
I remember my mom saying not to over use salt.
Thank you for sharing your recipe and instructions. Can I ask if you would ever adds any other flavourings like caraway seeds? If so when would you add? Thank you.
Hi, there – thanks for the super easy recipe! Question: can I cover the top of the jar with a paper towel instead of a lose fitting lid? Also – you mentioned you use a half gallon jar, should I be splitting this into two quart-sized jars, or no?
Thanks!
Yes, you can cover it with a paper cloth or a towel. To keep it in place you can secure it on with a rubber band. It doesn’t have to be airtight. Also, you can make any amount you want, I just like to make half gallons at a time.


We made crocks of sauerkraut with my parents as kids, it was our job to pound and add the salt. We had a homemade pounder shaped like a baseball bat but larger.
I just made a batch in a gallon jar, but I think I put to much salt. I used very large cabbages and used kosher salt (2 tbsp) per 1/4 head of cabbage as I was pounding it. There wasn’t enough brine when I was finished packing it so made a brine to make sure it was covered.
My question is because of the amount of salt I used will it ferment?
I remember my mom saying not to over use salt.
I use 1 tablespoon per head of cabbage. Also, keep on pounding and kneading and it will make more brine.
Thank you for sharing your recipe and instructions. Can I ask if you would ever adds any other flavourings like caraway seeds? If so when would you add? Thank you.
Hi! Will this work with red cabbage mixed in with green? I have both left over and want to make sauerkraut to use it up
Yes definitely! We do it all the time!
Thanks for this recipe! Why must the lid be changed?
It doesn’t have to be changed, just left on loose so gases can escape.
Hi, there – thanks for the super easy recipe! Question: can I cover the top of the jar with a paper towel instead of a lose fitting lid? Also – you mentioned you use a half gallon jar, should I be splitting this into two quart-sized jars, or no?
Thanks!
Yes, you can cover it with a paper cloth or a towel. To keep it in place you can secure it on with a rubber band. It doesn’t have to be airtight. Also, you can make any amount you want, I just like to make half gallons at a time.
Hi, I’m just starting to learn about fermentation and am wondering why it doesn’t need some type of fermentation bacteria, like whey or kefir grains?
It will create its own bacteria during the fermentation process.
My husband love, love, loves this stuff! Thanks for a great recipe!
I am so glad he likes it!
Love making my own sauerkraut! This recipe is so easy and delicious!
Thank you! I am glad you like it!