Common skin irritants can be annoying, irritating, and a nightmare to get rid of. Having a salve on hand that uses natural ingredients is a must to relieve the itch and reduce the appearance of skin blemishes.

You can use this salve for soothing and moisturizing dry, flakey or itchy skin.
This post contains affiliate links, which means I make a small commission at no extra cost to you. Get my full disclosure HERE.
Homemade Salve Recipe
- 1/2 cup shea butter
- 1/2 cup coconut oil
- 1/4 cup beeswax
- 1 tablespoon raw honey
- 10 drops lavender
- 8 drops frankincense
- 5 drops Tea Tree
- 5 drops geranium
- Storage Tin
Directions:
- Melt shea butter, coconut oil, and beeswax in a double boiler.
- Remove from heat and allow to cool slightly.
- Stir in raw honey and essential oils.
- Transfer to storage tin.
- Allow it to harden with the lid off.
- Apply to the area of concern.
Don’t forget to print off your free printable label. It can be found in the online resource library.
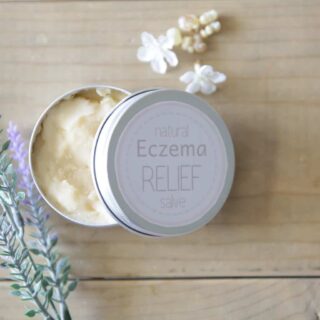
Homemade Skin Salve
Ingredients
- ½ cup shea butter
- ½ cup coconut oil
- ¼ cup beeswax
- 1 tablespoon raw honey
- 10 drops lavender
- 8 drops frankincense
- 5 drops tea tree
- 5 drops geranium
- Shallow Storage Tin
Instructions
- Melt shea butter, coconut oil, and beeswax in a double boiler over medium heat.
- Remove from heat and allow to cool slightly.
- Stir in honey and essential oils.
- Once ingredients are well combined, transfer the salve to metal storage tins.
- Allow the salve to harden completely before securing the lid.
- Apply to the area of concern.
Veronica Hoddenbagh says
Thank you for this recipe! Would you use it as is on an 8 month old?
Aura BM says
Can the beeswax be omitted? Will it make it less effective?
I’d like to make this recipe today as I have all other ingredients at home, except the beeswax. My daughter is constantly itching with mild eczema.
Laura says
You could omit but the texture may change a bit.
Ashley Garcia says
This salve helps my eczema so much. Thank you for this! It’s works better than other store bought creams.
Lenora Carey says
Approximately, how many salve tins does this fill?
Simon says
I would also like to know how many this makes?
Michelle says
Gosh thank you for posting this!! My son has had the most horrible outbreak. We are working to pinpoint the trigger but I needed just THIS to help with the flaky, painful itching. I made a double batch and it’s beautifully smooth and smells amazing. It’s easy for him to apply and I know with simple amazing ingredients will give him some much needed (& appreciated) relief! Thank you again!
Laura says
I am so glad you like the recipe, you are so welcome!
Julie says
Does the honey make your skin sticky when you use this salve?
Laura says
I have not had any issues with that.
Purvi says
Thank you for the recipe! Can I completely omit the essential oils for this recipe just to keep it fragrant free? Do the essential oils play a role besides fragrance in healing the eczema?
Laura says
They do provide some benefits, but you can certainly make it without them!
Jenny says
Can I use yarrow infused olive oil in place of coconut oil?
Kate says
For what ages is this safe? I have a 3.5 month old who is getting patches of eczema already. 🙁
Laura says
I would omit the essential oils before using this on someone that young.
ST says
CAN I USE SOMTHING ELSE INSTED MANGO BUTTER
Laura says
This recipe call for shea butter
Esra says
Thank you very much for sharing this important recipe, but won’t bacteria form because of honey and there is no preservative?
Can I replace honey with powder?
Laura says
I have never had any issue with it but you can add a preservative if you would like to.
Jenny says
Honey is a preservative
MsBeachLizard says
I have raw honey (from my Son’s bees) in quart jars that I’ve had for several years. It is still good and is amazing. A beehive never goes above 95° F. (The reason honey does not crystallize in the hive.) So, it stands to reason that raw honey should NEVER be heated more than 95° F. Doing so destroys all its beneficial nutrients and enzymes and healing properties. Example: Heating honey to 98.6° F destroys roughly 200 beneficial nutrients. Also, honey should never be microwaved as it destroys it no matter the temperature. They don’t call it “nuking” for nothing. Microwaving honey turns it into a liquid sweetener. Honey is anti-inflammatory, antioxidant, antibiotic, anti microbial, is preservative. It is also excellent for acne and healing skin wounds and other skin ailments. You might also be surprised to know that coconut oil (including MCT oil) is also preservative along with its other skin benefits. I have oil skin yet I use coconut oil on my face and have done so for years. I do not look my age. Some have also used unrefined EVOO to preserve certain foods and herbs. Note: If shea butter is added, be aware the shelf life of shea is approx two years… Cocoa Butter can keep un-refrigerated in an airtight container for one year (up to two years refrigerated). This homemade product made responsibly with clean equipment should last you at minimum one year. I would use an amber glass container (never plastic) and store away from light either in the refrigerator or a very cool and dry place. — To the Author of the recipe: Excellent.
MsBeachLizard says
P.s. I would recommend putting the honey in after the rest of the beeswax and oils/fats have cooled to the above mentioned temperature of 95° F or less to keep the benefits of the honey. Otherwise, there is no benefit to having the honey in this salve. Use a candy thermometer. Heating the beeswax and oils/fats to melt them will not ruin *distilled essential oils*.
Tekla says
Thanks for your recipe. It’s really help