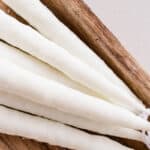
Candle Dipping
Uncover the joys of candle dipping this winter with this handy guide.
Servings: 15 -20
Equipment
- Double boiler/candle burner
- Hanging rack
Ingredients
- 4-5 pounds of soy or beeswax
- Candle wick
Instructions
- Melt the wax of your choice in the double boiler. ( I use a mason jar placed in a pot filled with water)
- Once melted, remove the jar with the melted wax from the pot to your working area.
- Prepare the wick by cutting them to double the desired length of the candle and attaching the weight to both ends. This will end up being two candles once you’re done dipping.
- Holding the wick in the middle (you can also use a pencil for holding the wick if easier), dip it into the hot wax to the desired length.
- Carefully hang it on a drying rack to set up while you repeat the process for the rest of the candles.
- After a couple of dips in the wax, you can cut off the weights with the scissors.
- Repeat dipping in hot wax until the desired thickness has been reached.
- Hang the candles on the drying rack for up to 12 hours to fully harden before snipping the wicks and lighting.
Notes
I’ve included step-by-step images in the post above for visual guidance. If you would rather watch, I’ve included the complete step-by-step video tutorial here in the recipe card!
- You can use soy or beeswax; however, beeswax is much quicker.
- Cut the weights off the bottom once the candles have enough weight to sink in the hot wax on their own.
- Keep a small pot of wax melting on the stove to top off your jar as needed.
- Wax is messy – lay out parchment paper over your working surface to make cleanup easier.
- Do not let any wax down the drain.
- I boil all my pots and dishes, then dump them outside and wipe any excess wax out with a paper towel.