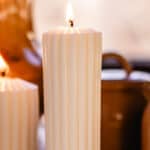
How to Make a Pillar Candle
These DIY pillar candles are simple and fun to make. This easy tutorial will walk you step-by-step through the process of making pillar candles. Follow along and you'll soon have an elegant, hand-crafted candle to light in your space.
Servings: 2 candles
Equipment
- Pillar candle molds These are similar to the ones I use.
Ingredients
- 7 oz Soy wax a pillar blend works best
- 20 drops Essential oils for fragrance optional, see notes
Instructions
- Gather the soy wax, essential oils, pillar molds, and wicks.
- Place the soy wax in a wax melter or double boiler and heat until completely melted. Check with your wax manufacturer for heating temperature.
- Now, if adding essential oil fragrance, allow the wax to cool to 140°F before gently stirring in the oils.
- To prepare the molds, cut a length of wick twice as long as you'll need for the candle. Tie a knot on one end. Then, using a needle pierce a small hole through the center of the bottom of the silicone mold.
- Then, use a bamboo skewer or something similar to push the wick through the hole. Feed it all the way through until the knot is flush against the bottom of the mold.
- Slowly pour the melted wax into the molds, filling them to the desired height.
- Pull the wick tight and center it to the candle. I like to wrap it several times around a bamboo skewer or even a pencil.
- Allow the candles to cool and harden completely before removing them from the molds. For silicone molds, you simply peel them away. If using metal molds, you may have to place the whole candle in the freezer before removing it from the mold.
- Finally, flip the candle over and trim the wick to about ¼ inch before lighting the candle. Note: the candles are upside down inside the molds.
Notes
Scroll up to post for Step-by-step instructions.
Safe candle precautions:
Be cautious when you're pouring the hot wax into the mold. Wear protective gear like gloves and an apron to prevent burns.
Make sure to place a candle-safe pillar holder beneath the candle before burning.
Never leave pillar candles burning unattended.
When burning the candle, avoid placing it underneath anything flammable such as curtains or drapes.